How To: Migrate your Cloud Instance to AMD EPYC
Mar 20, 2026

As your organization grows, your cloud usage grows and cloud compute spending can also grow. Many organizations are re-evaluating the type of instances they run their workloads on to optimize their cloud environments for cost efficiency, performance, and sustainability. One of the most common optimization paths today is switching from Intel-based instances to AMD EPYC based instances across cloud providers.
All major cloud providers now offer general-purpose, compute-optimized, and memory-optimized instance families powered by AMD EPYC™ processors, making it possible to migrate from Intel® Xeon® based instances without changing application code, operating systems, or container images. Because AMD EPYC instances use the same x86_64 architecture as Intel, migrations do not require refactoring applications, recompiling binaries, or rebuilding container images. In practice, most production migrations come down to deployment strategy, not code changes. However, organizations still need a safe and predictable migration path that minimizes risk, maintains availability, and preserves existing automation and scaling behavior.
This post provides a best practices guide to migrating production workloads from Intel-based instances to AMD-based instances in the cloud. It focuses on two common deployment models:
- Virtual machine (VM) based workloads
- Containerized workloads in Kubernetes clusters
Key considerations
Most successful migrations follow the same pattern: confirm compatibility, prepare a clean base image, validate performance, and define a rollback path before shifting live traffic. The first thing to verify is whether your existing AMI or container images work as-is on an AMD instance. For most customers, this is a non-issue, since standard Linux distributions, kernel modules, and cloud-init scripts work the same way across x86 CPU vendors. If you use monitoring agents, security agents, or custom binaries, the simplest validation is to launch a single AMD instance, run your bootstrap process, and confirm everything runs normally. Now, you are ready to build (or clone) a new “golden AMI” for rollout.
Storage behavior is the next consideration. If your existing fleet uses EBS volumes, they can be reattached or recreated on AMD instances without change. If your applications use local ephemeral disks, those workloads will need either a data migration plan or confirmation that data can be safely discarded during a rolling update.
It is also useful to understand how migration affects any existing cloud cost commitments, like Reserved Instances, Enterprise discount programs, private pricing agreements, committed usage or Savings Plans discounts. Some organizations migrate in phases specifically to avoid overlapping reservations, while others use the migration as an opportunity to right-size or consolidate instance types. None of these blocks a migration, but it is easier to plan before deployment than during it. On AWS, a migration from Intel (for example, M7i to AMD (M8a) only matters if you are using instance-family–specific Reserved Instances because those are locked to the M7i family and will not automatically apply to M8a. In that case, the discount is lost until the reservation is converted, sold, or allowed to expire. However it does not affect Compute Savings Plans, those apply with no action required, because those apply across instance families, sizes, and CPU vendors. The same principle applies in Google Cloud’s Committed Use Discounts (CUDs) and Azure’s Compute Savings Plans, continue to apply if you stay within the same commitment type (vCPU/hour or spend-based), even if the underlying VM SKU changes from Intel to AMD.
With these considerations in place, you are ready to begin the actual migration.
Deployment Strategy Options
There are several ways to introduce AMD instances into a production environment, most organizations follow one of three patterns: a rolling update, a blue/green deployment, or a Canary rollout. All three approaches allow you to introduce AMD instances without interrupting service, and all of them provide a clear rollback path if needed. Very few organizations use the All-at-once deployment
All-at-once: An all-at-once cutover replaces all serving capacity in a single step. It is used usually only when they have a defined maintenance window, the fleet is small, or the application can accept a brief interruption. The right approach depends on whether you need zero downtime and how much parallel capacity you can run during the transition.
Rolling update: The instances are replaced gradually while maintaining a minimum level of healthy capacity. If you are already using an autoscaling group, a VM scale set, or a managed instance group, this simply means creating a new template or image that specifies the AMD instance type and allowing the platform to replace instances one at a time. The application remains online throughout the process, and the update can be paused or rolled back automatically if health checks fail.
Blue/green deployment: It maintains two complete fleets in parallel: the existing Intel environment (blue) and a new AMD environment (green). You validate the green fleet fully, running functional checks, load tests, or even shadow traffic, before routing production traffic to it. Once the cutover is complete, the blue fleet can be retired. The green environment remains untouched until the moment traffic is switched, but it temporarily requires double capacity.
Canary rollout: A small amount of production traffic (say 10%) is routed to AMD instances first. If performance, error rates, or latency remain within expected thresholds, the traffic allocation is increased gradually to 100%. The Canary environment needs small initial parallel capacity.
Virtual Machine (VM) Based Workloads
Auto Scaling Group Instance Refresh
One of the simplest methods to migrate from Intel-based instances to AMD-based instances is to use Instance Refresh. It allows you to gradually replace instances in an Auto Scaling Group (ASG) with new instances based on an updated launch configuration. This is the rolling update strategy, where instances are replaced gradually, one or a few at a time, while the rest of the fleet continues serving traffic.
Select your existing launch template and create a new version by modifying the instance type say from M7i to M7a. Then in your Auto Scaling Group, edit settings, and point it to the latest version of the launch template. Initiate an Instance Refresh either through the console or AWS CLI. This will gradually terminate the old Intel-based instances and replace them with the new AMD-based ones while making sure your application is healthy and available and maintaining minimum count.
		aws autoscaling start-instance-refresh \
  --auto-scaling-group-name my-asg \
  --strategy Rolling \
  --preferences MinHealthyPercentage=90,InstanceWarmup=300
The MinHealthyPercentage setting defines how much of the fleet must stay available during the update, and InstanceWarmup ensures each replacement instance is fully initialized before the next one is terminated.
Use Load Balancer to Gradually Shift Traffic
If your fleet sits behind an Application Load Balancer (ALB). You can provision a second fleet using the AMD-based instances from your golden AMI with the same security groups as those of the older Intel instances. Register the AMD fleet in a separate load balancer target group, say green target group. Verify that the green group is healthy and update the listener to send some or all traffic to green. If you want to canary first, you give green a small weight (percentage of traffic). When you are done with testing, you set green to 100%.
The ALB listener’s action is an object you can edit in the console or via the AWS CLI. Here is what gradual traffic looks like in CLI form first a 5% canary to green while 95% still goes to blue.
		aws elbv2 modify-listener \
  --listener-arn arn:aws:elasticloadbalancing:...:listener/app/my-alb/abc/def \
  --default-actions '[
    {
      "Type": "forward",
      "ForwardConfig": {
        "TargetGroups": [
          {"TargetGroupArn": "arn:...:targetgroup/blue-tg/111", "Weight": 95},
          {"TargetGroupArn": "arn:...:targetgroup/green-tg/222", "Weight": 5}
        ]
      }
    }
  ]'
Once the new target group receives 100% of traffic and remains healthy, the Intel target group can be deregistered and deleted. Rollback simply means reversing the listener rule to point back to the blue target group, so no instances need to be replaced to recover.
		aws autoscaling detach-load-balancer-target-groups \
  --auto-scaling-group-name blue-asg \
  --target-group-arns arn:aws:elasticloadbalancing:...:targetgroup/prod-tg/ABC
Keep in mind to confirm that the green target group’s health check path and port match your application, a wrong path will keep green at 0 healthy targets and block the migration.
If you prefer to validate entirely out-of-band, you can expose the green fleet on a separate ALB, run your checks there, and then do the listener switch on the production ALB when you are ready. DNS cutover with Route 53 weighted records is also an option, but ALB target group switching is simpler because you are not managing TTLs and multiple load balancer endpoints, you keep one hostname, one load balancer, and you move the forwarding decision inside the listener.
Containerized Workloads in Kubernetes Clusters
Kubernetes is CPU architecture agnostic, so, migrating containerized workloads from Intel-based worker nodes to AMD-based worker nodes is quite easy, because both architectures run the same linux/amd64 container images. So, there is no need to rebuild or retag images, no need for multi-arch registry, and no changes to Dockerfiles or CI pipelines needed. Also, as the workloads are already decoupled from the underlying host, migration happens at the node layer, not the application layer.
Add an AMD Node Group
Kubernetes makes it safe to run Intel and AMD nodes in the same cluster at the same time. You can introduce a new AMD node group, keep the Intel nodes active, and move workloads gradually using scheduling controls instead of instance replacement. The mechanics are consistent across managed services (EKS, GKE, AKS) and self-managed clusters.
If you are using EKS on AWS, you will create a new node group using AMD instances (e.g., m8a.8xlarge). This can be done using managed node groups through eksctl, or using a custom provisioner like Karpenter if you are managing scaling more dynamically.
		eksctl create nodegroup \
  --cluster your-cluster-name \
  --name amd-nodes \
  --node-type m8a.2xlarge \
  --nodes 3 \
  --nodes-min 2 \
  --nodes-max 5
After the AMD node group is ready, you can label or taint the new nodes to control which workloads are scheduled there as shown below. Optionally, you can add labels dynamically via Deamon sets.
kubectl label nodes <amd-node-name> node-type=amd
This creates an AMD-backed node group, pre-labeled. Once the nodes join the cluster, you can direct specific deployments to run on them using taints, nodeSelector, nodeAffinity, or tolerations.
		managedNodeGroups:

 - name: amd-nodes

    instanceType: m8a.xlarge

    desiredCapacity: 3

    minSize: 2

  maxSize: 6

    amiFamily: ubuntu

    labels: { node-type: amd }

    tags:

       role: application
Label Based Rollout:
Kubernetes does not automatically move pods between node groups, so the migration is controlled entirely through scheduling rules. You can steer deployments on your new AMD nodegroup with nodeselector and label you assigned to node above.
		spec:
  template:
    spec:
      nodeSelector:
        node-type: amd
When applied, new pods for that workload will only be scheduled onto AMD-backed nodes. Existing pods will remain running on Intel nodes until they are rescheduled (via a rollout, drain, or restart), which means the migration can proceed with no forced interruption. This approach is most often used for stateless workloads, like API backends, microservices, workers, and web apps, where pods can be rescheduled freely.
Taint-and-Toleration Canary Rollout:
For workloads where you want tighter control, such as applications with unpredictable performance characteristics, low latency requirements, or long-lived connections, you may not want pods to land on new AMD nodes automatically.
Taint repels pods from scheduling on a node unless those pods have a matching toleration. During migration, taints are useful for preventing Kubernetes from putting pods on the new AMD nodes until you are ready. You can test first with a few tolerating pods, and when everything works, remove the taint and let more traffic go there.
		managedNodeGroups:
  - name: amd-ng
 instanceType: m8a.xlarge
    taints:
      - key: "cpu"
        value: "amd"
        effect: "NoSchedule"
Choose your canary deployment, add the matching toleration only to that deployment.
		spec:
  replicas: 1
  template:
    spec:
      tolerations:
        - key: "cpu"
          operator: "Equal"
          value: "amd"
          effect: "NoSchedule"
      nodeSelector:
        node-type: amd
Once applied, only this deployment is eligible to run on AMD nodes. Everything else in the cluster continues running on older Intel node, even if the AMD nodes are empty. You could also add a nodeSelector to ensure the canary lands only on AMD, not elsewhere.
This pattern is commonly used when organizations want to run one real pod on AMD first, not a benchmark, not staging traffic, but an actual production workload with real requests. If needed, rollback is instant, remove the toleration, and Kubernetes reschedules the pod back on a previousnode. When the canary deployment is stable, you can scale it up, add tolerations/selectors to additional services, or remove the taint from the AMD node group in your eksctl config and recreate/update it so that normal scheduling is allowed.
Affinity-Based Blue/Green Rollout:
Blue/green inside Kubernetes, like the VM pattern, run two copies of the application in parallel, the green version with AMD nodes, validate it under production conditions, and then switch traffic in one step.
The cleanest way to place the green deployment on AMD is with node affinity. The blue deployment keeps its current scheduling, while the green deployment includes a rule that requires AMD nodes. Both are fronted by separate Services so that you can test the green stack before switching production traffic. Expose blue and green with separate Services. During validation you can hit the green Service directly, run synthetic checks, or shadow traffic.
		spec:
   affinity:
     nodeAffinity:
          requiredDuringSchedulingIgnoredDuringExecution:
            nodeSelectorTerms:
              - matchExpressions:
                - key: node-type
                  operator: In
                  values: ["amd"]
Once you are ready to switch, after testing. The simplest approach involves updating your original service selectors to point to the green deployments, immediately redirecting all traffic to your AMD EPYC based applications. The change is instantaneous and fully reversible because both deployments are already running.
If your clients use a ClusterIP Service, you can switch by patching the selector on the Service so it targets green labels.
kubectl patch service my-app -n my-namespace -p '{"spec":{"selector":{"app":"my-app-green"}}}'
If you are using ingress, you can gradually increase traffic to the green environment by adjusting weights (for example, 80% green and 20% blue during validation).
		metadata:
  name: my-app
  annotations:
    kubernetes.io/ingress.class: alb
    alb.ingress.kubernetes.io/actions.weighted-routing: >
      {"type":"forward","forwardConfig":{"targetGroups":[
        {"serviceName":"my-app-blue-svc","servicePort":"80","weight":20},
        {"serviceName":"my-app-green-svc","servicePort":"80","weight":80}
      ]}}
You can eventually shift the traffic to fully green by changing weights to green environment to 100 in annotations:
		metadata:
  name: my-app
  annotations:
    kubernetes.io/ingress.class: alb
    alb.ingress.kubernetes.io/actions.weighted-routing: >
      {"type":"forward","forwardConfig":{"targetGroups":[
        {"serviceName":"my-app-green-svc","servicePort":"80","weight":100}
      ]}}
This approach is useful when you want isolation between versions of your application or deployments of the same application on different instance types. It is great when you need to test AMD EPYC based instances without changing the existing workload spec.
Retiring Intel Nodes with Cordon and Drain
Once your workloads have successfully shifted onto AMD nodes, whether through label-based rollout, taint-and-toleration canary, or blue/green scheduling, the last step is to retire the Intel node group safely. Kubernetes provides two built-in mechanisms for this, cordon, and drain.
Cordon marks a node as unschedulable so that no new pods are placed on it, but existing pods continue running normally. Drain gracefully evicts pods from the node and reschedules them elsewhere in the cluster.
You can gradually drain the Intel-based nodes by cordoning them to prevent new pods from being scheduled, then draining them so existing workloads are safely evicted and rescheduled onto the new AMD nodes.
		kubectl cordon <intel-node-name>
kubectl drain  <intel-node-name> --ignore-daemonsets --delete-emptydir-data
Once all workloads are successfully running on AMD-based instances and no issues are observed, you can clean up by deleting the old Intel-based node group.
		eksctl delete nodegroup \
--cluster  \
--name intel-ng
Once the last Intel node is gone, the cluster becomes AMD-only, and all workloads continue running without spec changes your Services, Ingresses, autoscaling rules, and Pod specs remain valid because the migration happened at the node layer, not the application layer.
Conclusion
Migrating from Intel to AMD in the cloud is not a disruptive infrastructure event. Because AMD instances are x86 compatible, run the same operating systems, the same container images, and the same orchestration platforms; the migration becomes a question of how you introduce new capacity, not whether your applications can run on it. The patterns in this guide, such as rolling replacement, blue/green, and canary, are the same deployment strategies many organizations already use for version upgrades, and they allow the transition to happen gradually, with full observability and instant rollback at every step.
Organizations that complete this migration gain more compute flexibility, lower cloud OpEx, higher performance per dollar, more vCPU density per node, optimized license cost, better [Public] performance per watt and a wider range of instance choices across cloud providers. That added efficiency translates into better scaling headroom and lower cost per workload, all while keeping tooling, CI/CD, application code, and operational processes unchanged. If you are beginning a migration, already running mixed fleets, or want a deeper evaluation of instance families and tuning patterns, reach out to us. We would love to help you get the most out of your infrastructure.

Related Blogs
-
AMD-SUSE-EnterpriseAI
AMD, SUSE, and RGS are delivering a secure, open AI platform to accelerate private, sovereign, and enterprise AI deployments.
July 22, 2026
-
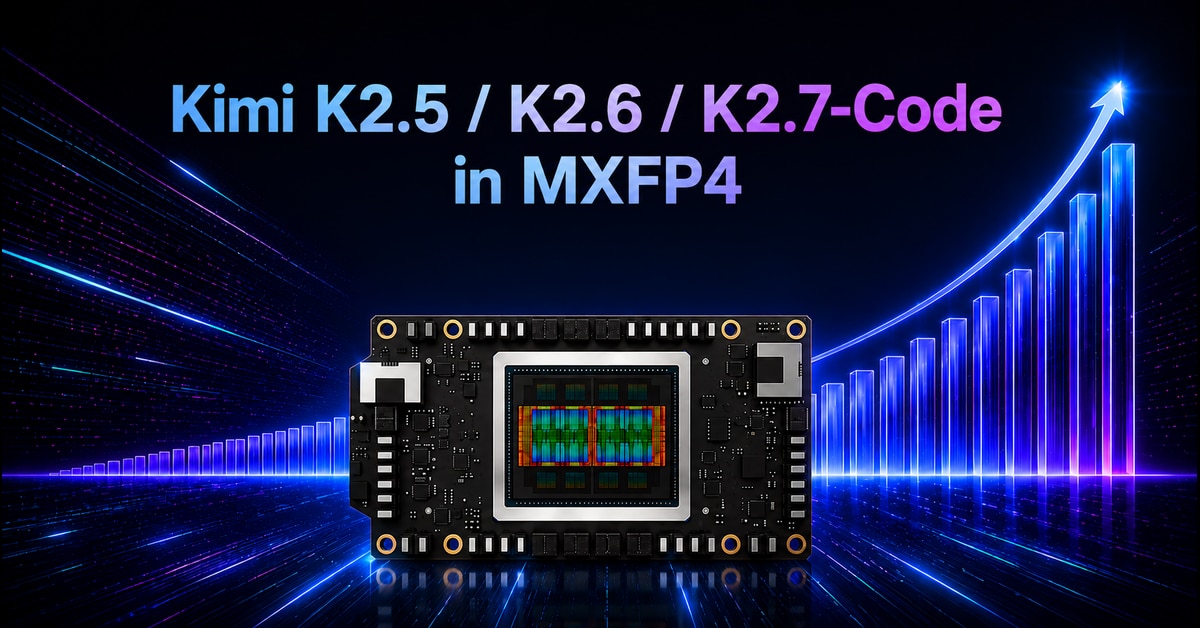
Kimi Code in MXFP4 on AMD GPUs
Discover how ATOM accelerates Kimi K2.5, K2.6, and K2.7-Code inference with optimized serving on AMD Instinct™ GPUs.
July 21, 2026
-
Rebuilding Agentic AI for AMD GPU
AMD and Moonshot AI built an agentic AI serving stack that optimizes KV cache, scheduling, and GPU performance on AMD Instinct™ GPUs
July 21, 2026
-
Scaling MiniMax-M3 Inference with Distributed Serving and Operator Co-Design on AMD Instinct MI355X GPUs — ROCm Blogs
Optimize MiniMax-M3 inference on AMD Instinct™ MI355X GPUs with ATOM online quantization, AITER sparse attention, FP8 KV cache, and EAGLE3.
July 20, 2026
-
Building a High-Performance Video Inference Pipeline with ROCm Libraries Using C/C++ — ROCm Blogs
Learn how to build a powerful, GPU-accelerated video analytics pipeline with ROCm, combining rocDecode for fast hardware video decoding and MIGraphX for efficient AI-powered analysis and inference.
July 20, 2026
-
Train and Run Models on AMD GPUs with Unsloth
Train, fine-tune, run AI models with Unsloth on AMD GPUs across Windows, WSL and Linux, with native inference for leading models.
July 20, 2026
-
Ideogram Scales Open Image Model with AMD Instinct™ GPU-Powered Inference
Ideogram 4.0 Releases Best Open Image Model AMD Instinct GPUs Power Production-scale Inference End-to-End Enterprise Capabilities Built to Scale
July 20, 2026
-
SPIR-V on ROCm: A Portable IR for AMD GPUs — ROCm Blogs
Learn how SPIR-V brings compile-once, specialize-on-device portability to AMD GPUs — with a reproducible HIP benchmark, trade-off analysis, and quick-start guide.
July 19, 2026