Run OpenClaw Locally On AMD Ryzen™ AI Max+ Processors and Radeon™ GPUs
By AMD AI Group, Usman Pirzada contributing
March 13, 2026
For years, powerful AI models have primarily lived in the cloud, accessed through remote APIs and services. But advances in local hardware and optimized inference stacks are beginning to shift that model, making it possible to run capable LLMs directly on personal systems. This transition is also giving rise to a new category of computing called the Agent Computer, where the primary user is an AI agent rather than a human, unlike traditional Personal Computers.
With platforms like AMD Ryzen™ AI Max+, models such as Qwen 3.5 122B can run locally with strong performance, supporting both single agent and multi agent workloads, signaling a shift from the cloud powered AI of yesterday to powerful local AI systems today.

While there are multiple ways to run and install OpenClaw, they may come with tradeoffs or missing features for Windows users. The AMD best known configuration (BKC) for OpenClaw via WSL2 introduces a streamlined way to run local AI agents and LLM workloads directly on AMD hardware without leaving the comfort of Windows. The setup enables fully local LLM provisioning with functional Memory.md support through local embeddings, powered by LM Studio using llama.cpp.
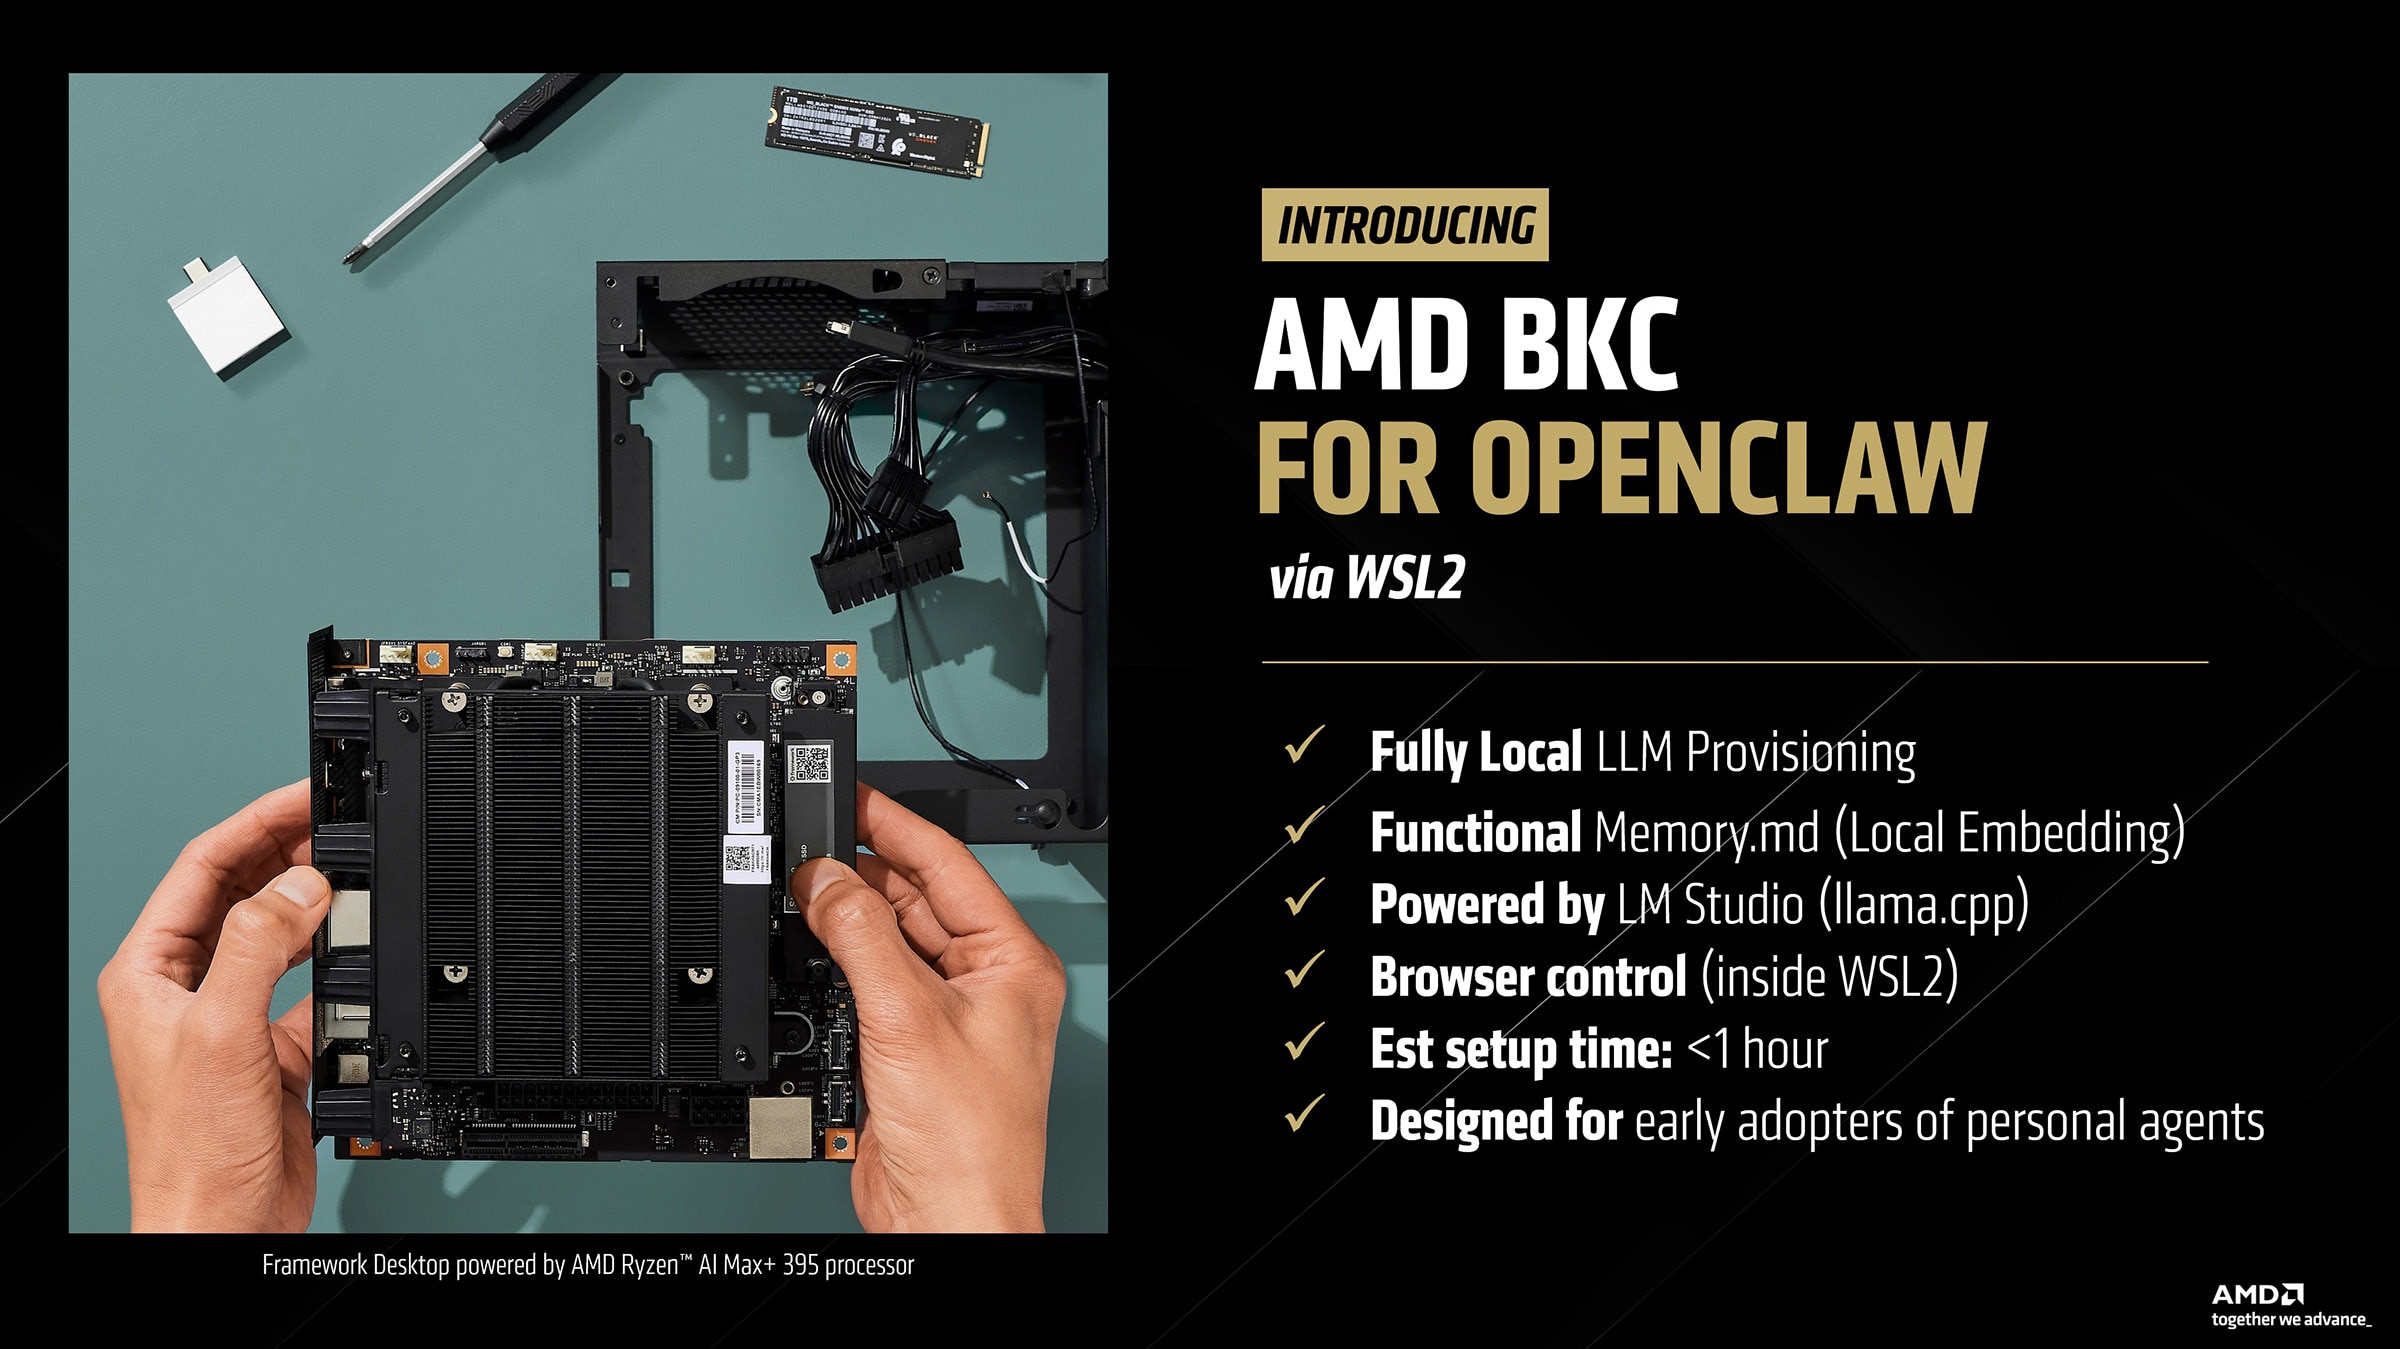
Browser control runs inside WSL2, enabling automated workflows and agent interactions. The environment can be configured in under an hour and is designed for early adopters experimenting with personal AI agents and local development workflows.
The RyzenClaw configuration aka an AMD Ryzen™ AI Max+ provisioned with 128GB unified memory is available from various AMD partners. Browse options here: Agent Computers
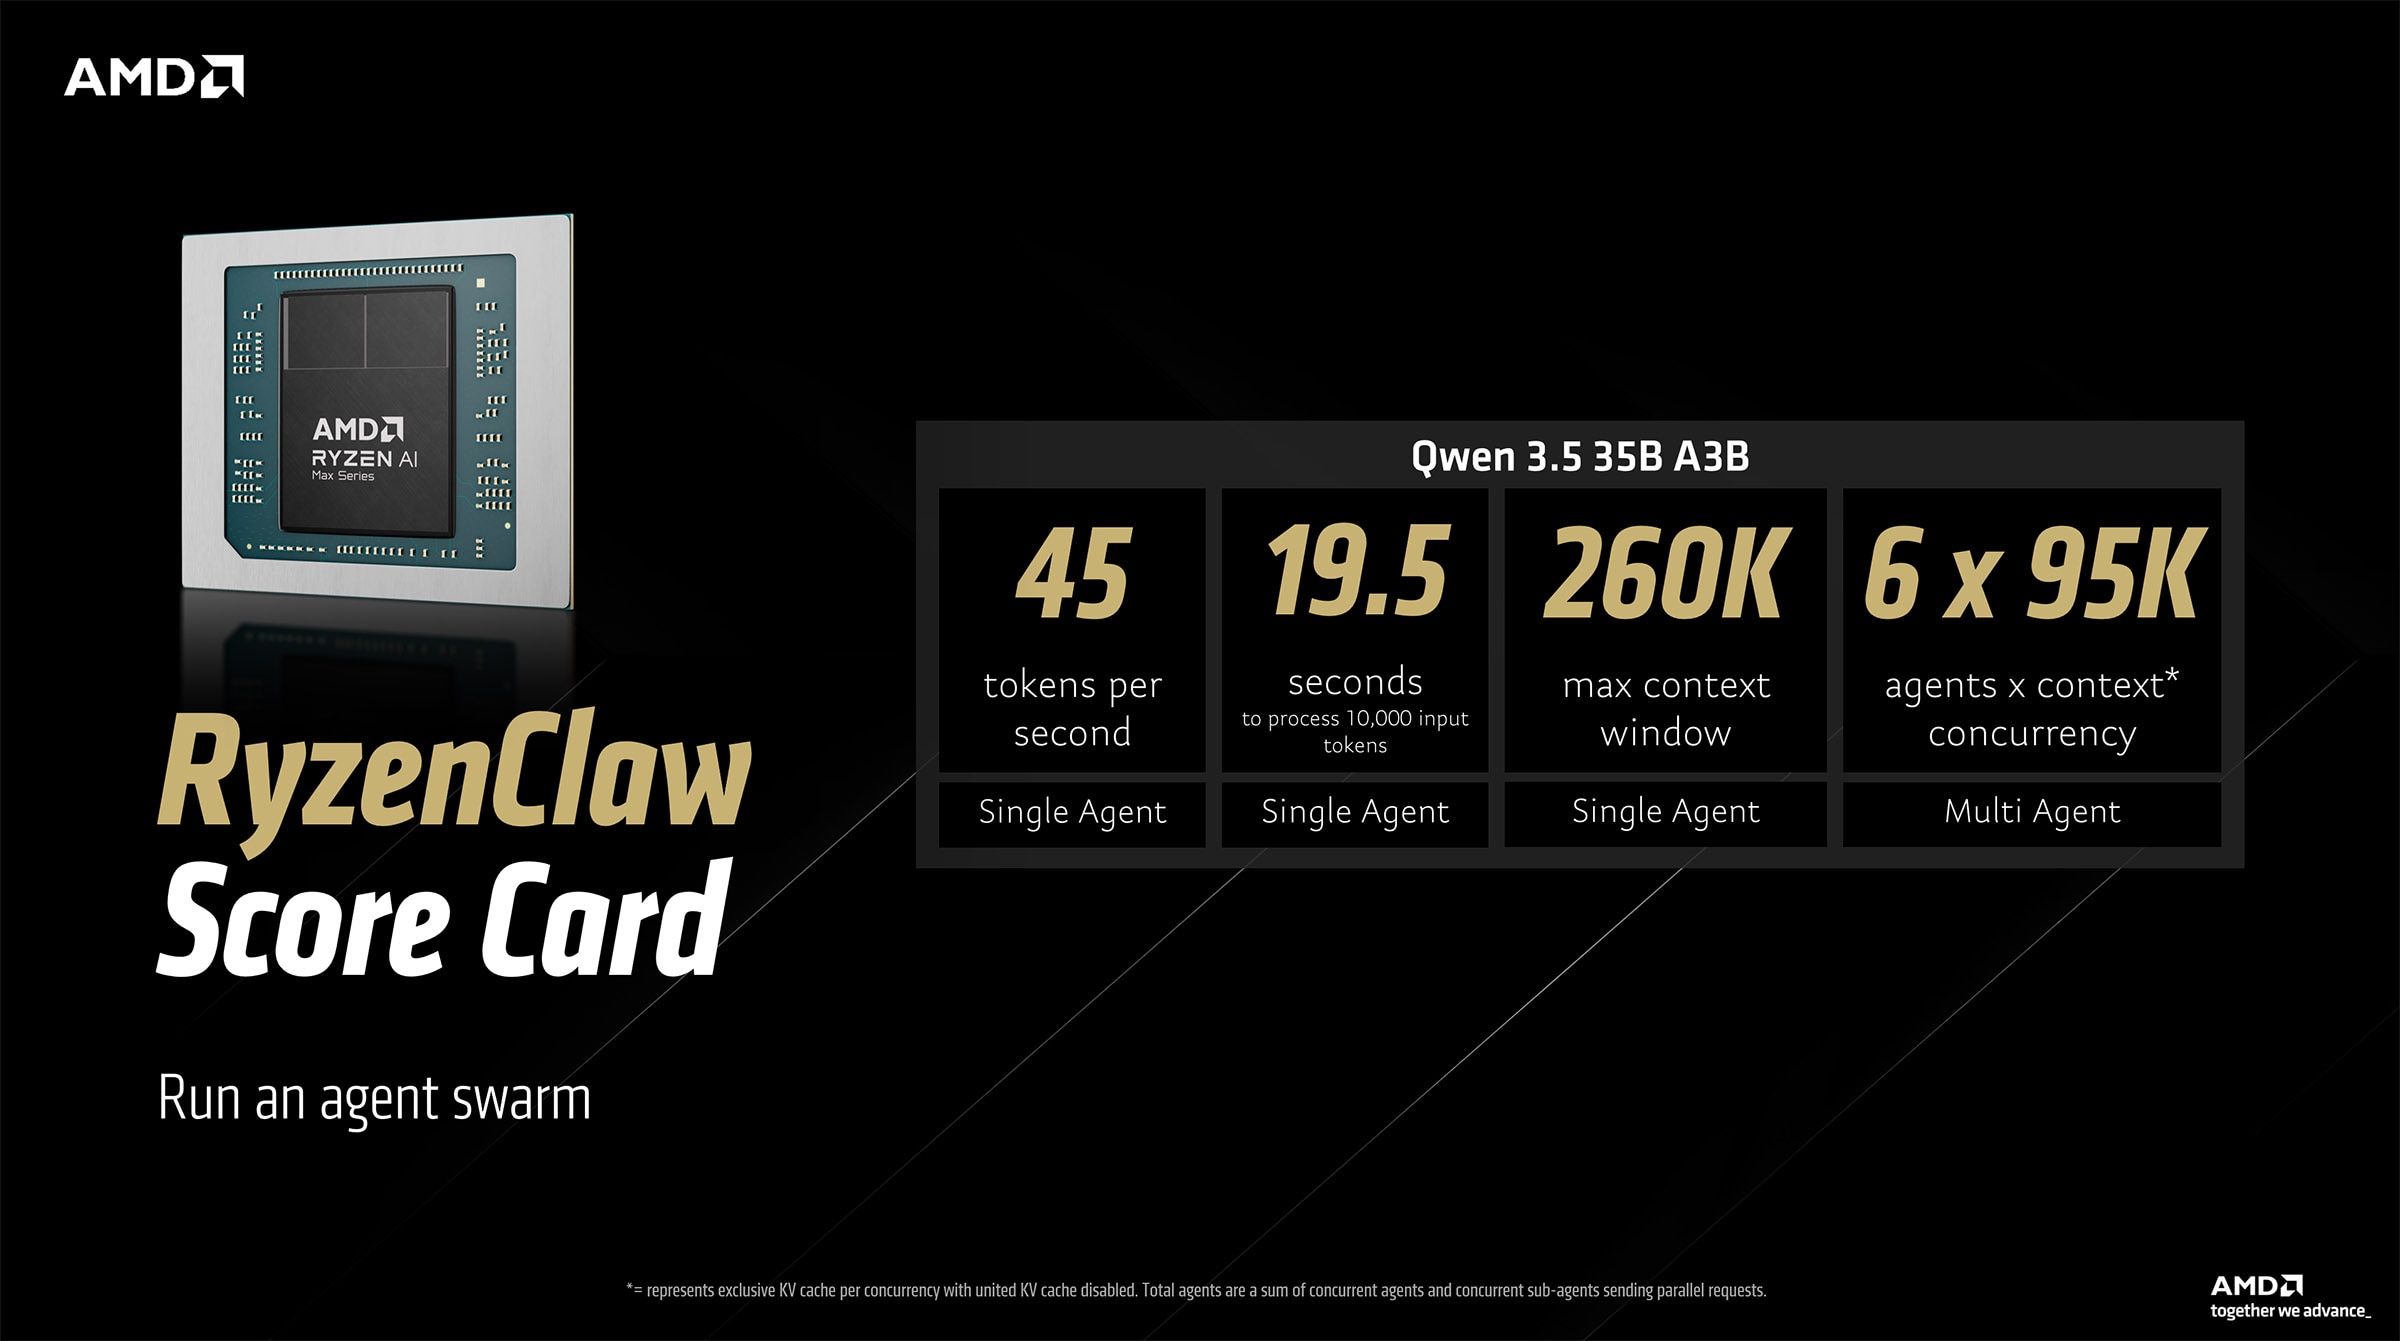
The RyzenClaw scorecard highlights the ability of AMD Ryzen™ AI Max+ platforms with 128GB unified memory to run cloud-quality AI agent workloads efficiently via OpenClaw. With the Qwen 3.5 35B A3B model, the system delivers around 45 tokens per second and processes 10,000 input tokens in about 19.5 seconds. It supports a maximum context window of 260K tokens and can run up to 6 agents concurrently. This enables scalable local AI experimentation such as agent swarms while maintaining strong responsiveness on consumer hardware.
The RadeonClaw configuration aka an AMD Radeon™ AI PRO R9700 graphics card is available from various AMD partners. Browse options here: Regional Retailers
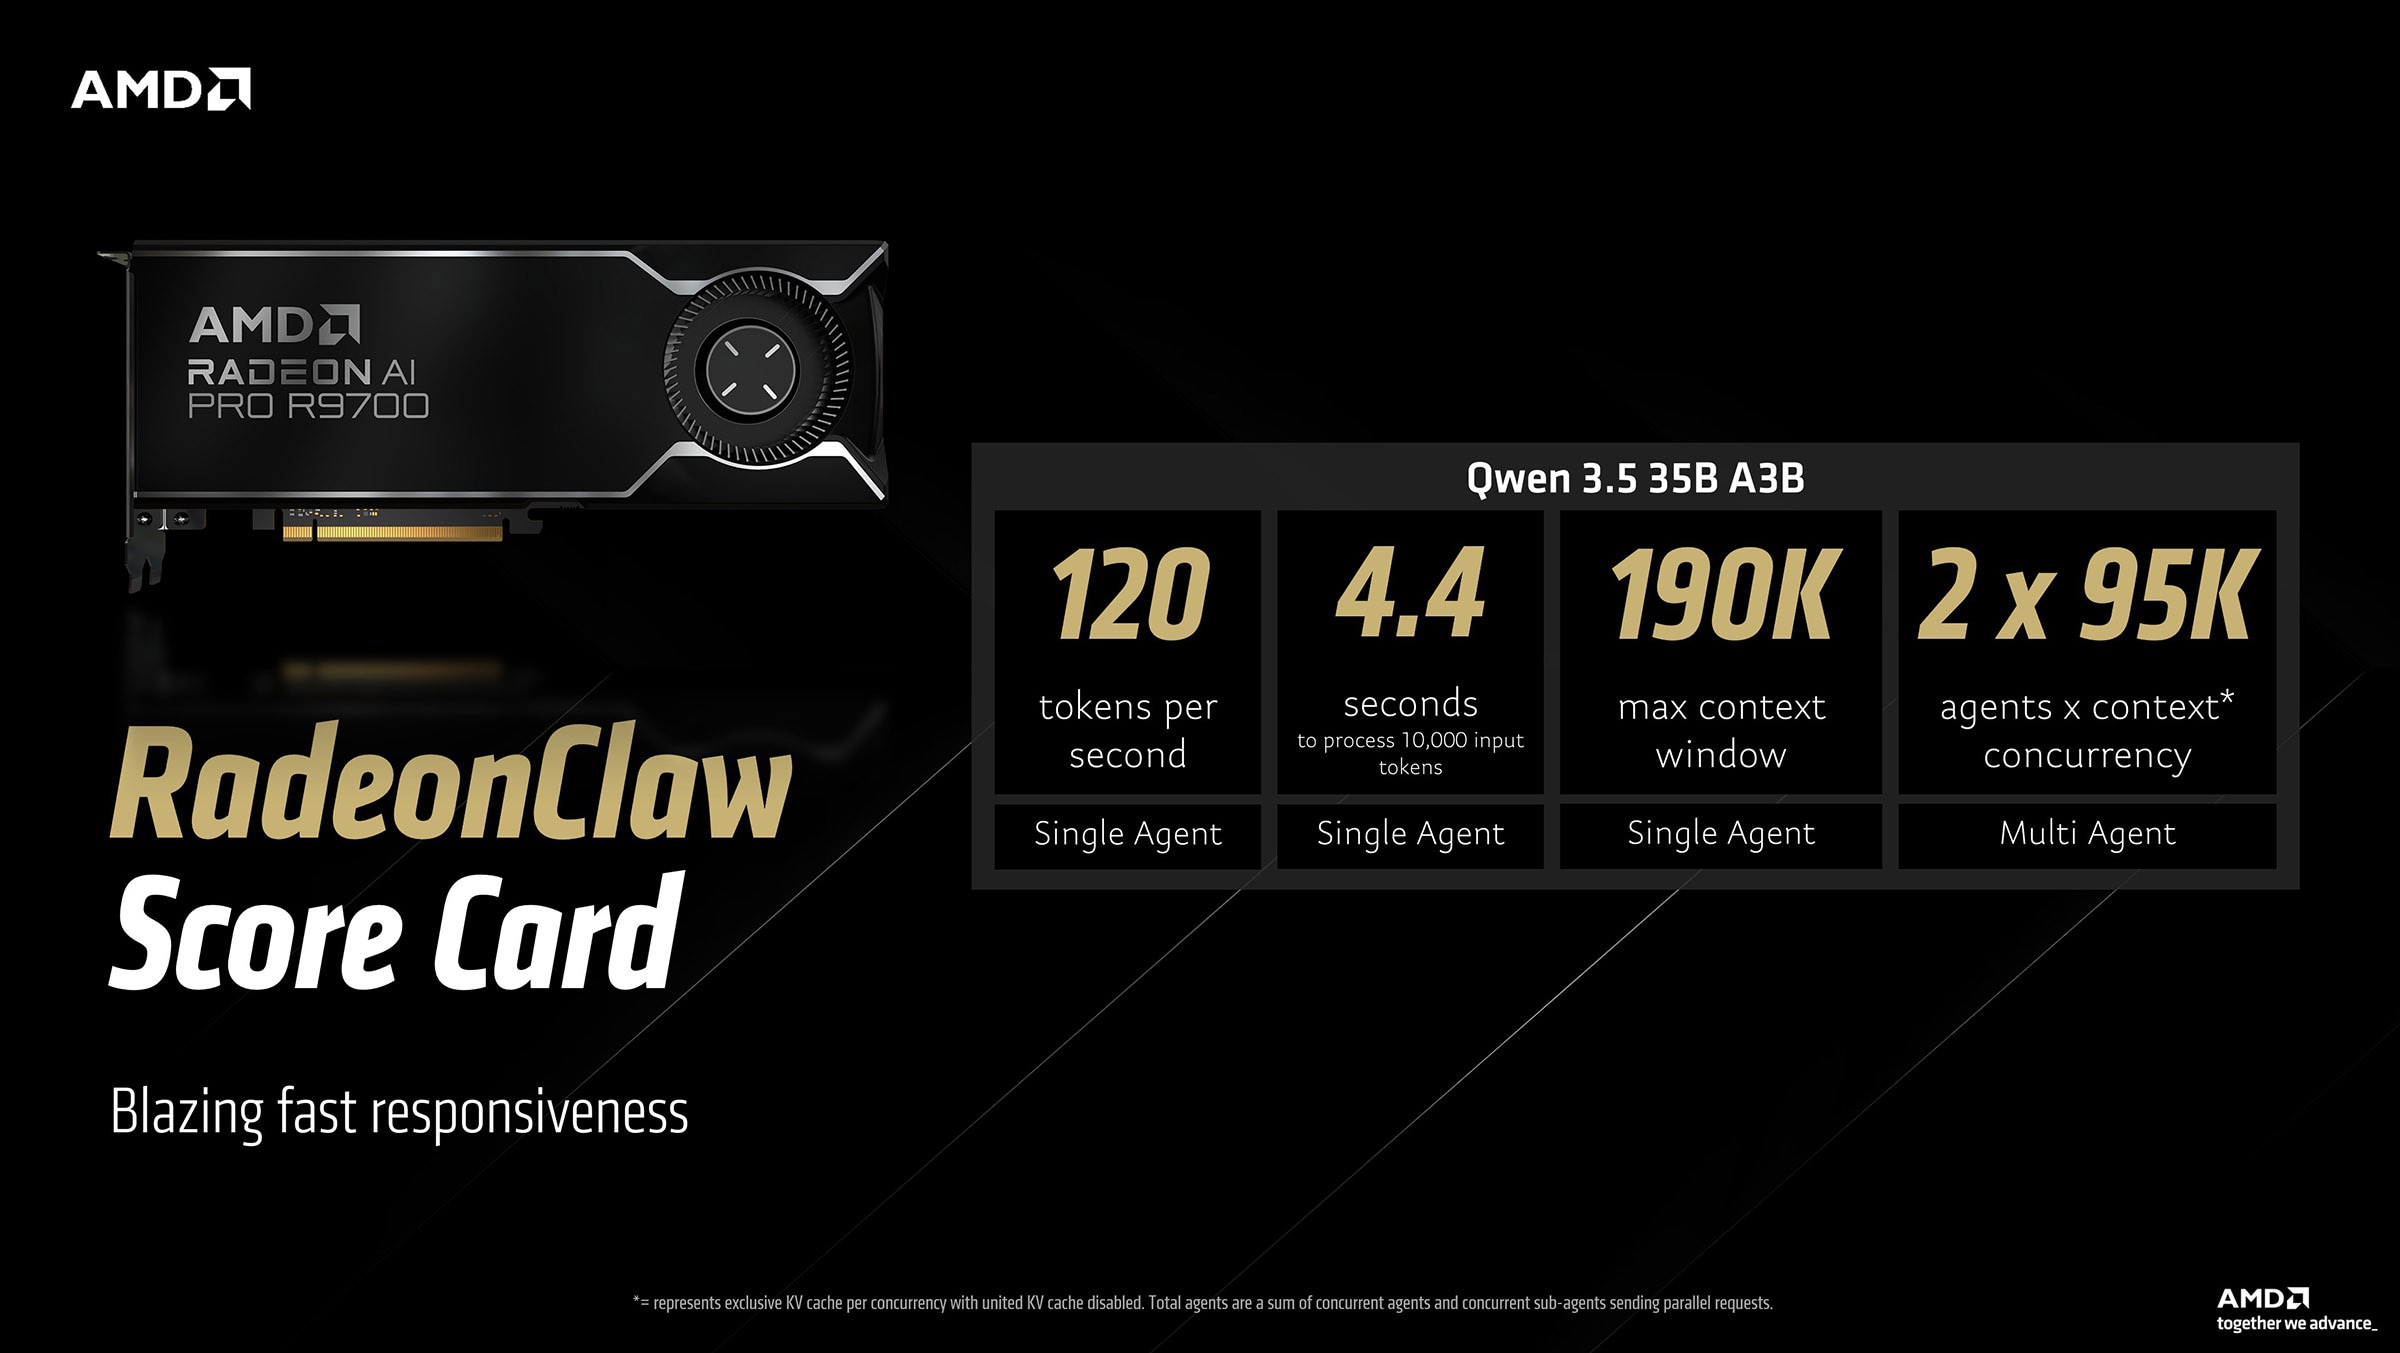
The RadeonClaw scorecard demonstrates the performance gains when running the same workloads on AMD Radeon™ AI PRO R9700 graphics. With the Qwen 3.5 35B A3B model, the system achieves roughly 120 tokens per second and processes 10,000 input tokens in about 4.4 seconds. It supports a 190K token context window and up to 2 agents concurrently. The result is significantly faster responsiveness for on-prem agent inference.
How to setup and run OpenClaw on AMD Ryzen™ AI Max+ processors or Radeon™ graphics
Next, we will walk through how to set up this environment step by step.
Estimated time to follow along and install: ~1 hour
Driver update and AMD Variable Graphics Memory setup
- Download and install the latest AMD Software: Adrenalin™ Edition drivers.
- Users with an AMD Radeon™ graphics card please skip this step. Users with an AMD Ryzen™ AI Max+ 128GB-based platform: Right click anywhere on desktop > AMD Software: Adrenalin™ Edition > Performance > Tuning > Variable Graphics Memory > Set to 96GB and Restart
LM Studio setup and proper configuration
Initial setup
- Download LM Studio
- Start LM Studio and click on "Skip for now" for the model download prompt.
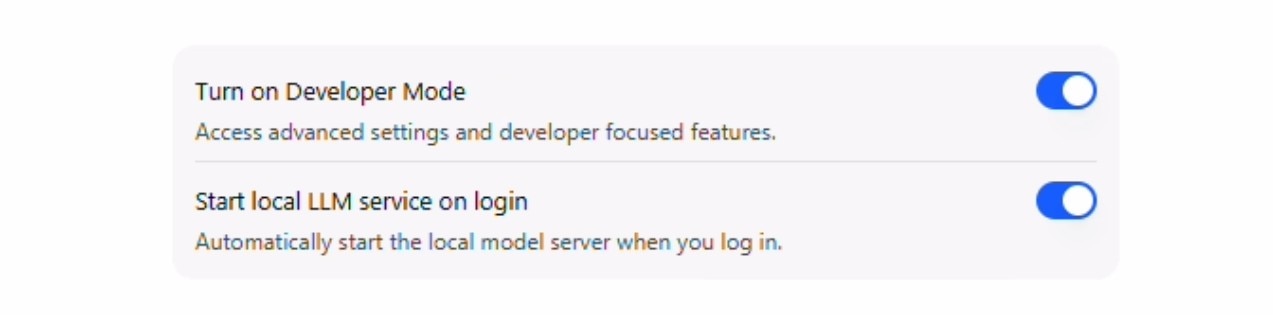
- Check "Developer Mode" and "Start LLM service on login"
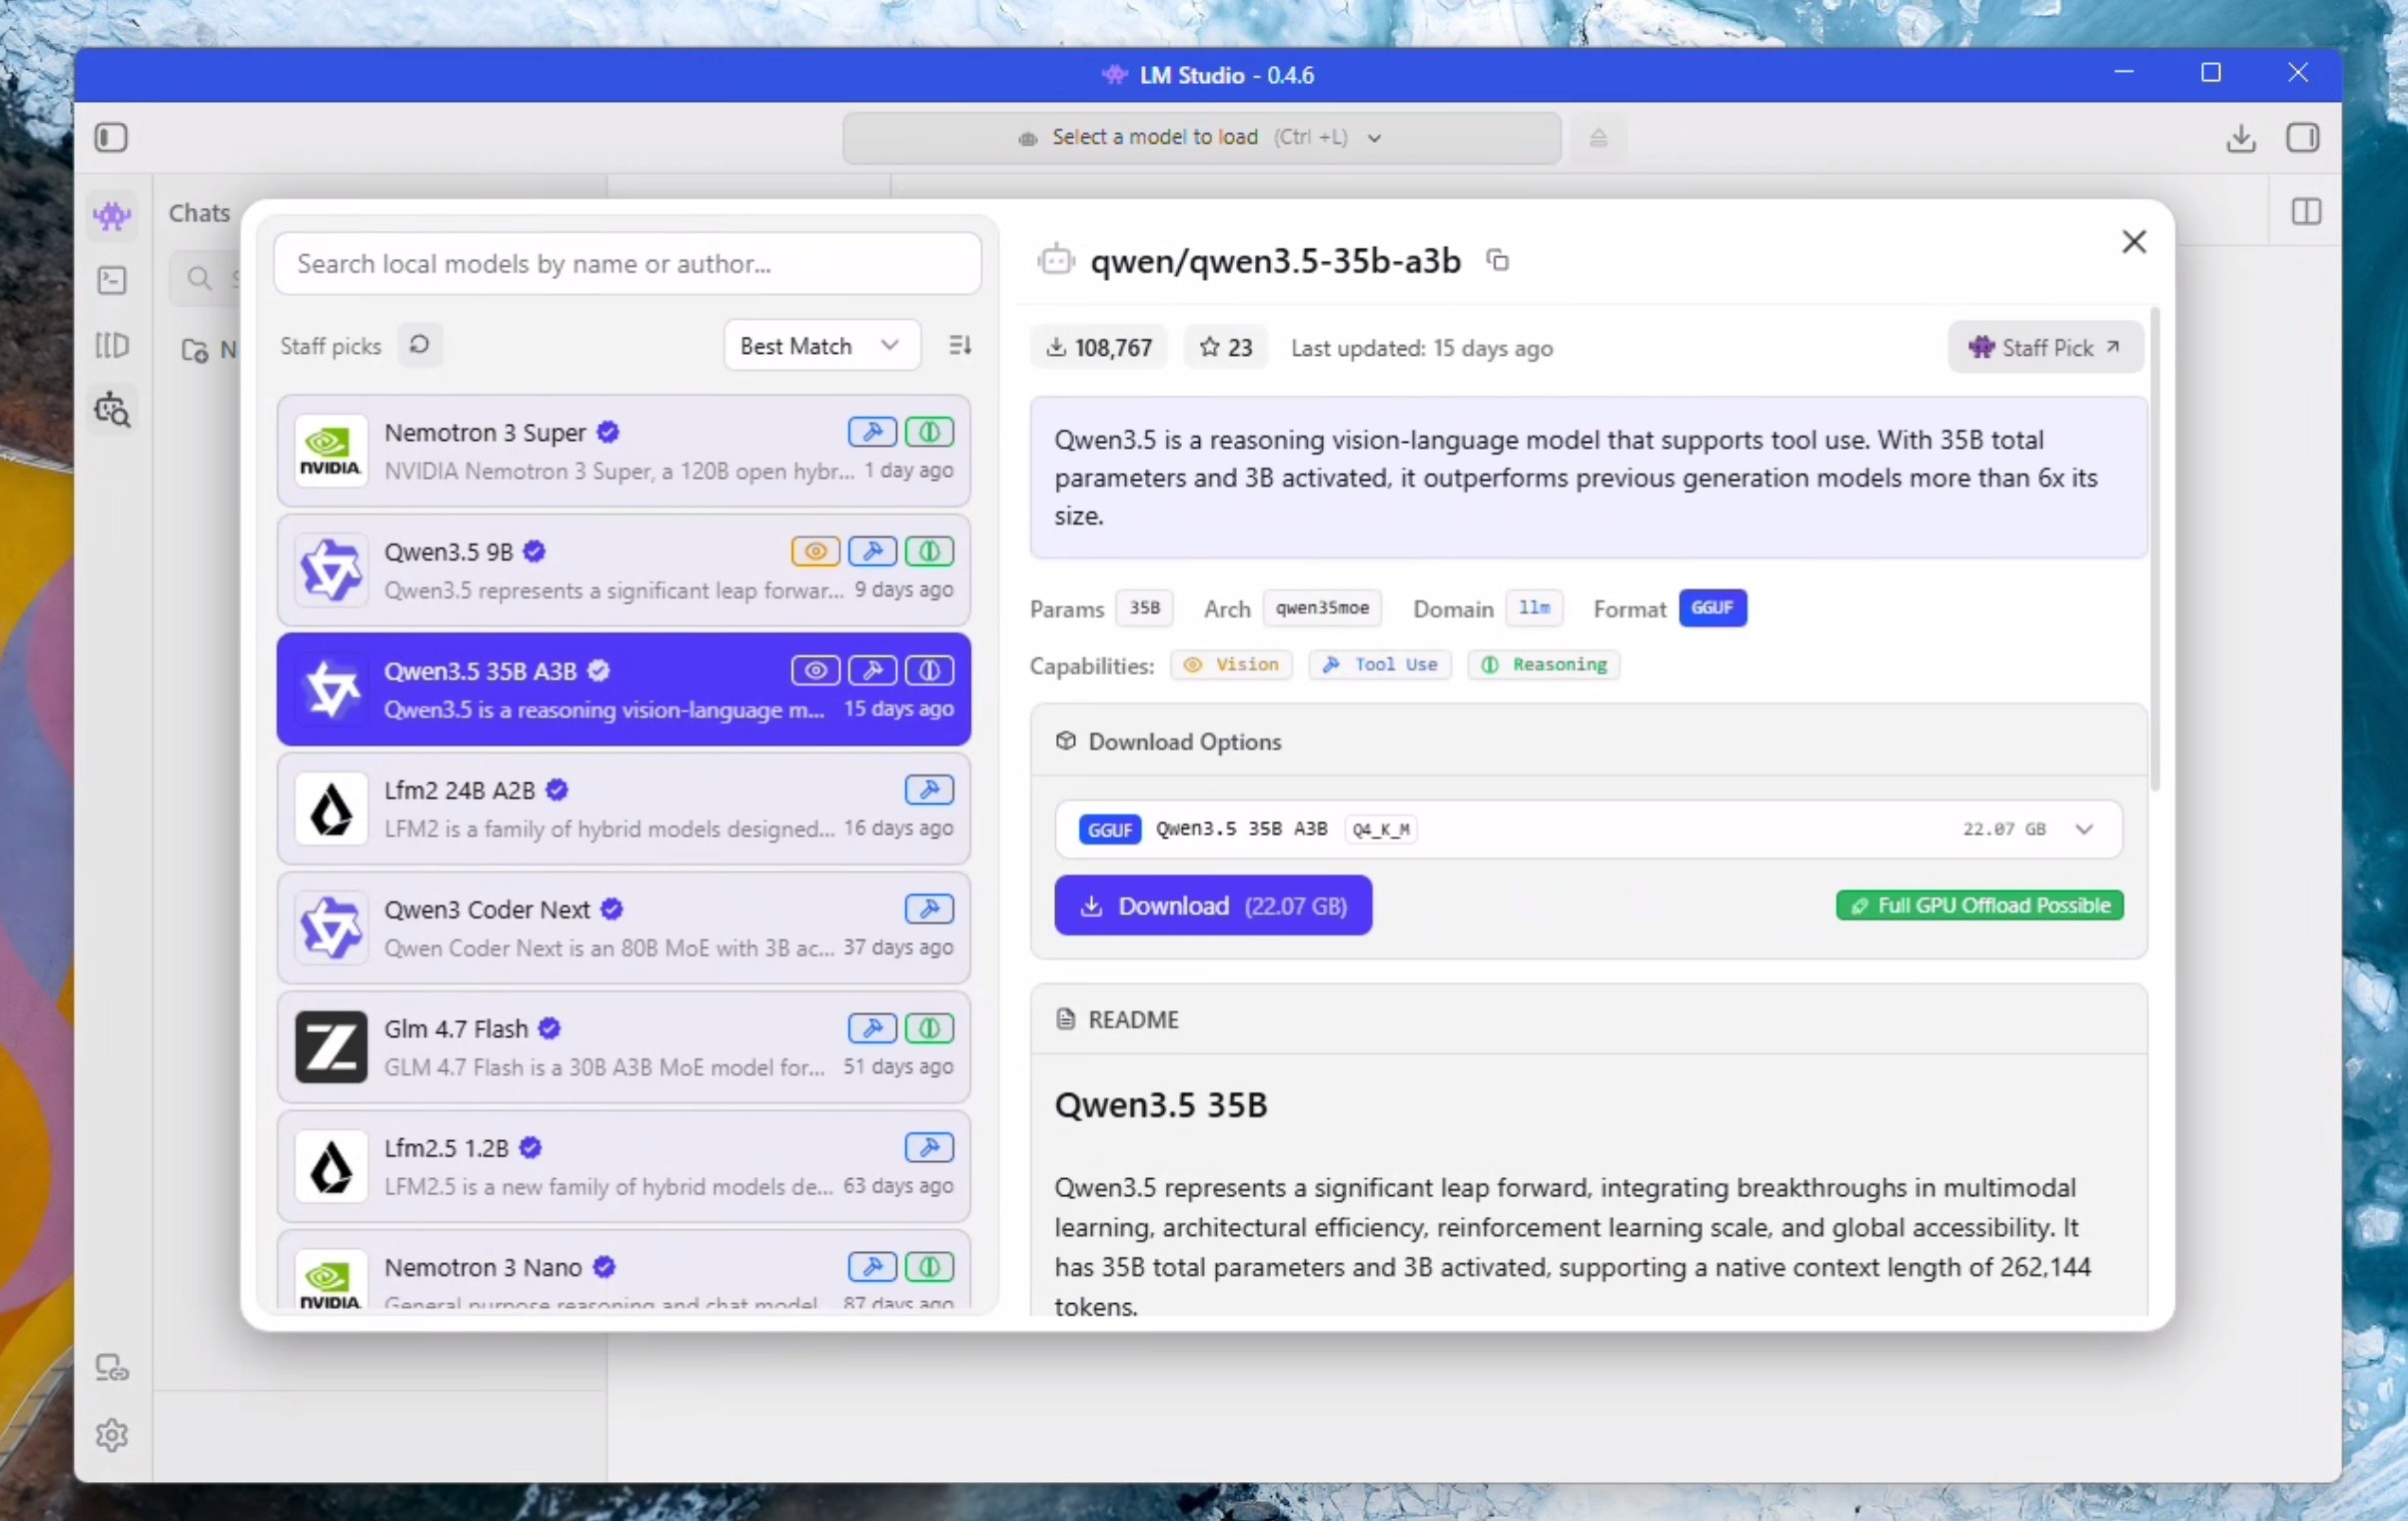
- Click on the "Model Search" Icon represented by a Robot and a Magnifying glass
- Select "Qwen3.5 35B A3B" on the left hand side and click download on the right hand side. Wait for it to finish downloading.
- Click Ctrl + L to bring up model selection. Check "Manually choose load model parameters" and click on the LLM to bring up the load options.
- Check "remember settings" and check "show advanced settings".
- Set context to 190000 and make sure GPU Offload is set to MAX.
- Uncheck "Try nmap"
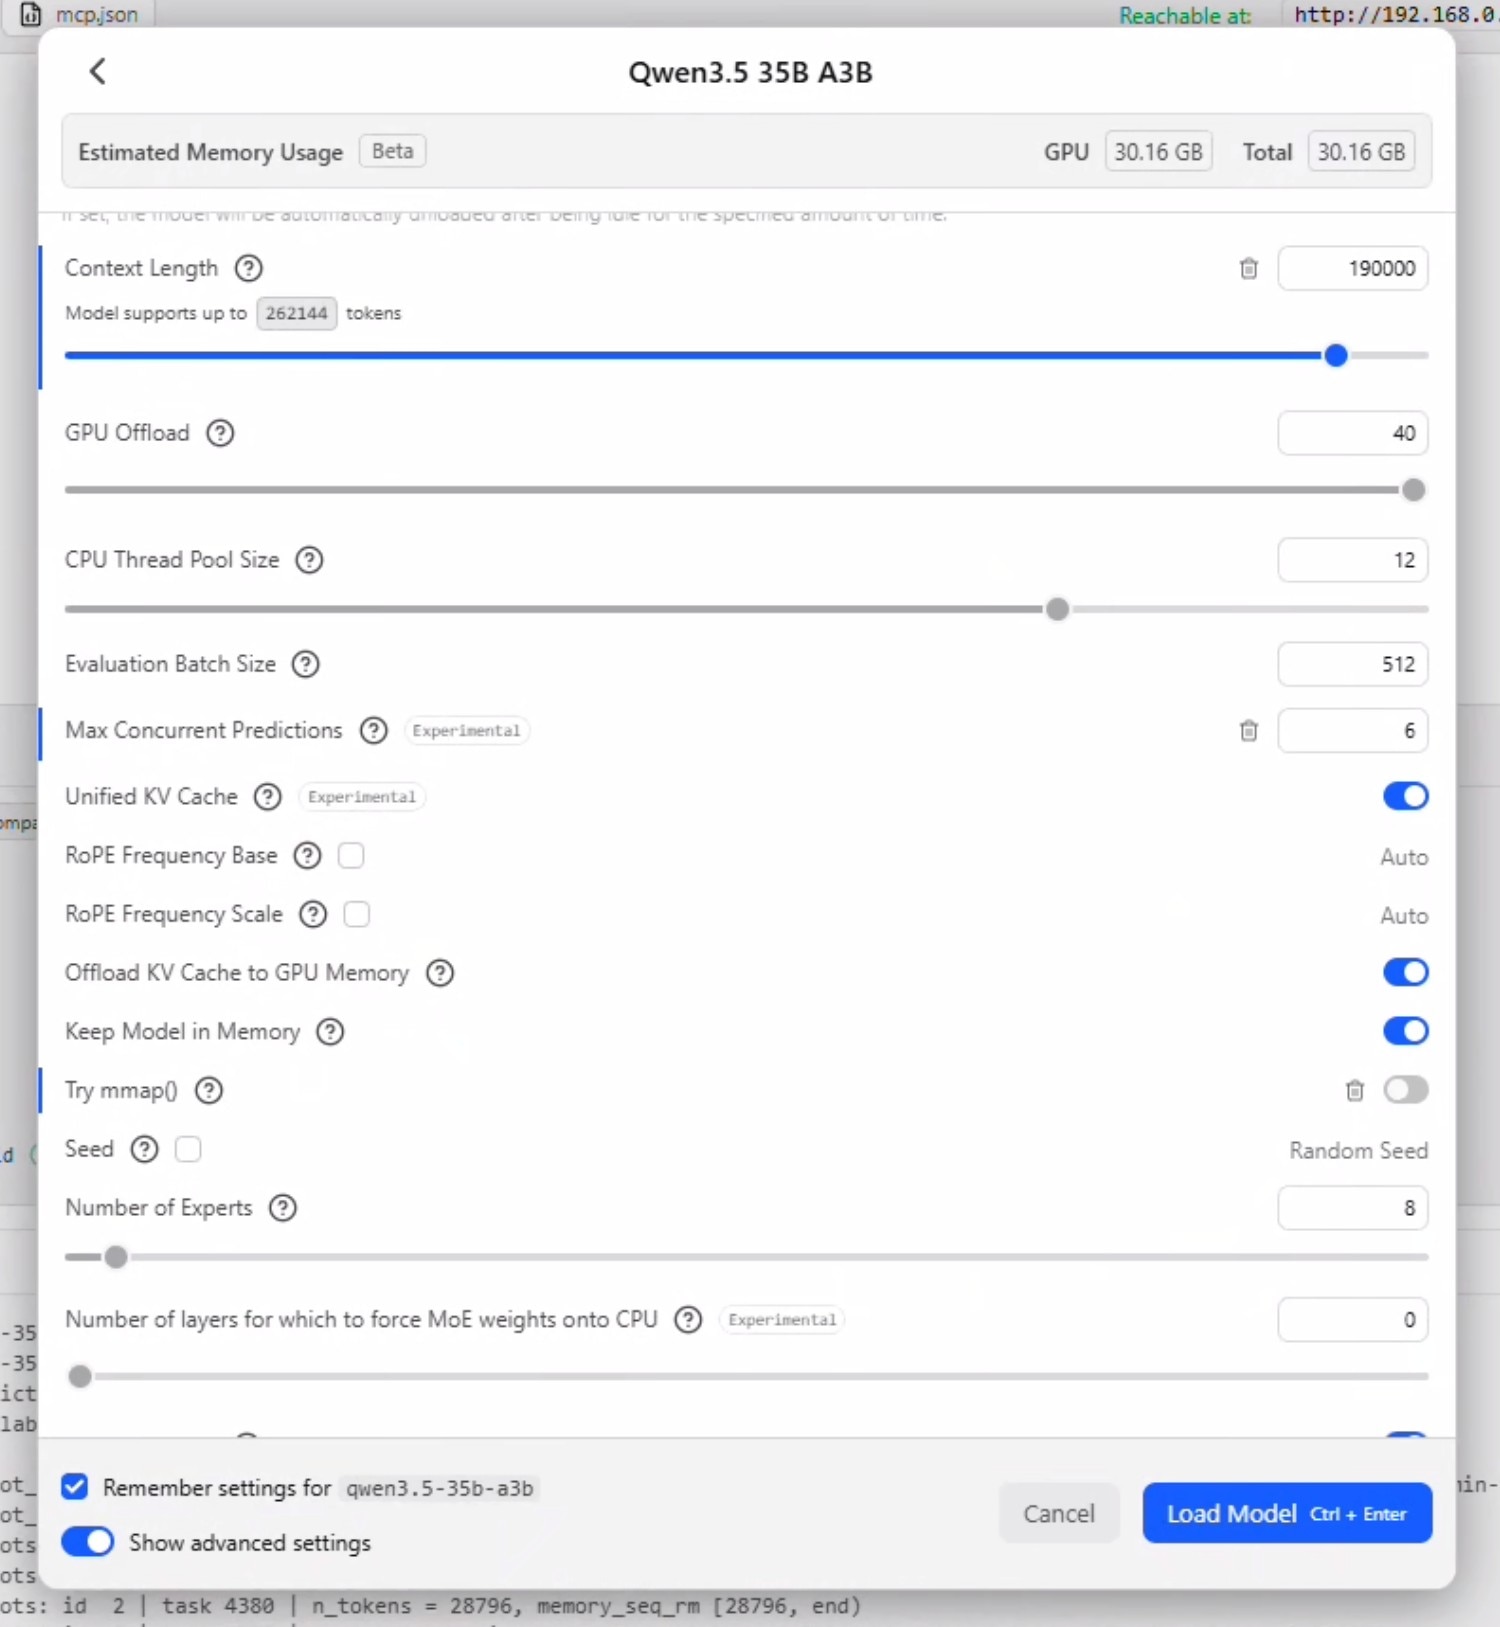
Concurrency Logic: Max Concurrent Prediction is how many parallel requests the model will accept. This should be set to the sum of the following settings in OpenClaw: [Max Concurrent Agents] + [Max Concurrent Agents * Max Concurrent Sub Agents]. So if you have openclaw.json file is set to 2 concurrent agents with 2 concurrent sub agents - this field should be set to 6.
Disabling Unified KV Cache allows each agent to have its own KV Cache and context window - but significantly increases the memory utilization as a multiple of the parrallel requests. Leaving Unified KV Cache enabled allows all agents to share the same window so does not impact memory utilization.
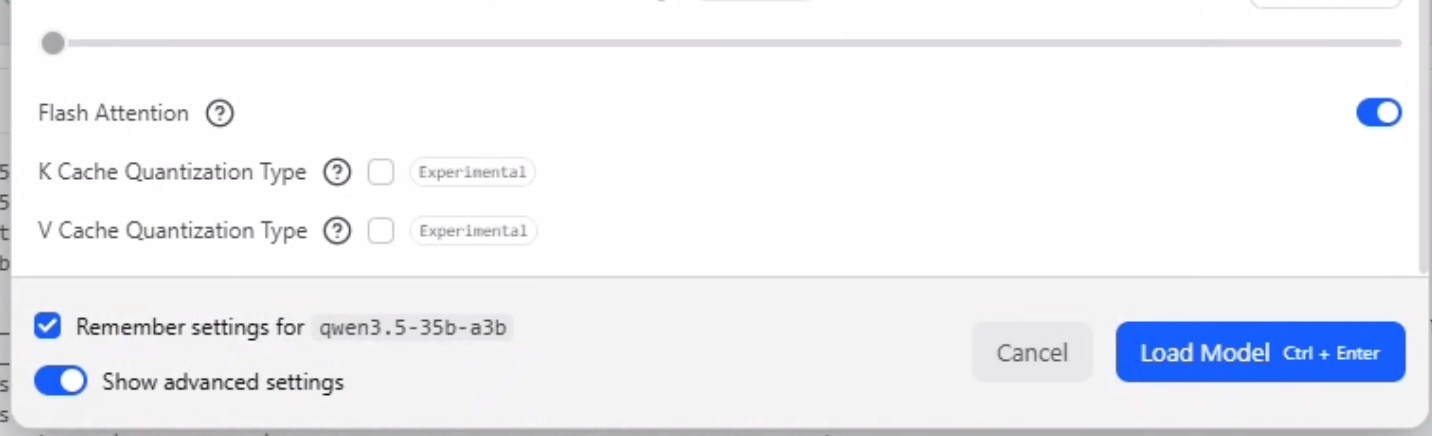
- Ensure "Flash Attention" is enabled.
- For a detailed explaination of Max Concurrent Predictions and Unified KV Cache, please see concurrent agent logic above. For now, we will set max concurrent predictions to 6 and leave unified kv cache checked.
- Click load.
- You may need to select the model again from the drop down menu in case it does not show up.
- Start a chat and send a message "test" to ensure the LLM is working.
Server setup and hardening against crashes
- Press Ctrl + 2 to take you to the developer tab.
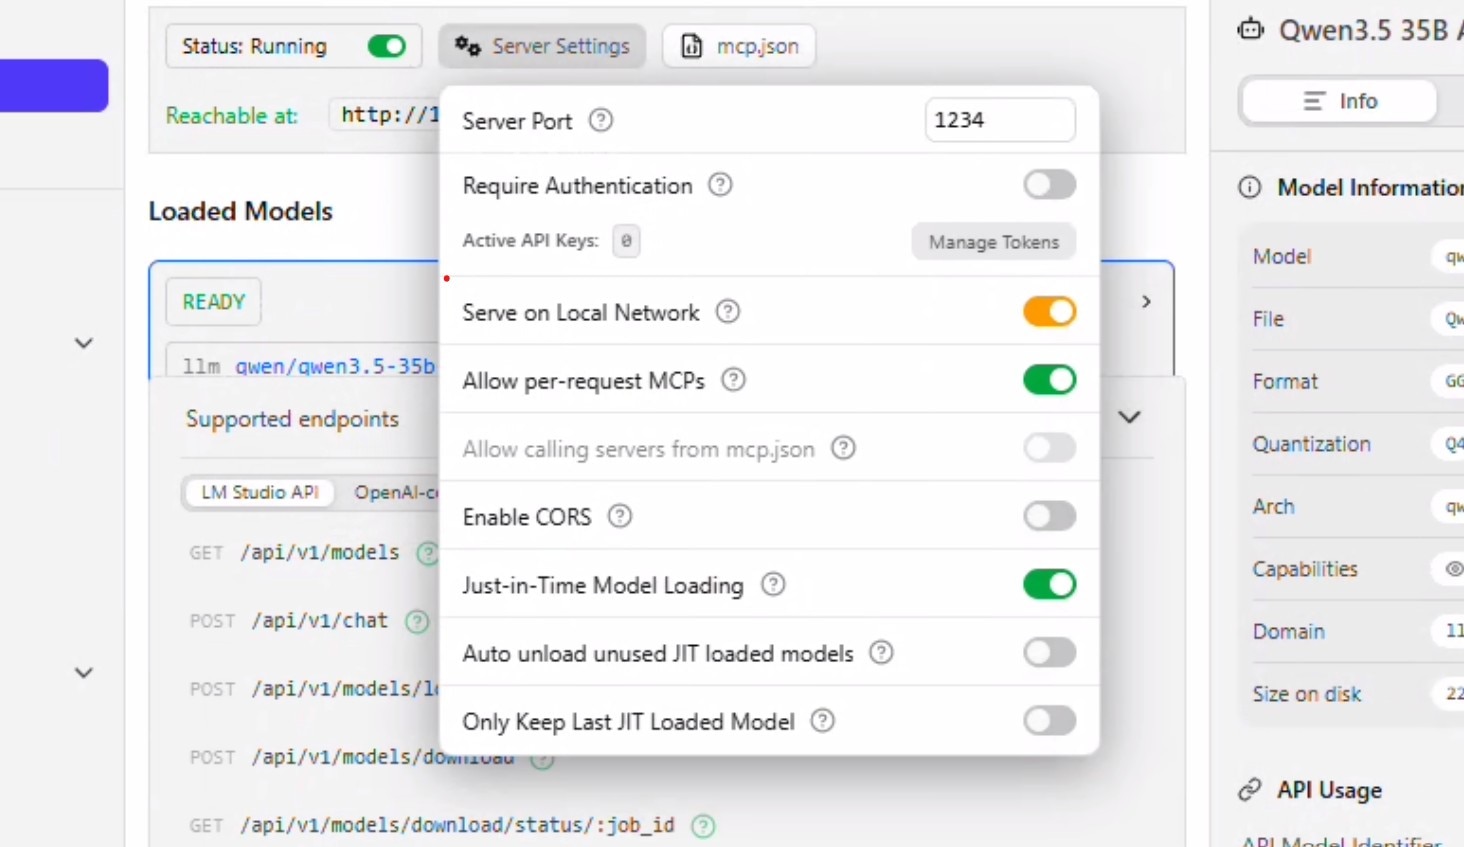
- Press the toggle infront of "Status: Stopped" to start the server.
- Click on Server Settings
- Allow "Serve on Local Network". You will be prompted for permissions at this point.
- Uncheck "Auto unload unused JIT loaded models" and "Only keep last JIT loaded model". Click anywhere to close the context window.
- Click on Load Model. Select Qwen 35B A3B. The settings that we configured above should automatically populate. Click Load.
- The model should get loaded and you will see the status "READY".
- Keep this window open and move on.
Installing WSL2 and OpenClaw core
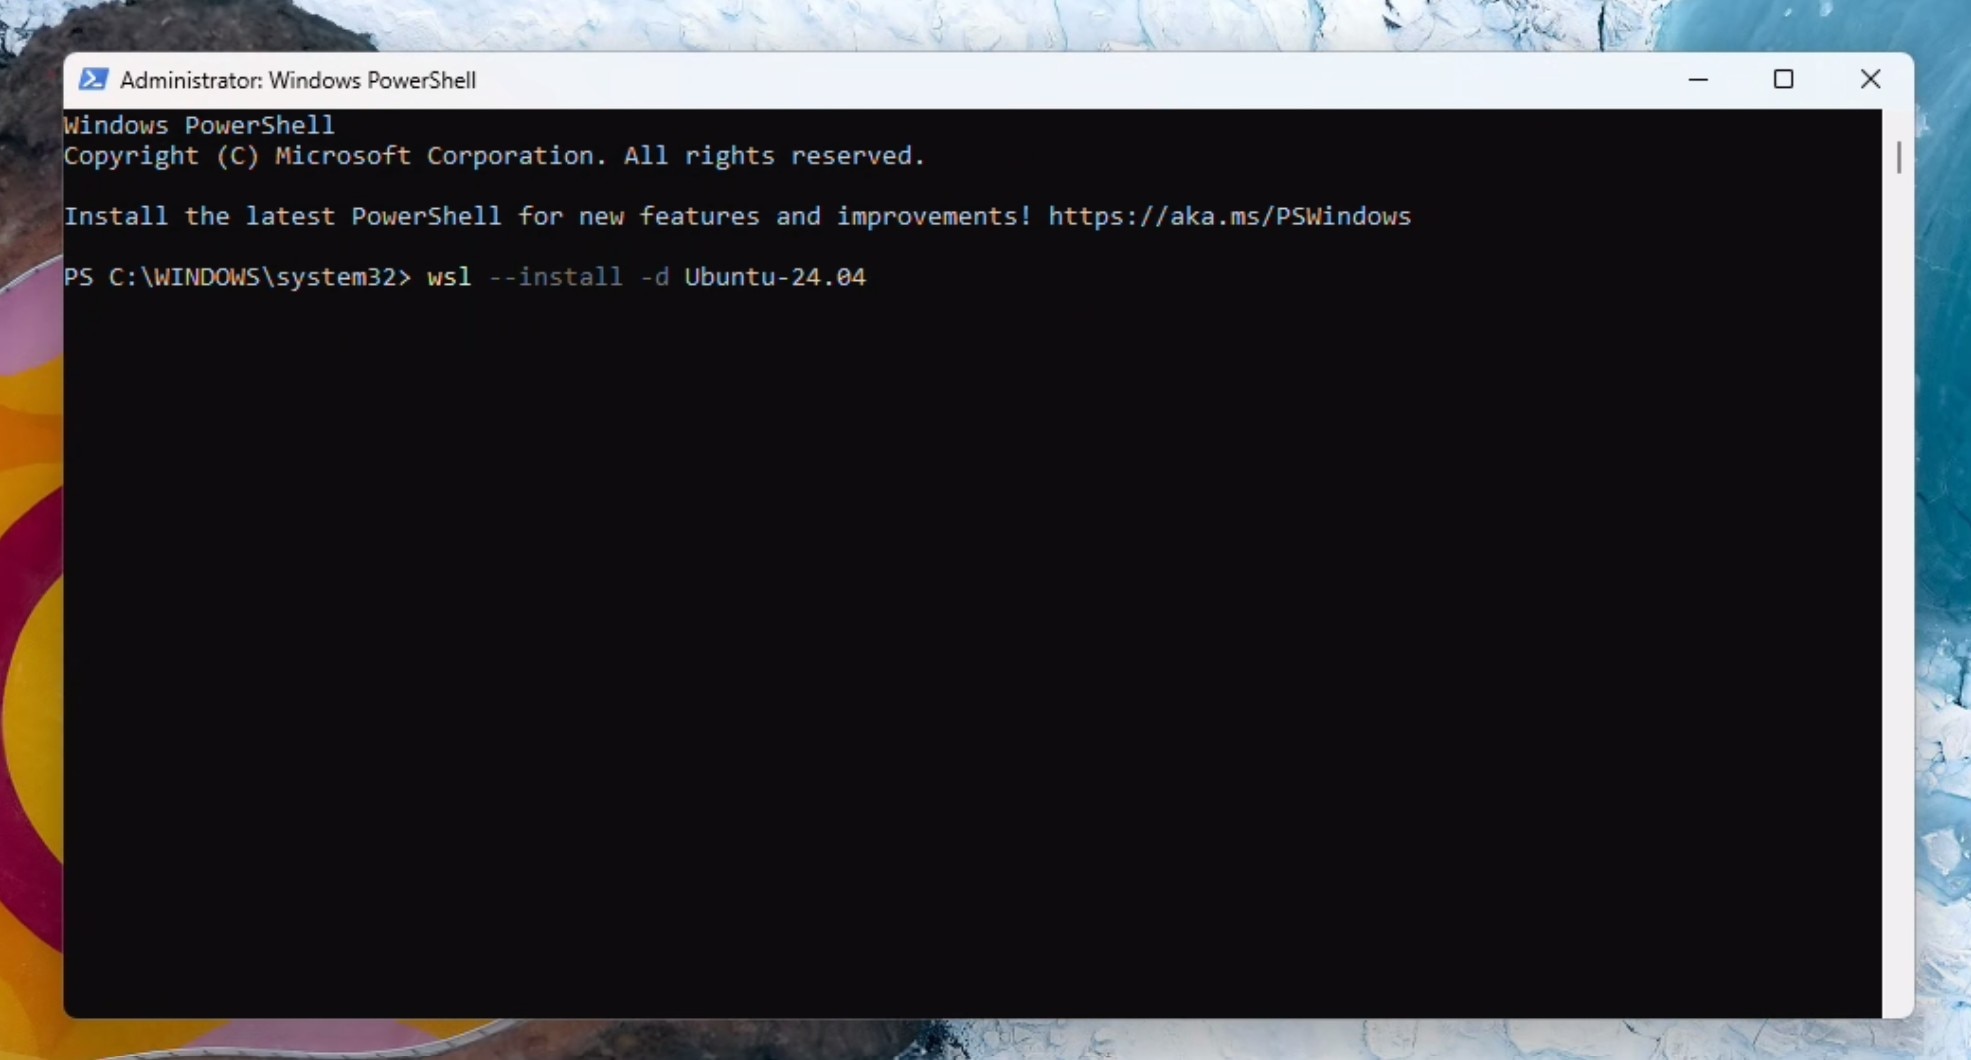
Open a powershell window as administrator.
Install Ubuntu (if you are running this command for the first time, WSL will get installed first):
wsl --install -d Ubuntu-24.04
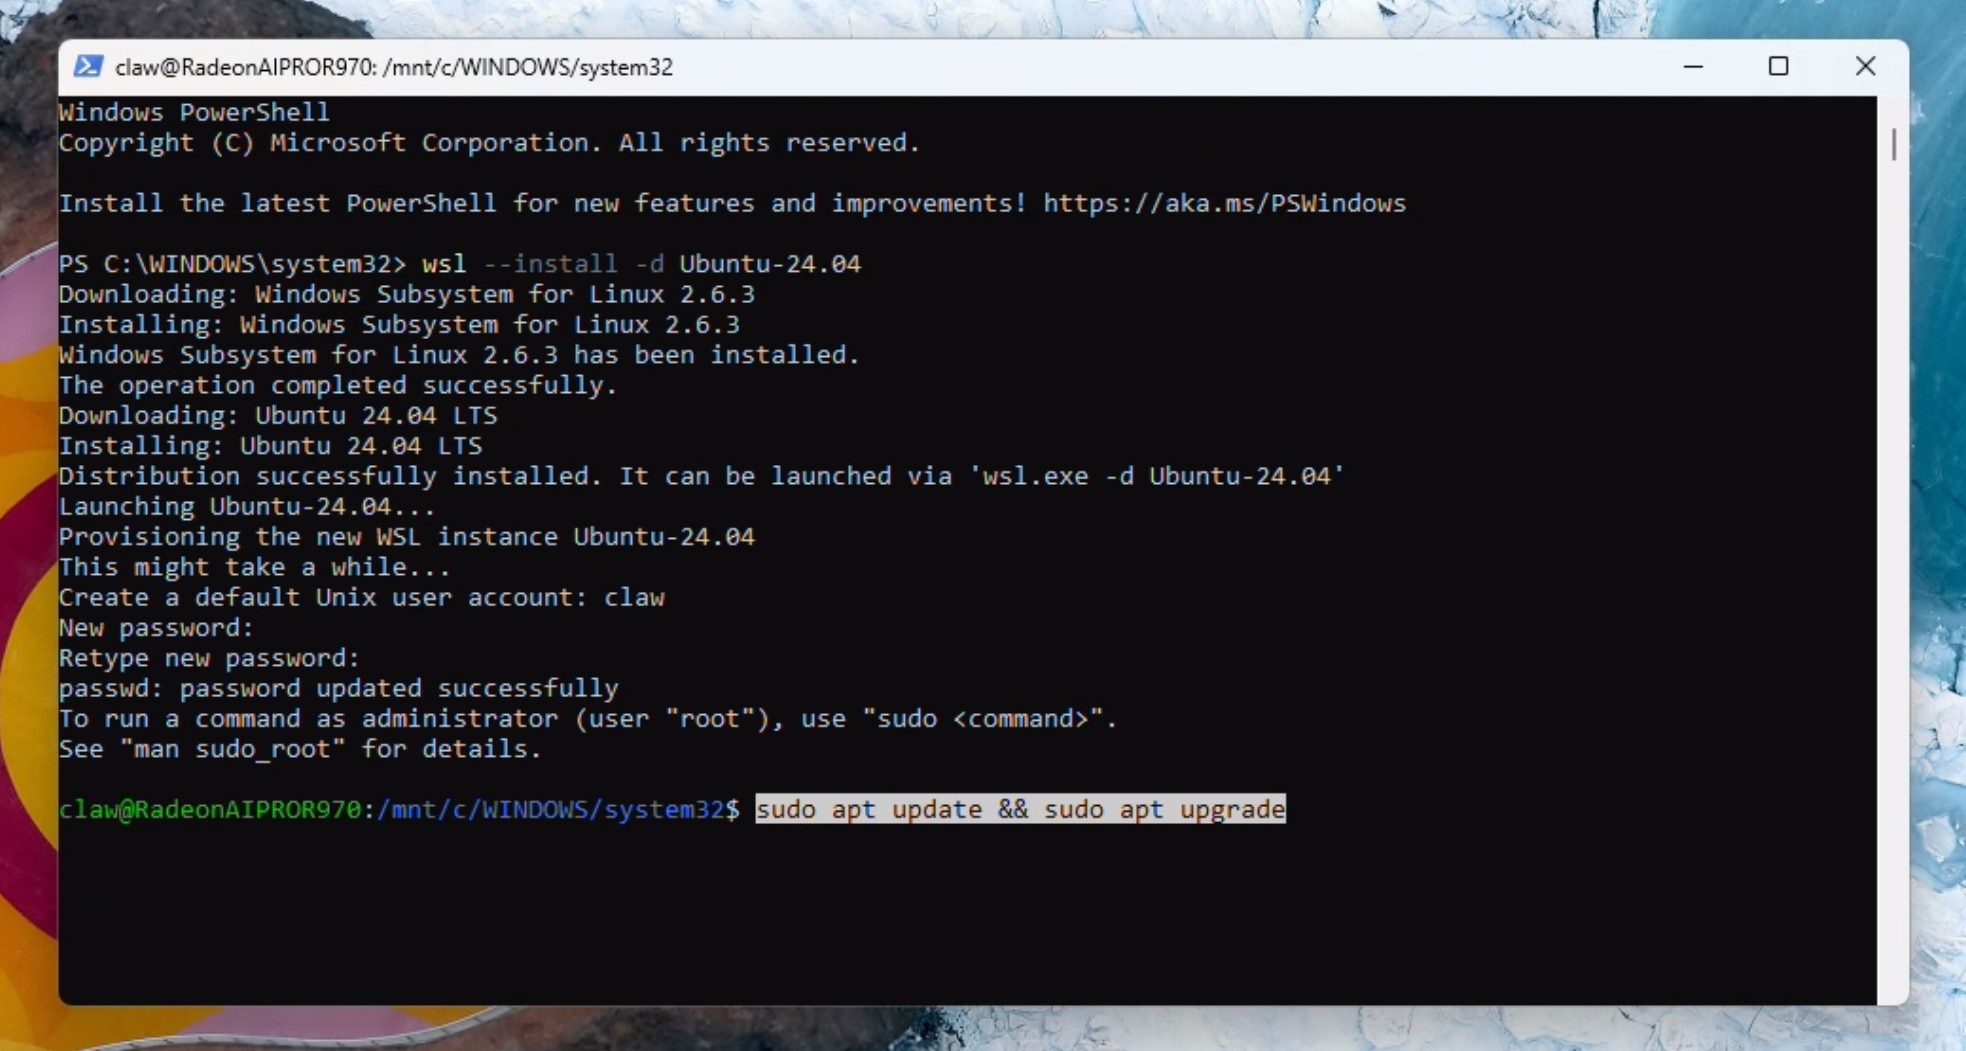
Create a username and password. Run updates. You may be prompted to enter the password and press Y to continue:
sudo apt update && sudo apt upgrade
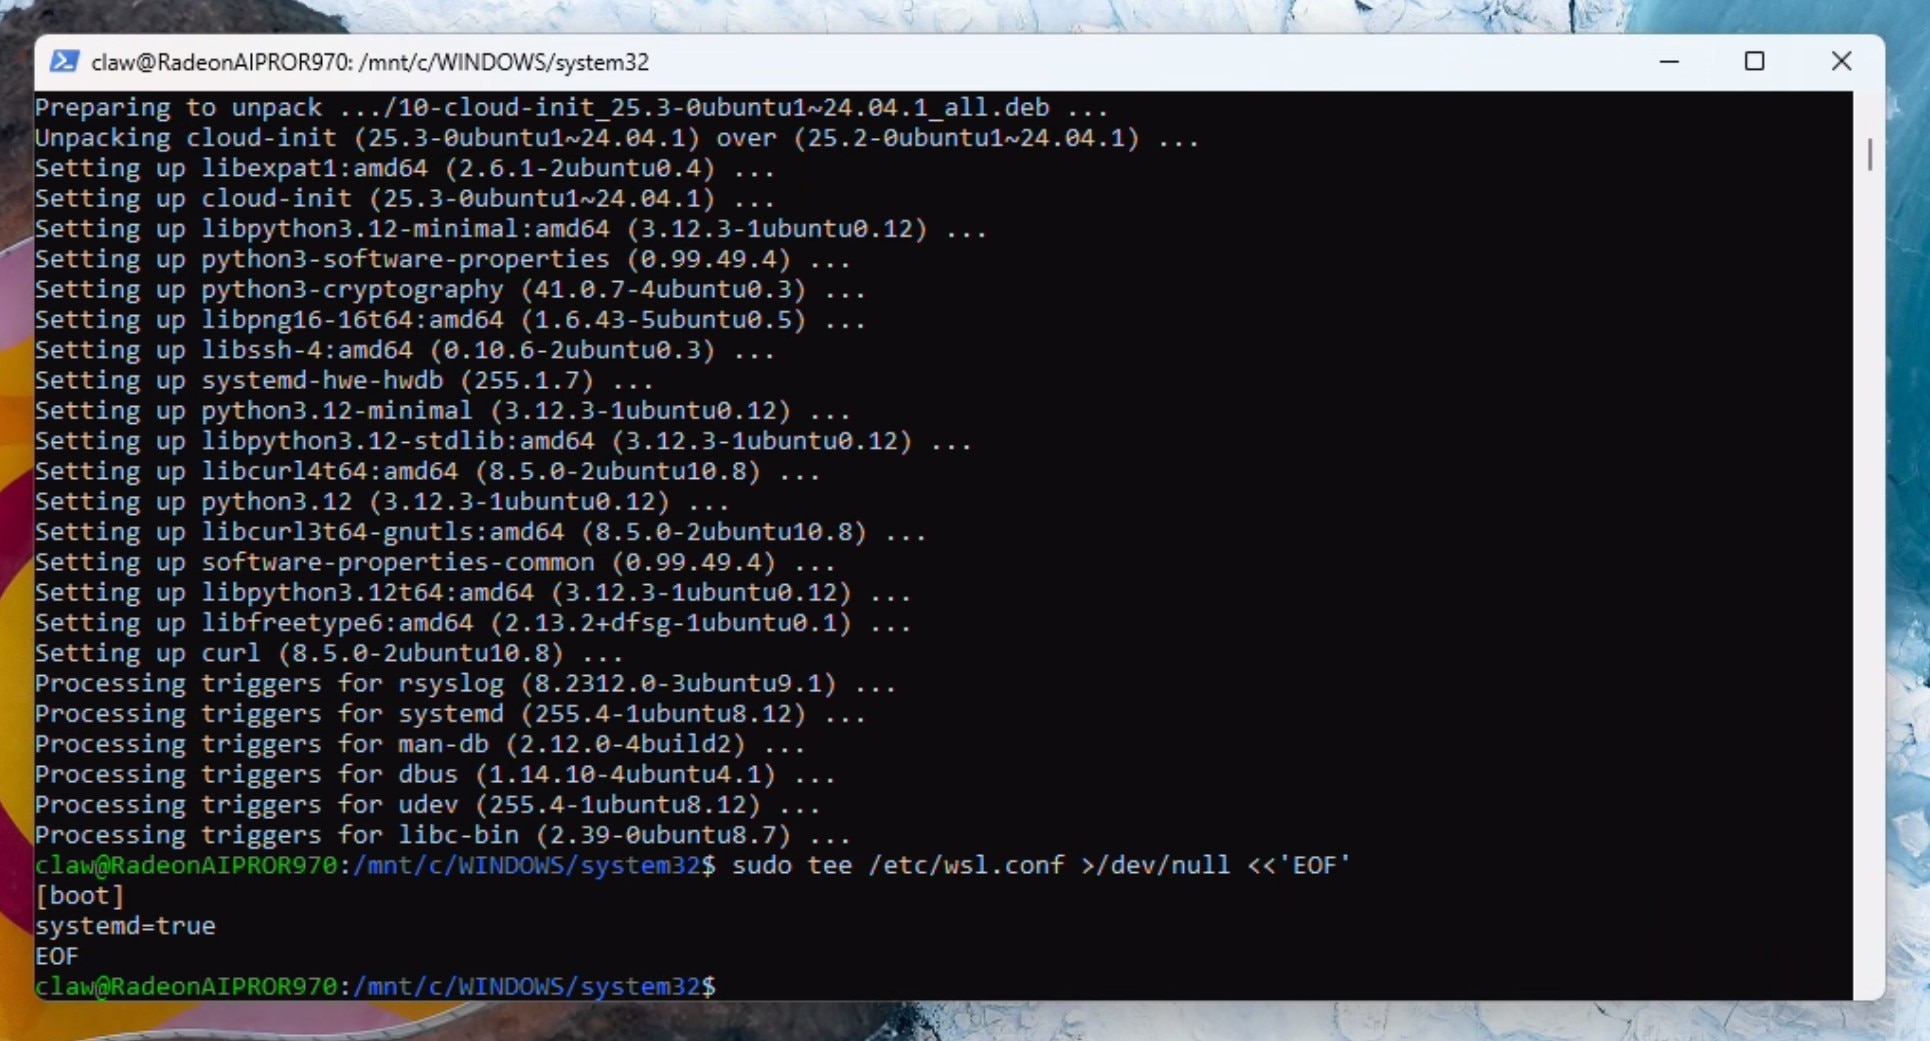
Enable systemd:
		sudo tee /etc/wsl.conf >/dev/null <<'EOF'
[boot]
systemd=true
EOF
Open a second powershell terminal (as administrator) and run:
wsl --shutdown
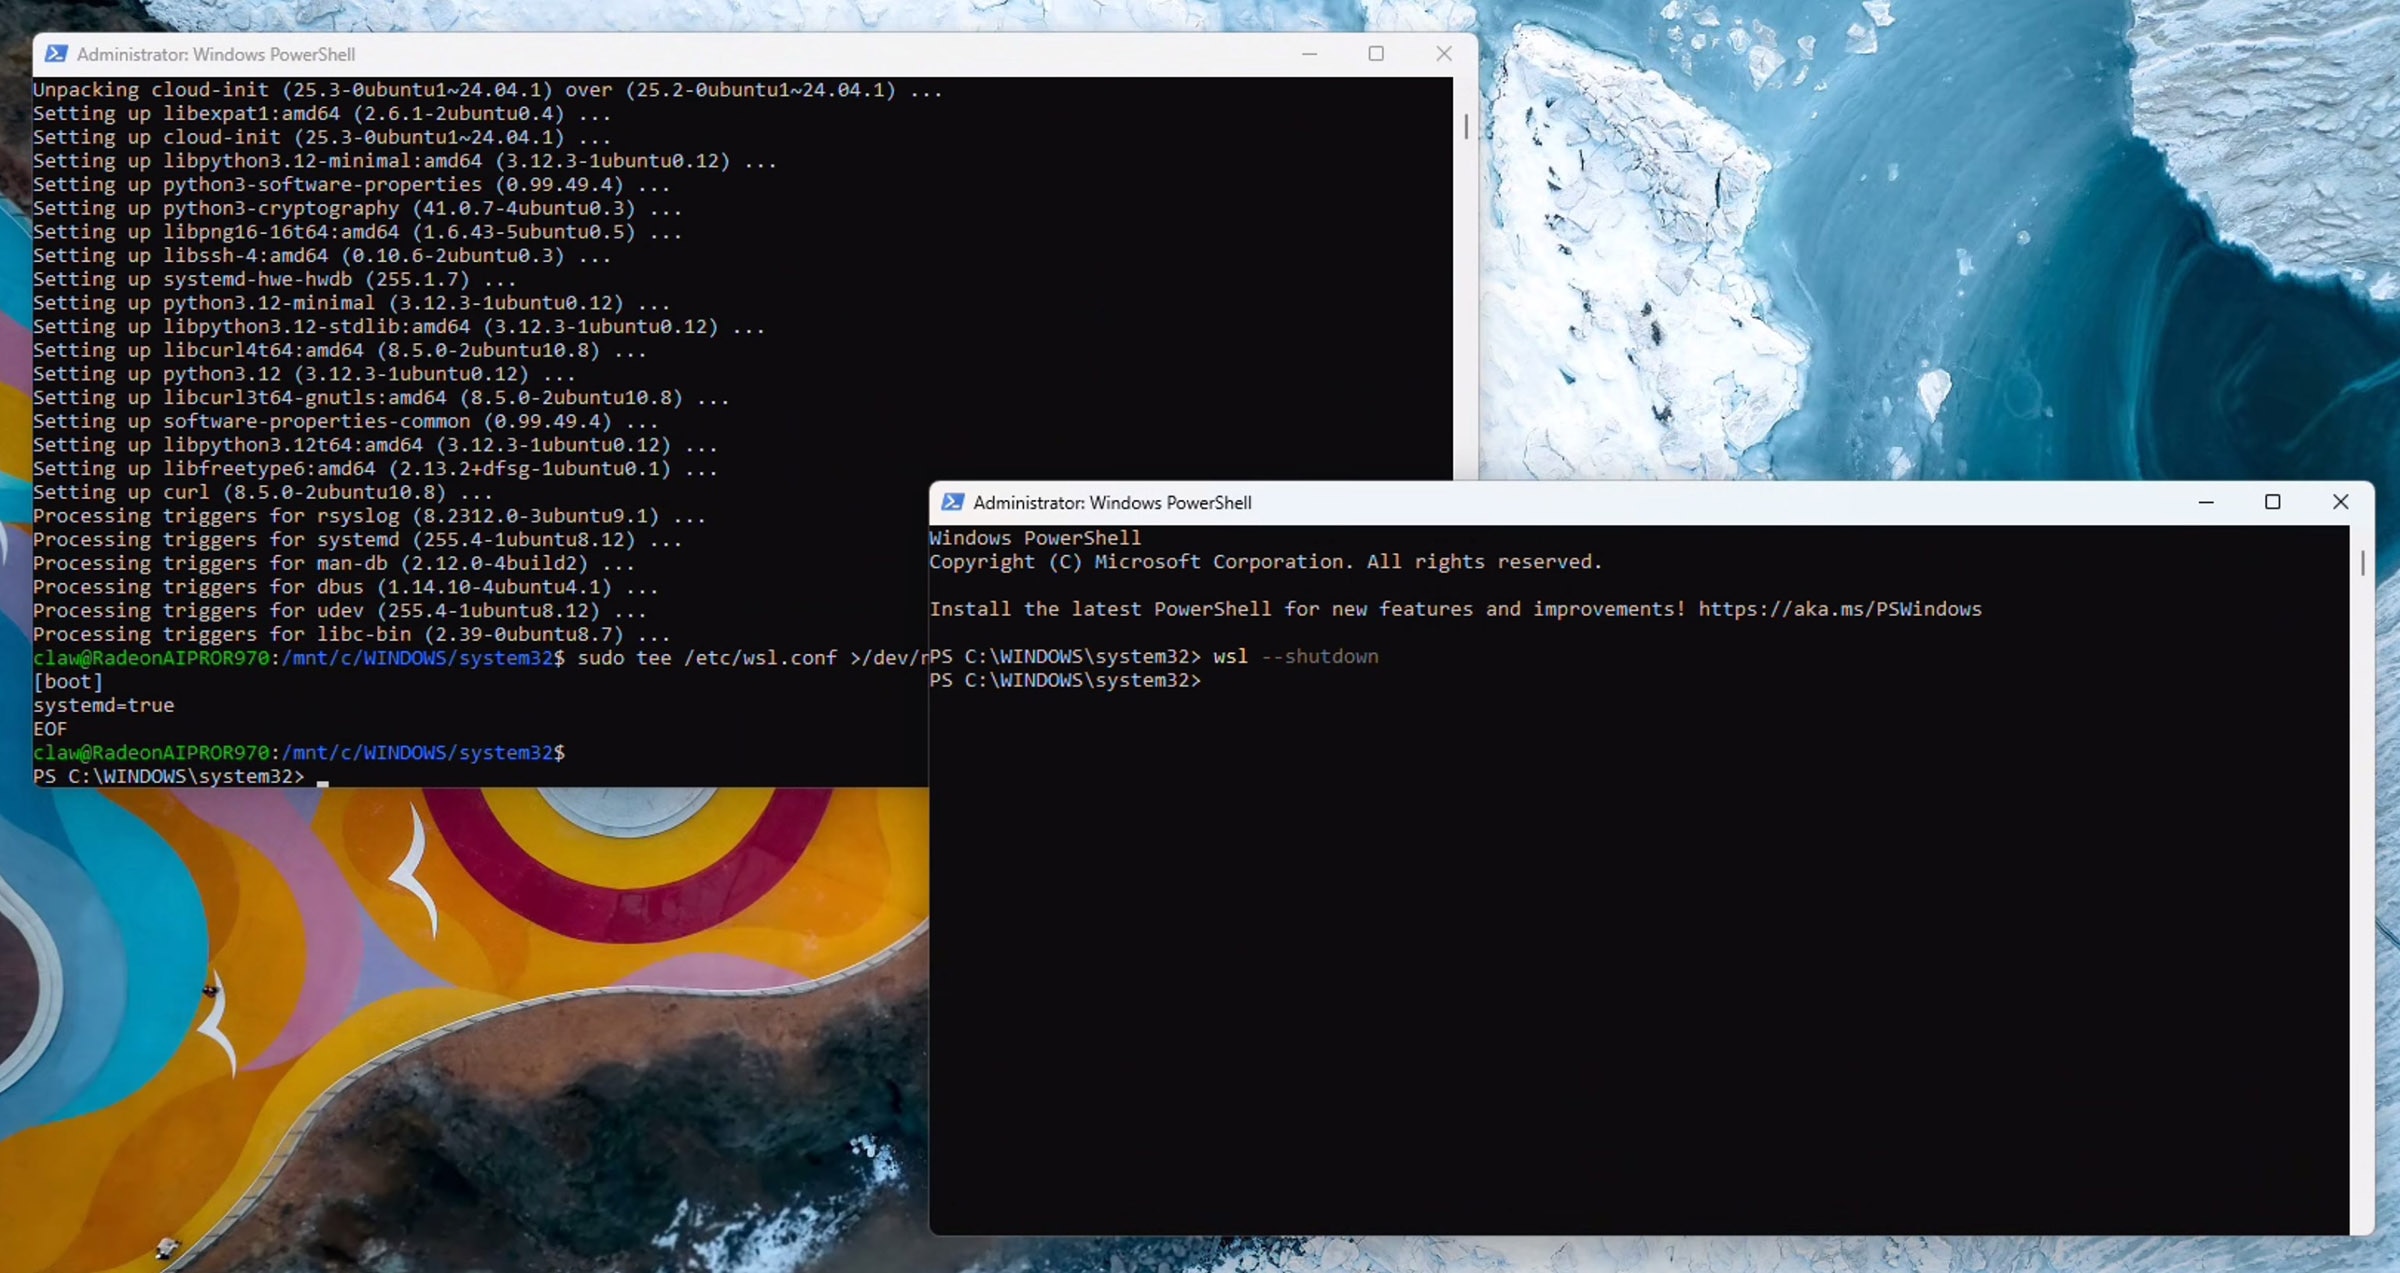
Go back to the original powershell terminal (stay here from now on) and run:
wsl.exe
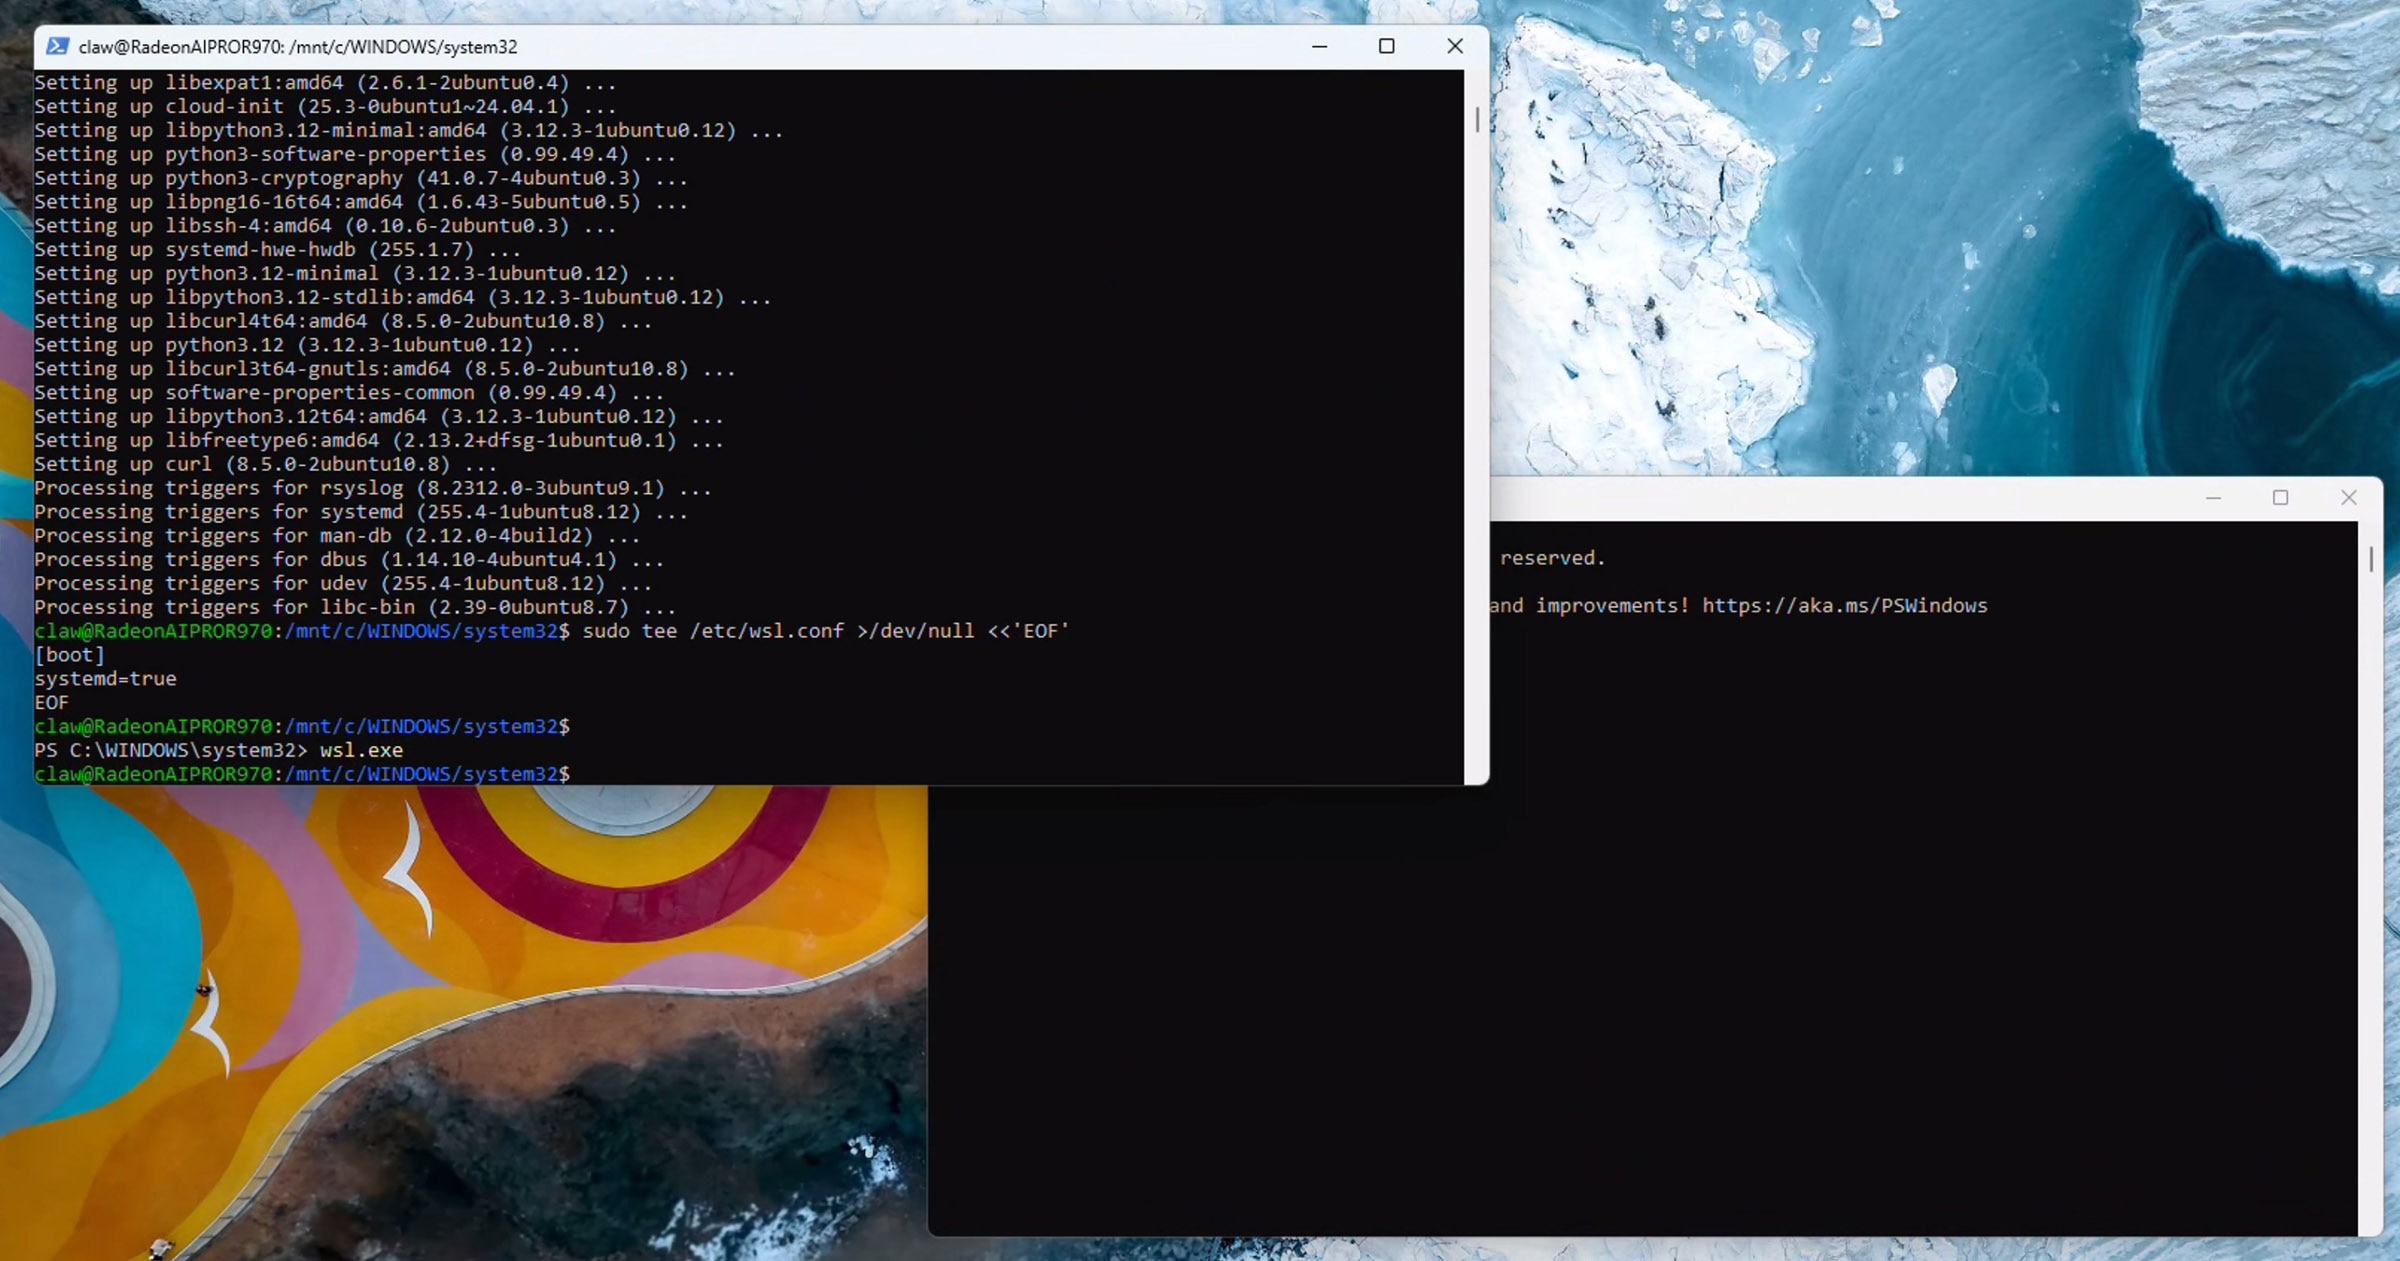
Verify systemd is running by executing:
ps -p 1 -o comm=
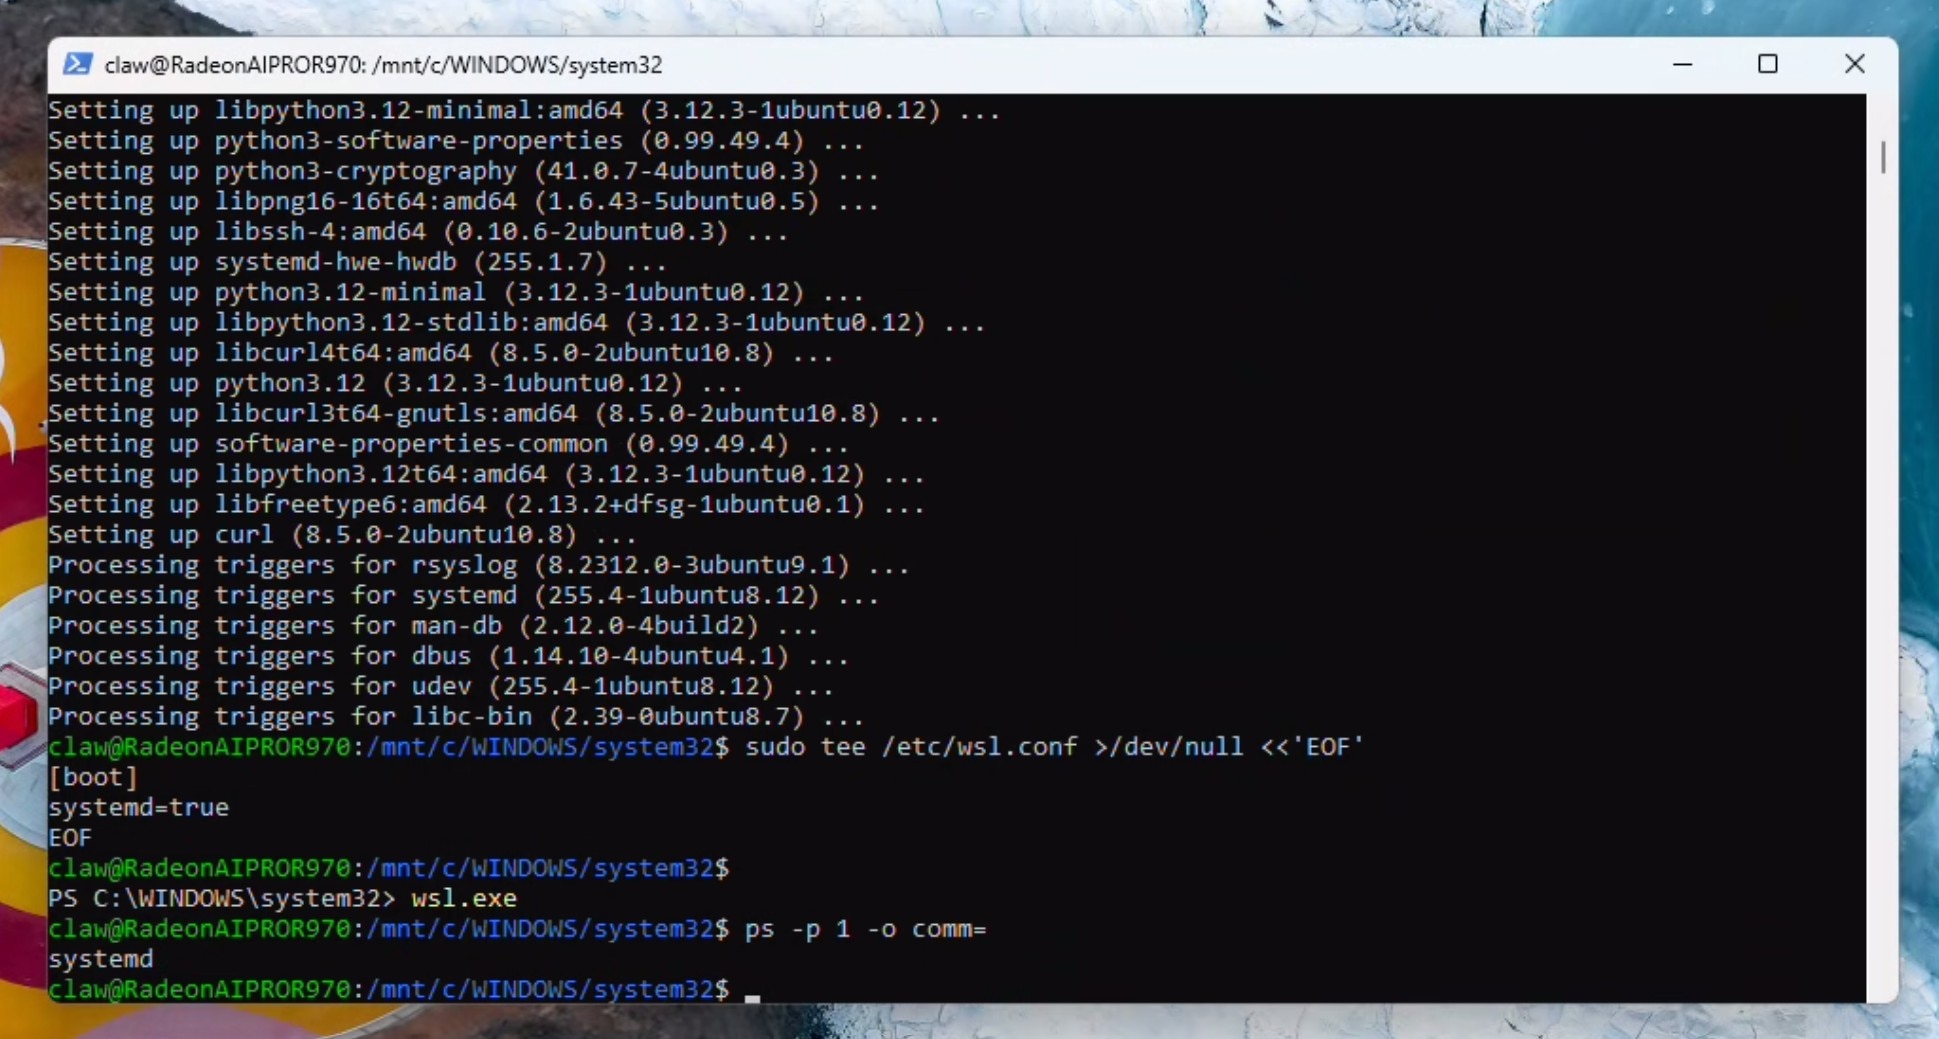
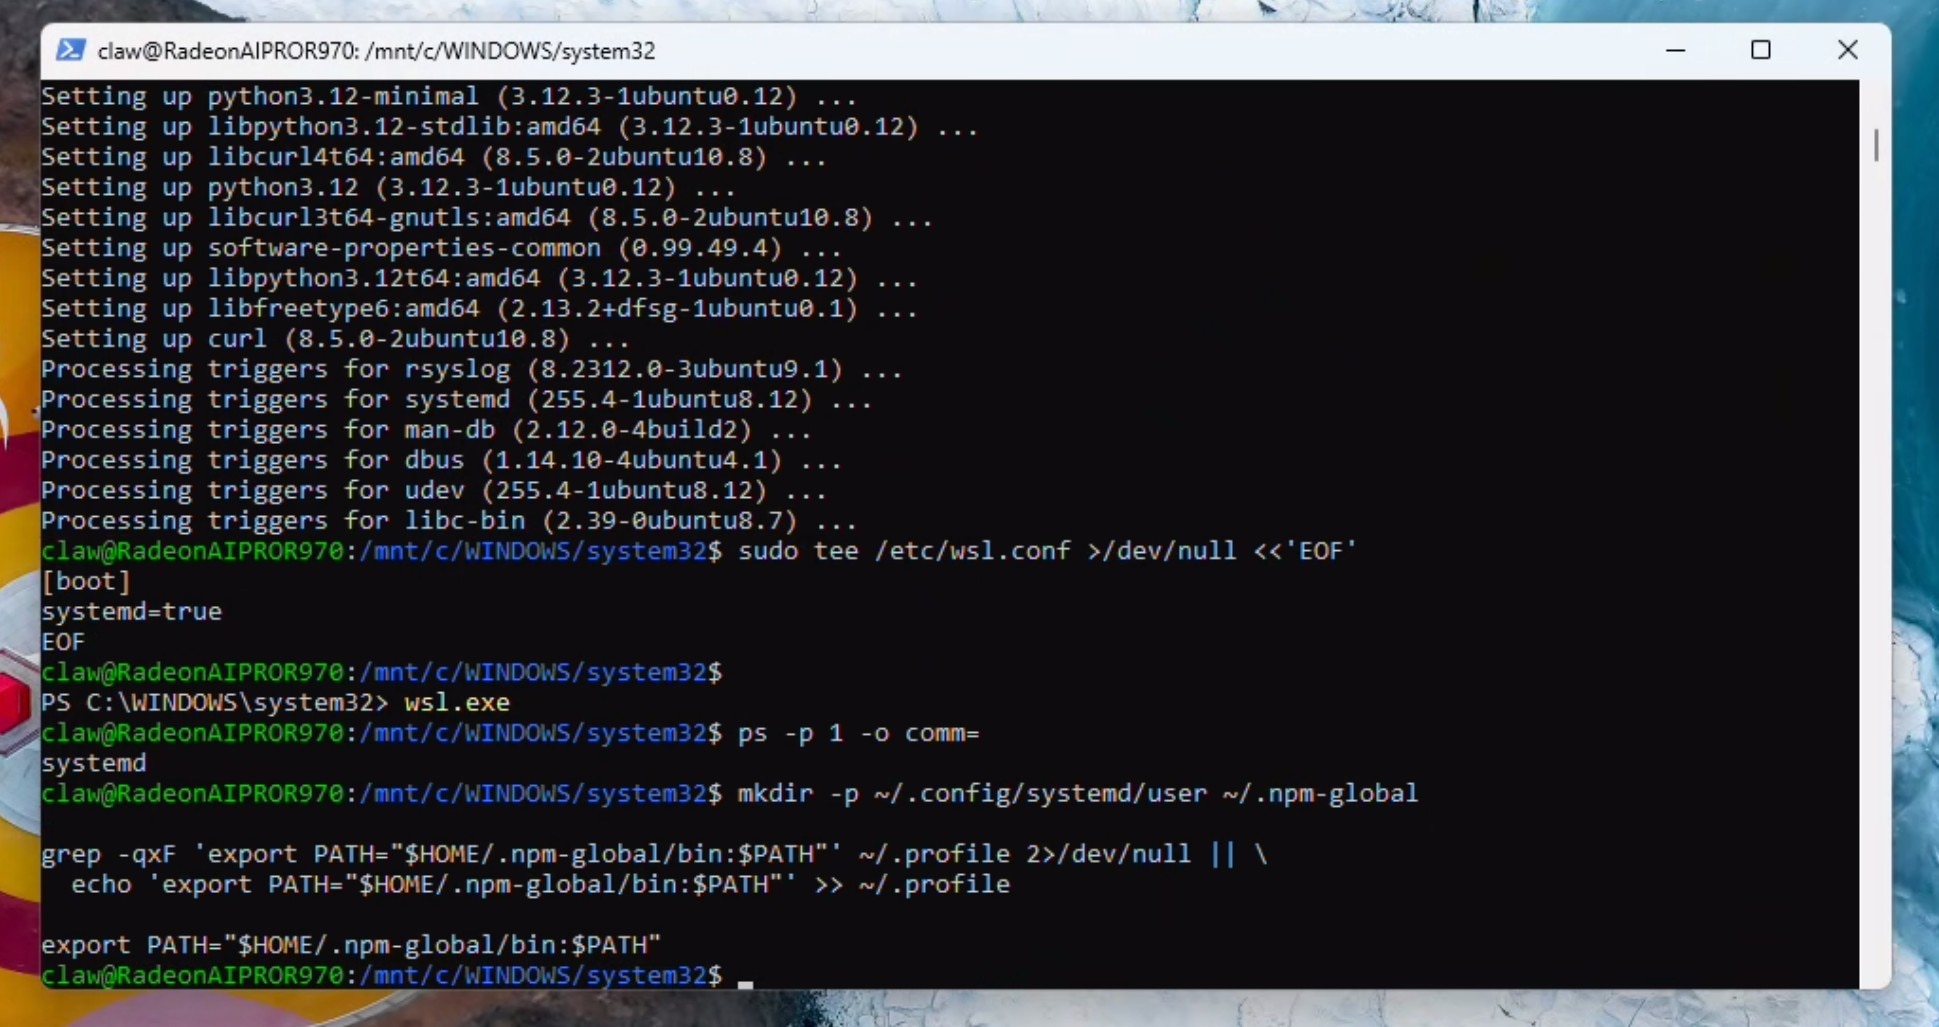
If you recieved "systemd" as the response, you can proceed and add to path:
		mkdir -p ~/.config/systemd/user ~/.npm-global

grep -qxF 'export PATH="$HOME/.npm-global/bin:$PATH"' ~/.profile 2>/dev/null || \
  echo 'export PATH="$HOME/.npm-global/bin:$PATH"' >> ~/.profile

export PATH="$HOME/.npm-global/bin:$PATH"
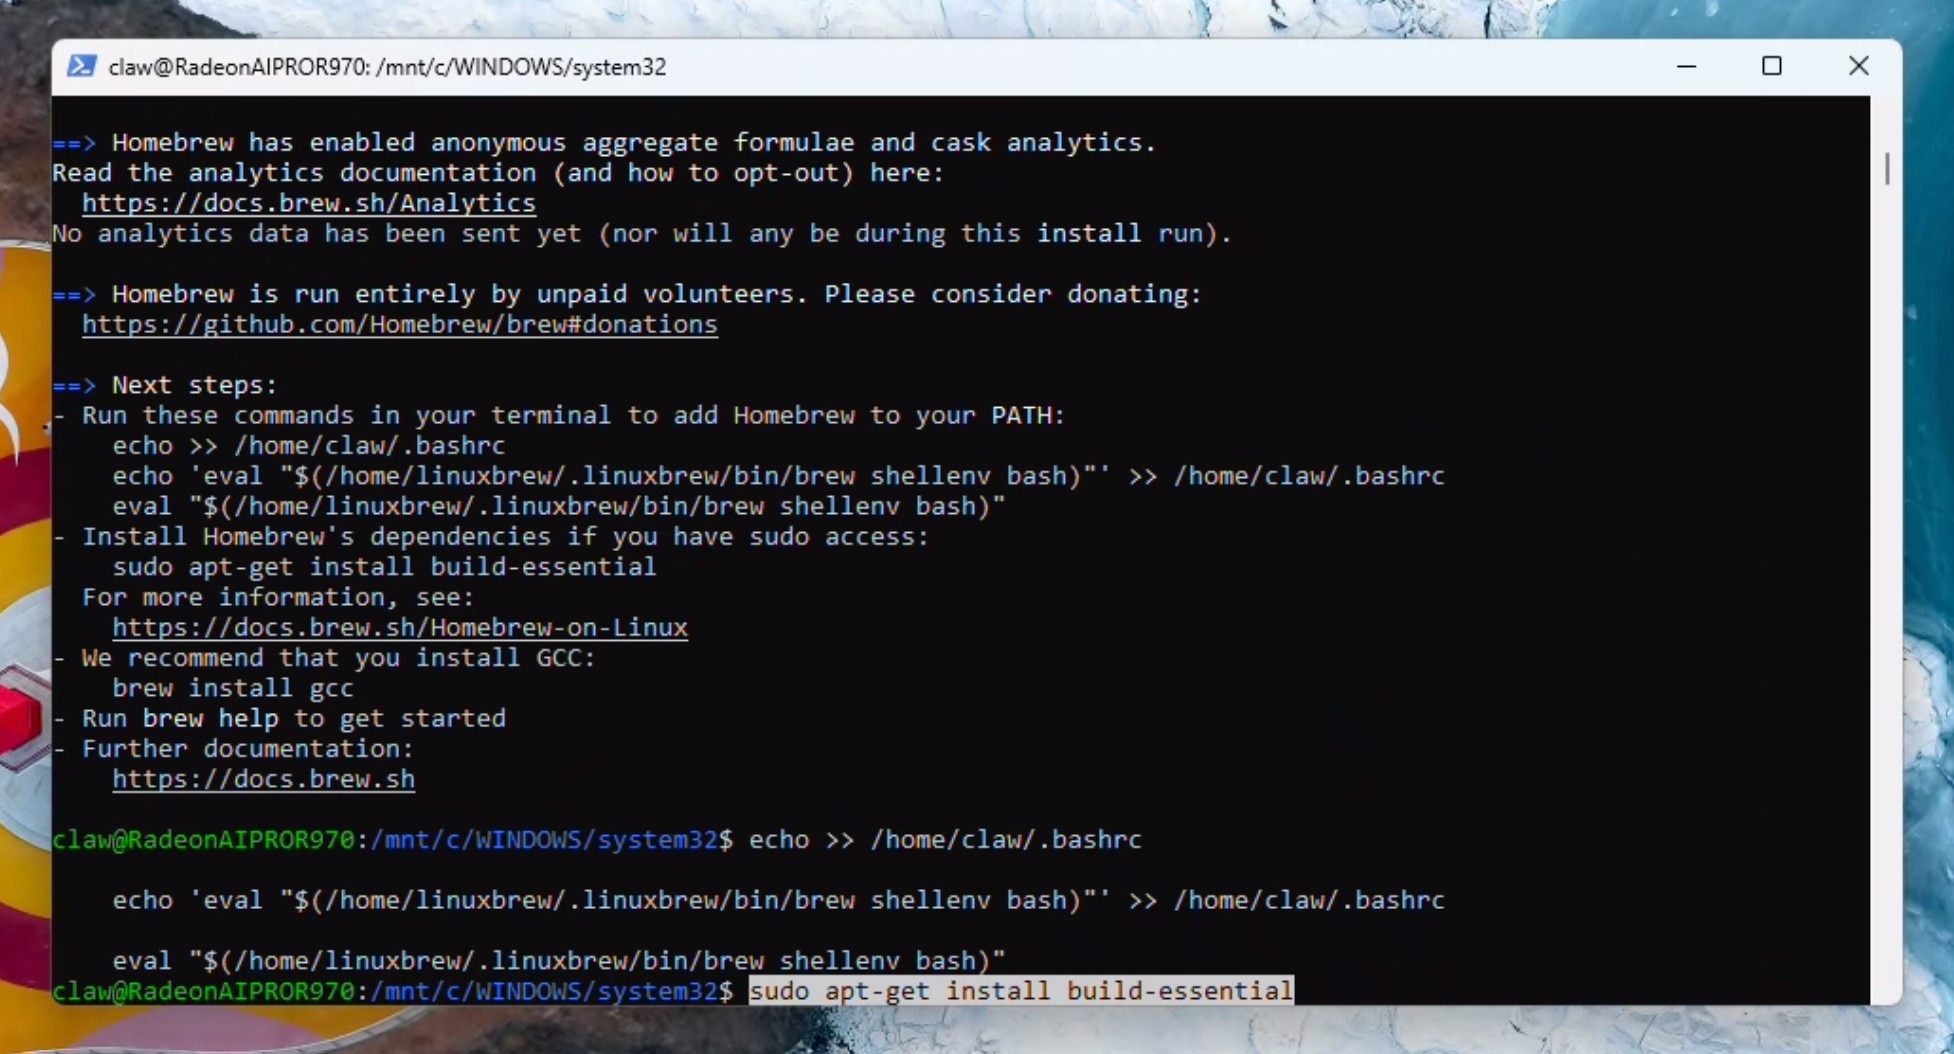
Install Homebrew (required for some skills). You may be prompted for the password and to press ENTER:
/bin/bash -c "$(curl -fsSL https://raw.githubusercontent.com/Homebrew/install/HEAD/install.sh)"
Setup the shell environment:
		echo >> /home/claw/.bashrc

    echo 'eval "$(/home/linuxbrew/.linuxbrew/bin/brew shellenv bash)"' >> /home/claw/.bashrc

    eval "$(/home/linuxbrew/.linuxbrew/bin/brew shellenv bash)"
Install build-essentials. You may be prompted for the password and to press Y to continue:
sudo apt-get install build-essential
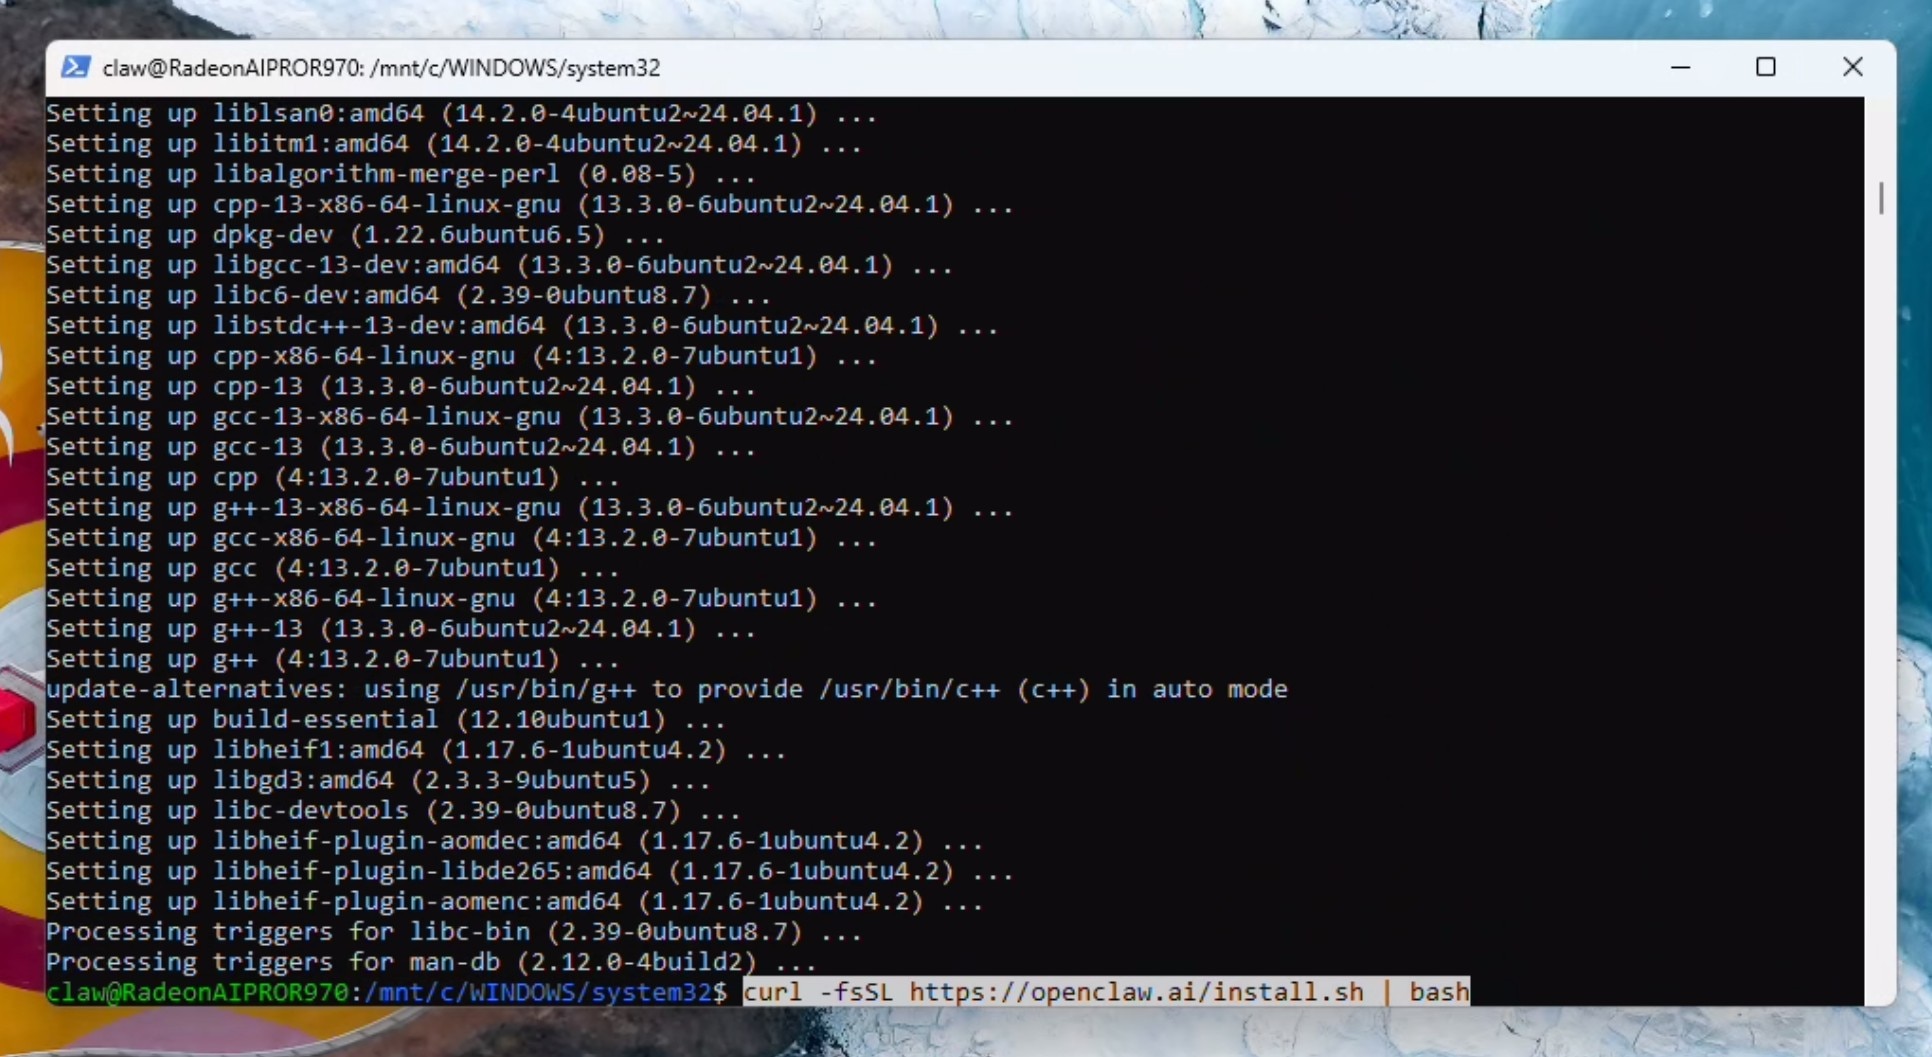
Install OpenClaw
curl -fsSL https://openclaw.ai/install.sh | bash
Configuring OpenClaw with a local LLM
Read the security warning and press the left arrow key to navigate to Yes and hit Enter to continue. Hit enter again to select Quick Start.

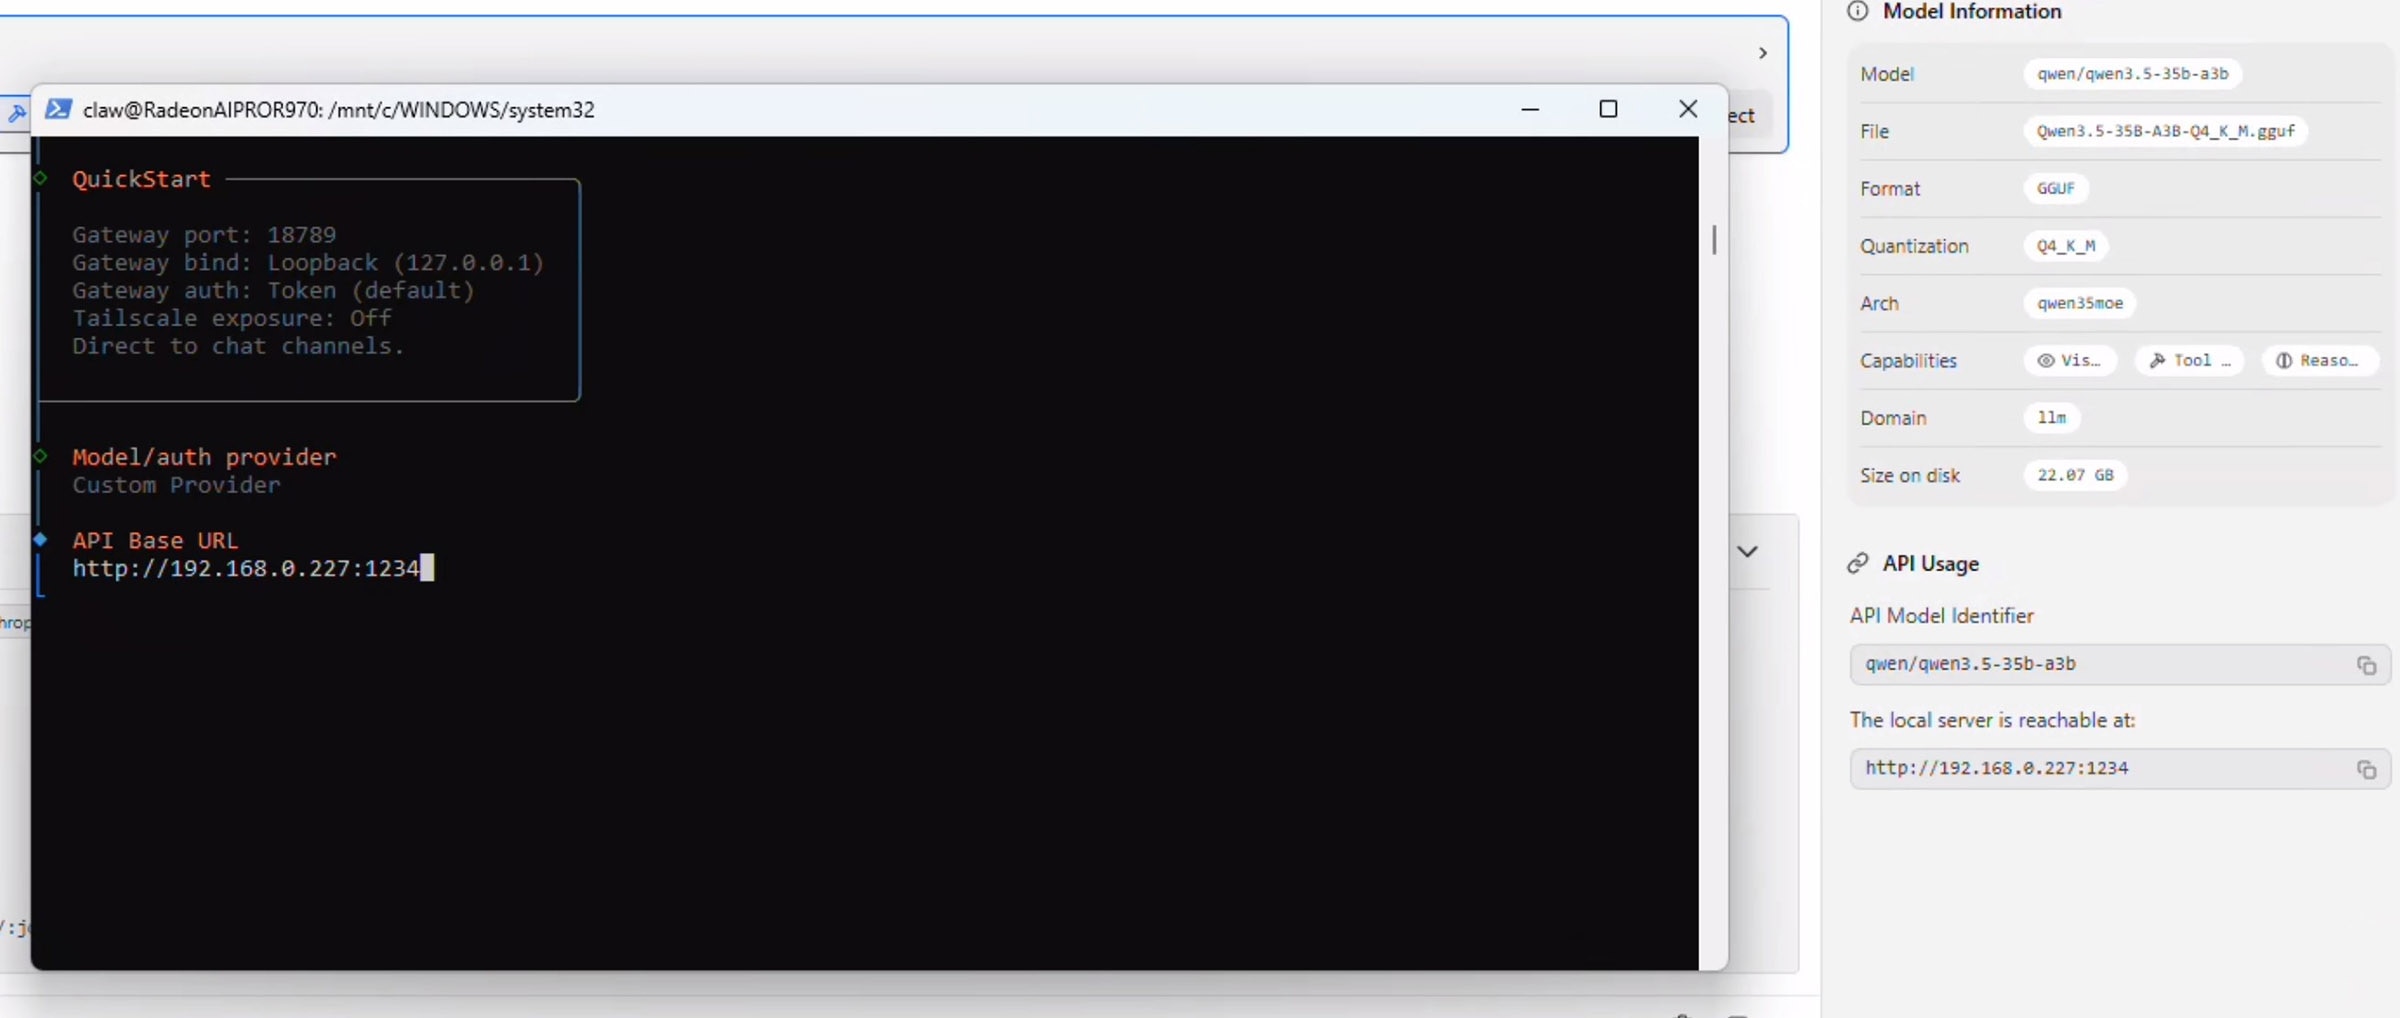
Press the down arrow key to scroll down till you "Custom Provider" and click enter.

Open LM Studio again - notice the section on the right which says API Usage. Copy the address below "Local server is reachable at" and paste this (Tip: right click while the Powershell window is focused to automatically paste your clipboard) into the powershell window:
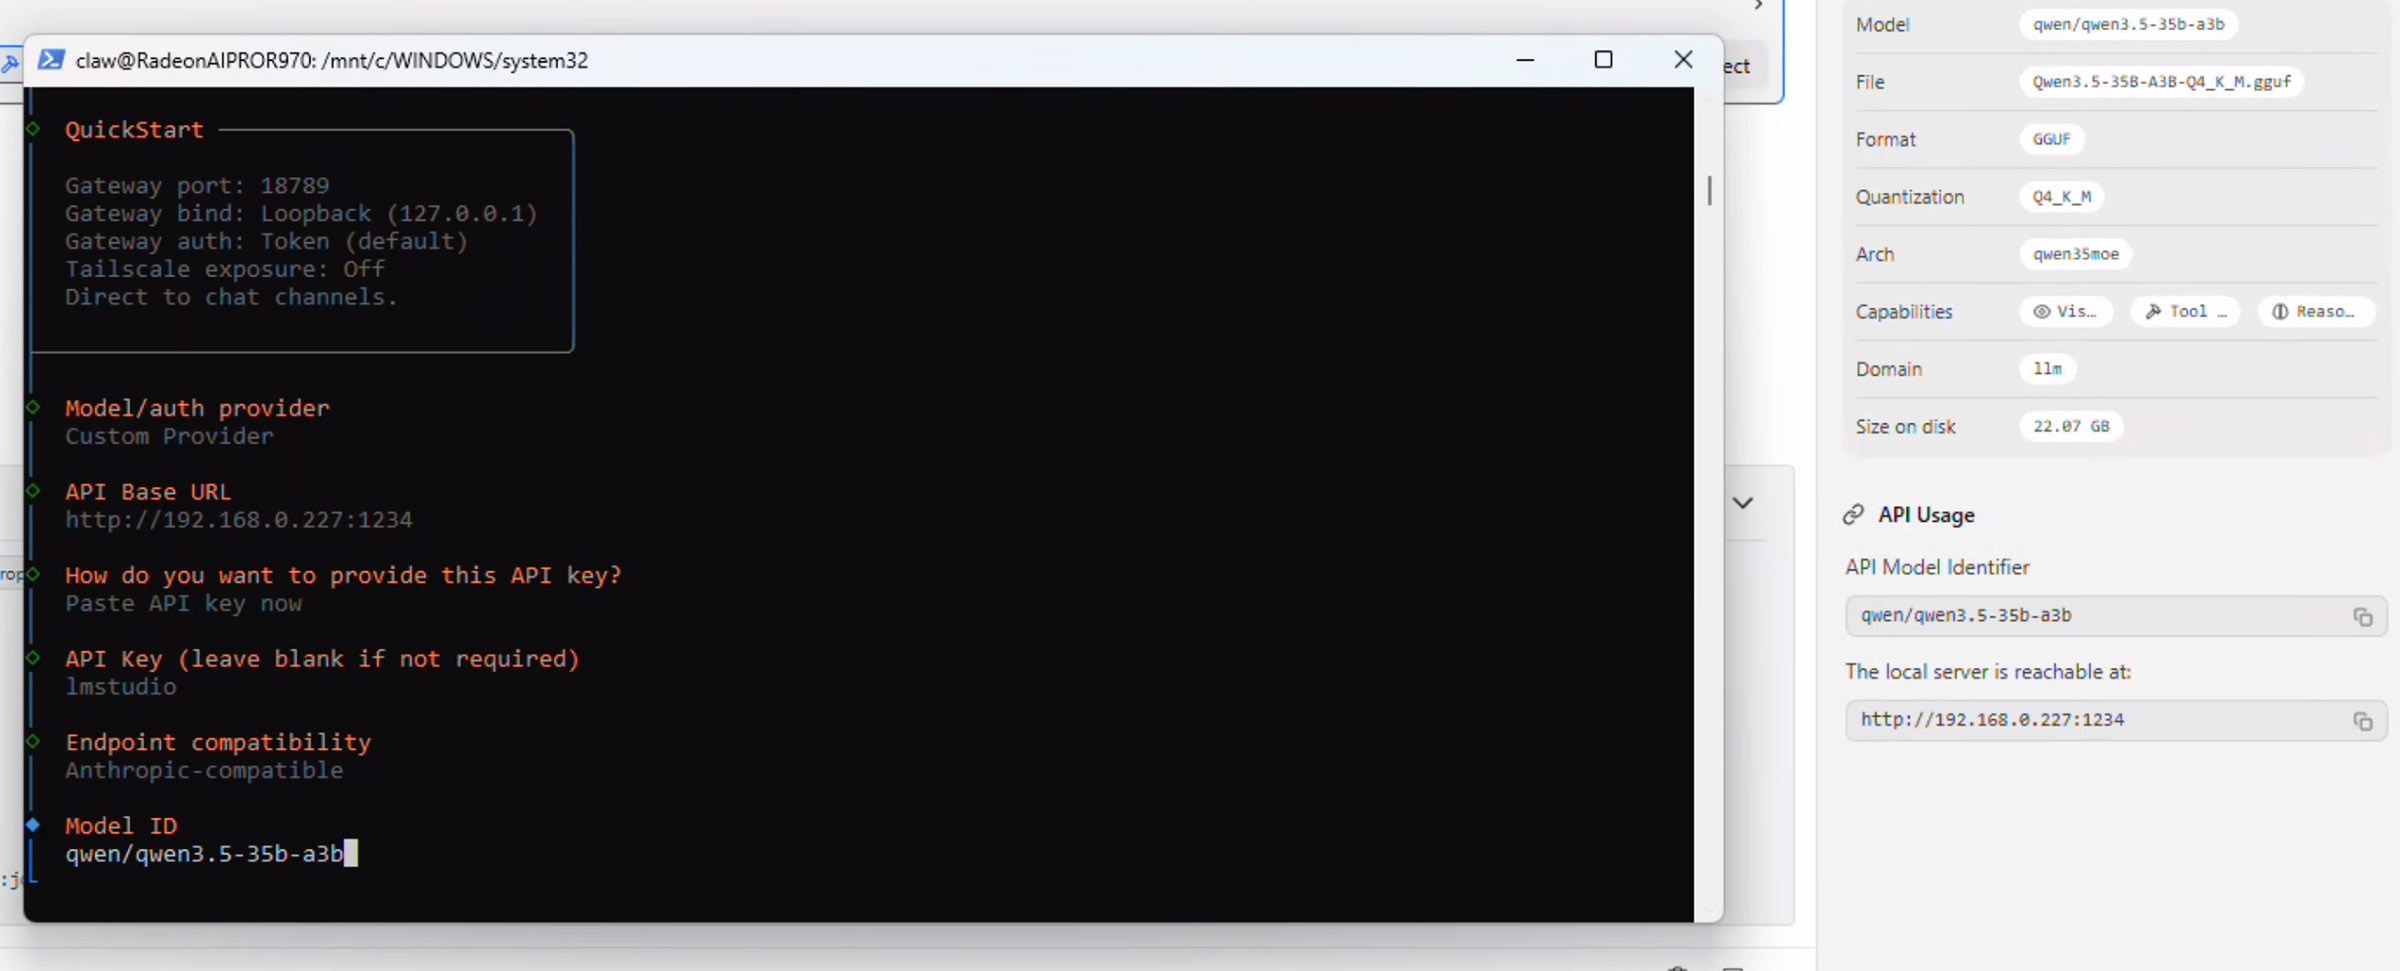
Press enter on "Paste API Key Now" and enter "lmstudio" - don't leave this blank even though it is not required.
Select "Anthropic-compatible API" and press enter. Navigate back over to the LM Studio "API Usage" section and copy the model name exactly. Paste this in the window for the Model ID and press enter:
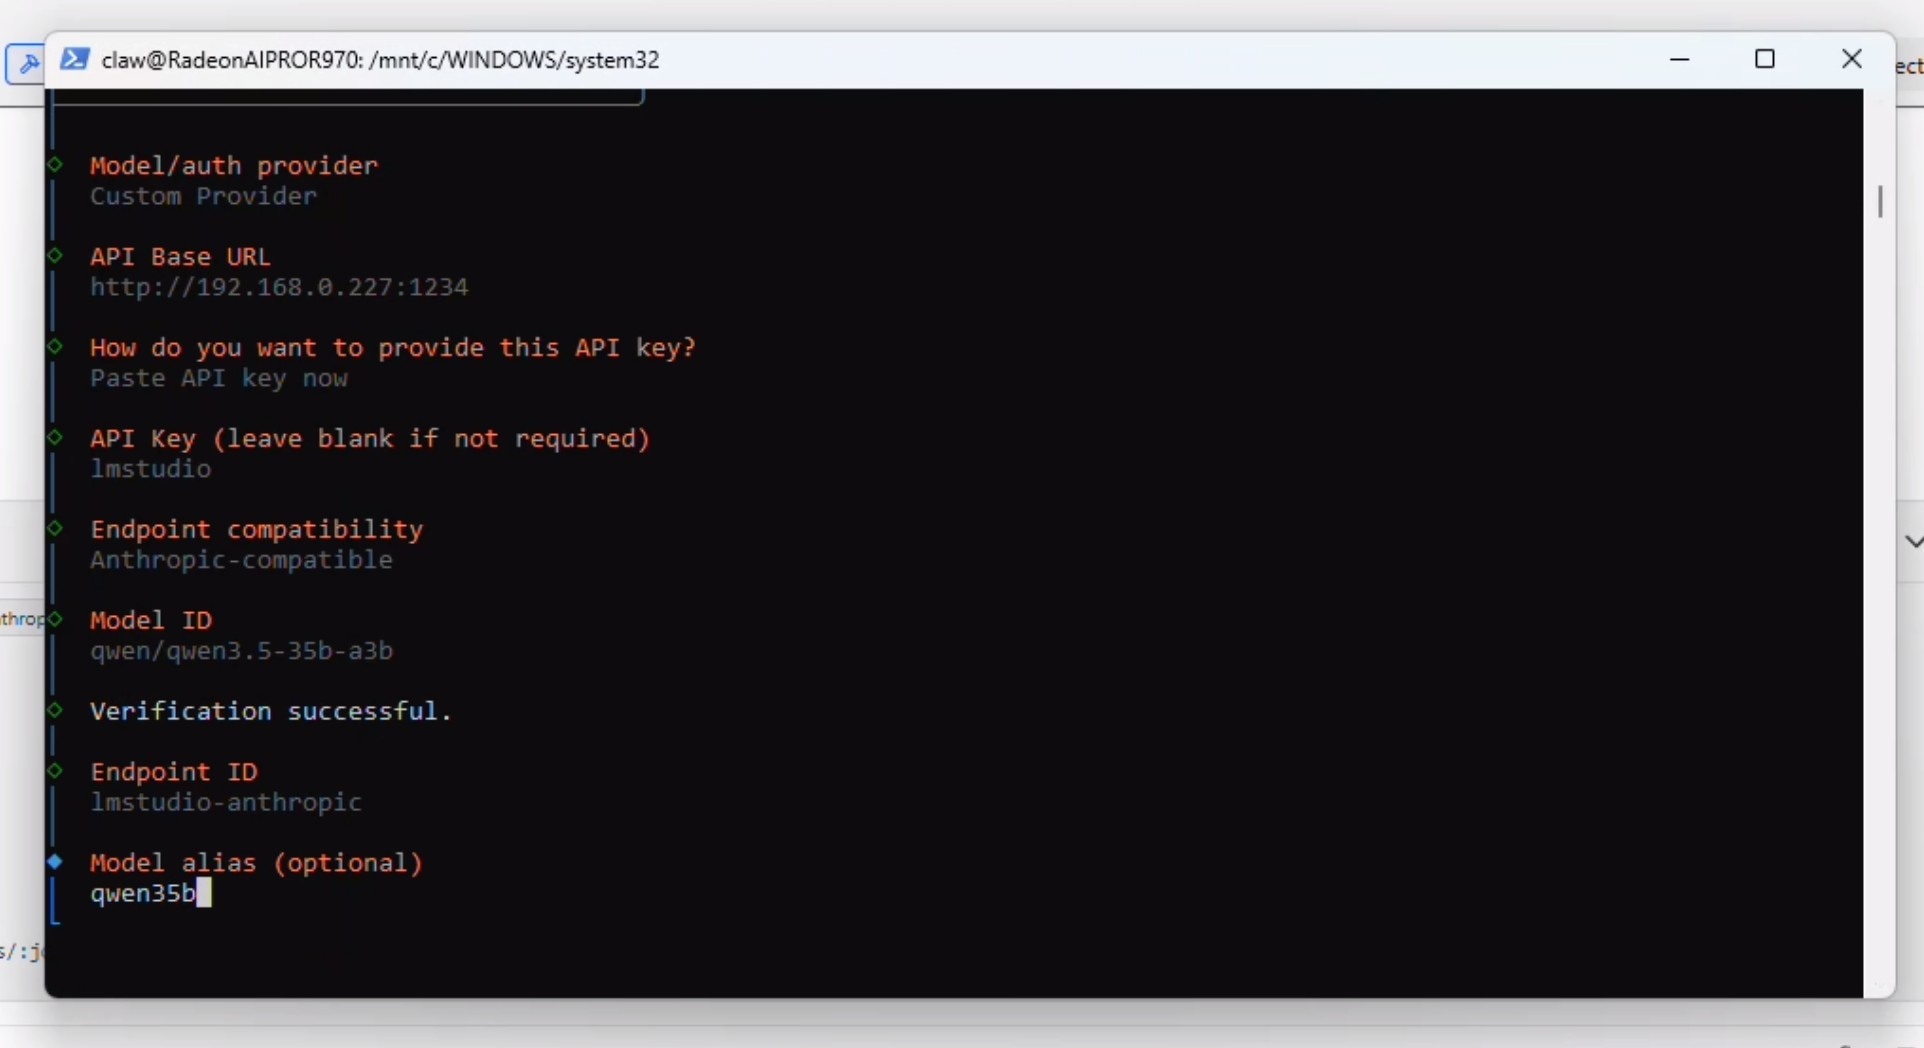
At this point OpenClaw will verify the connection and say "Verification Succesful" and prompt you for a Endpoint ID and then a Model alias. Add both of those:
This is the point where you configure your communication channel with your bot. Before you proceed ensure you have the tokens and authentications already sorted. For this example, we will be using Discord. To setup Discord, you will need 1) the authentication token and 2) the Discord bot (App) already invited to your discord before you continue here. Do this now by following the OpenClaw discord guide here: Discord - OpenClaw
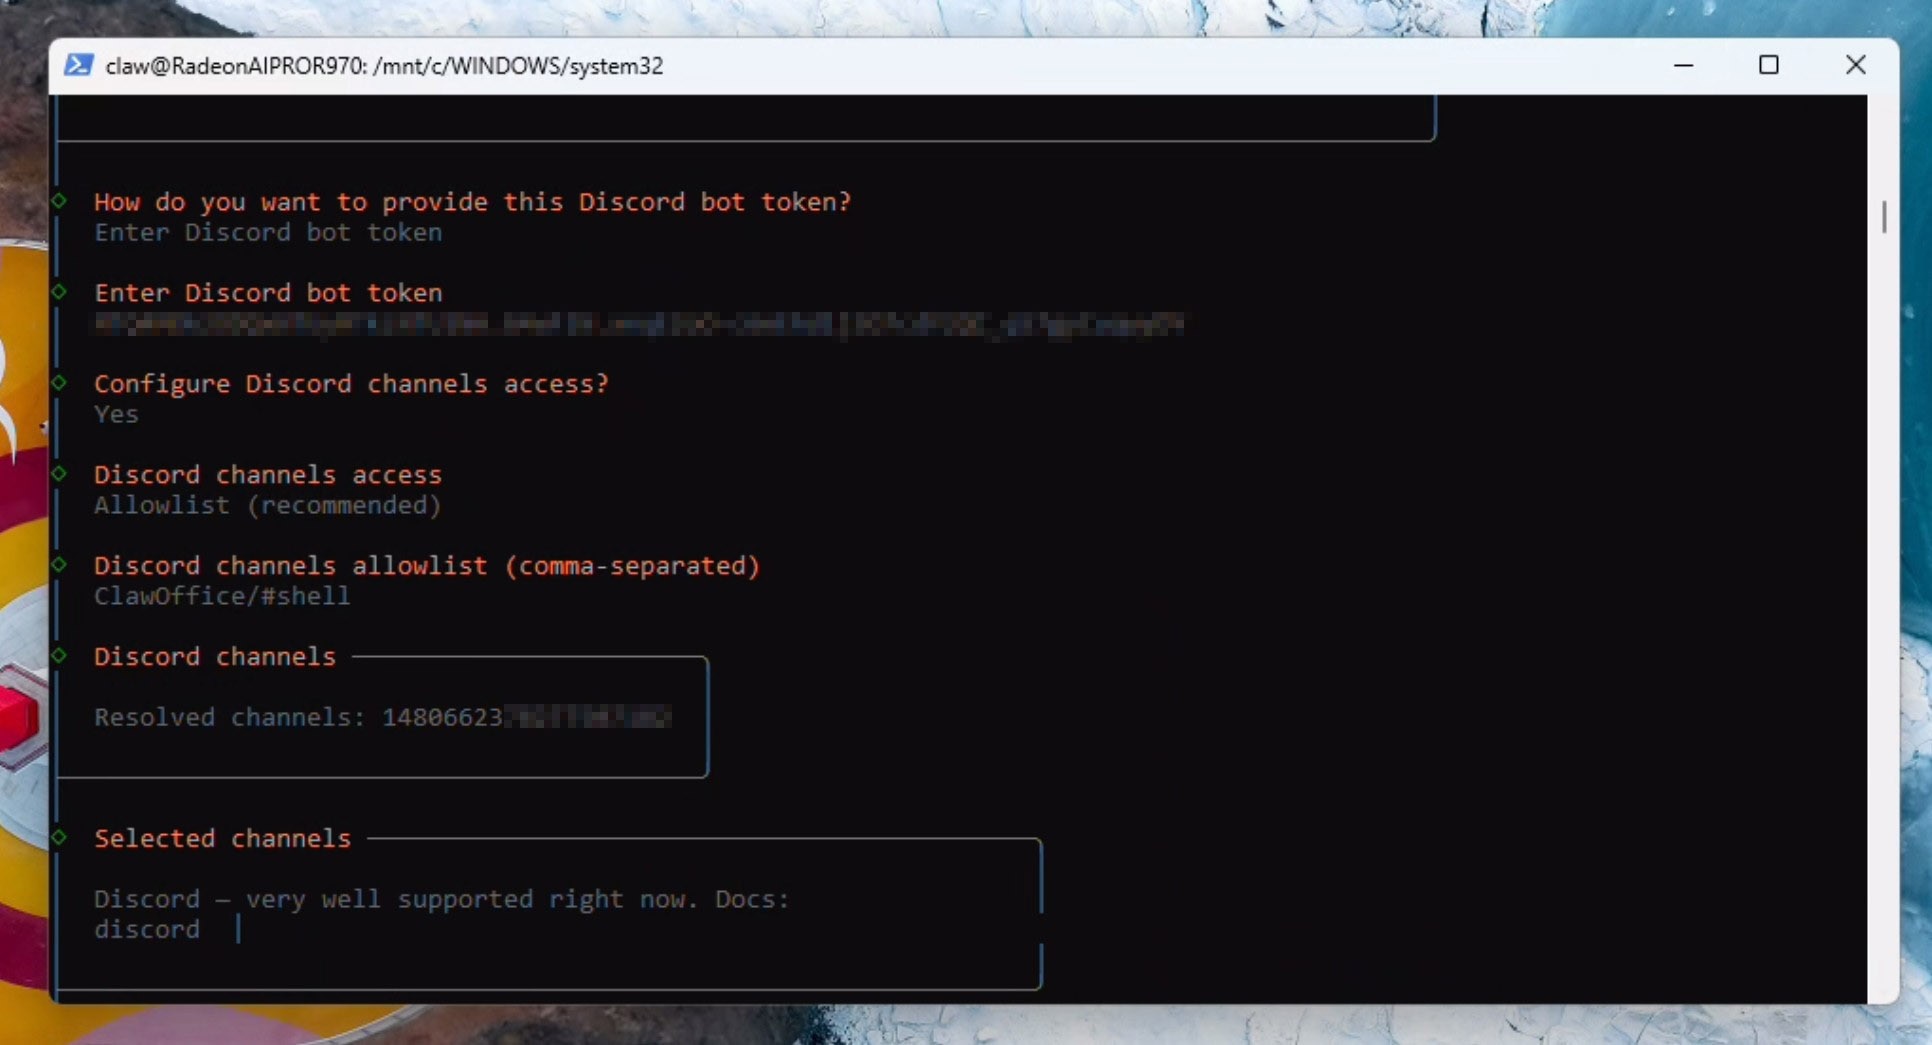
Provide the discord auth token and select Yes to Configure Discord Channel access:

Enter your discord server name and the channel name in the format specified, for example: ClawOffice/#general and press enter. If all goes well, you will see verification succesful and a channel ID being resolved automatically:
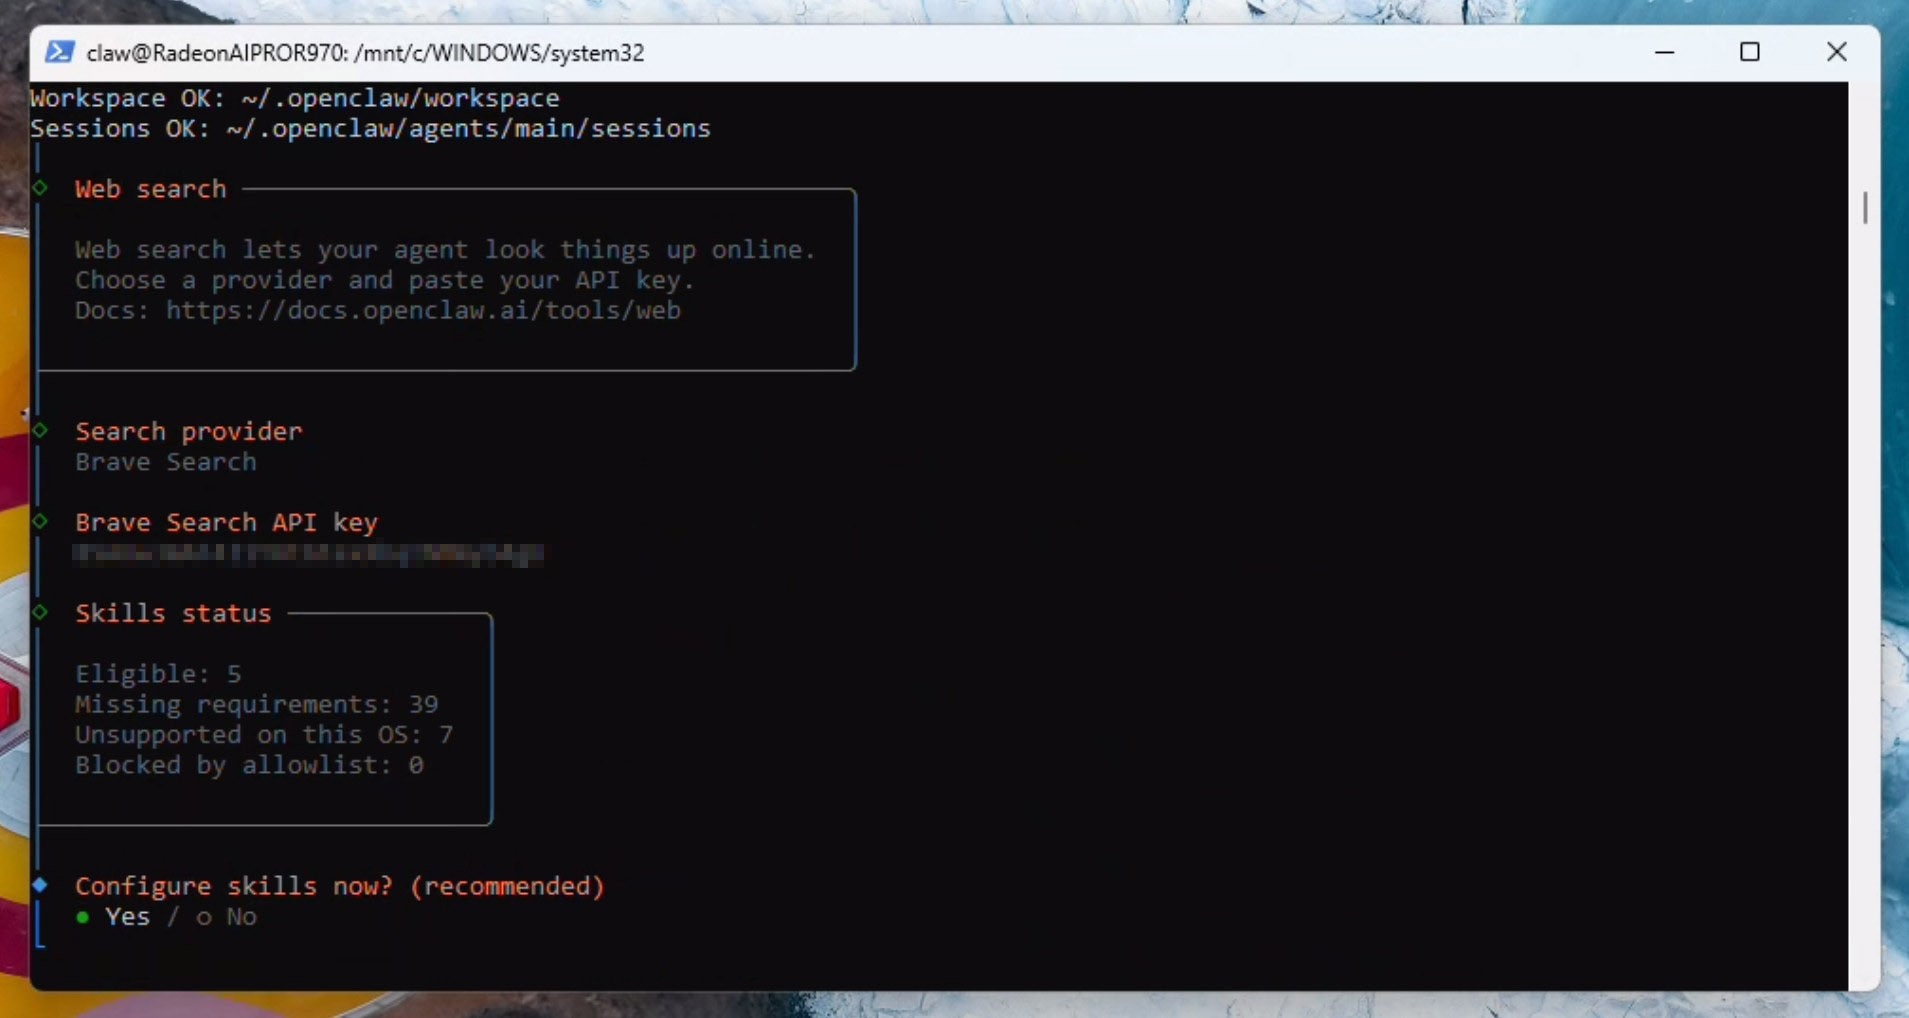
We now need to configure the web search API. You can either skip this step or sign up for an API like Brave - which offers a lot of calls for just $5. We will be configuring the Brave search API in this example by copying the API key:
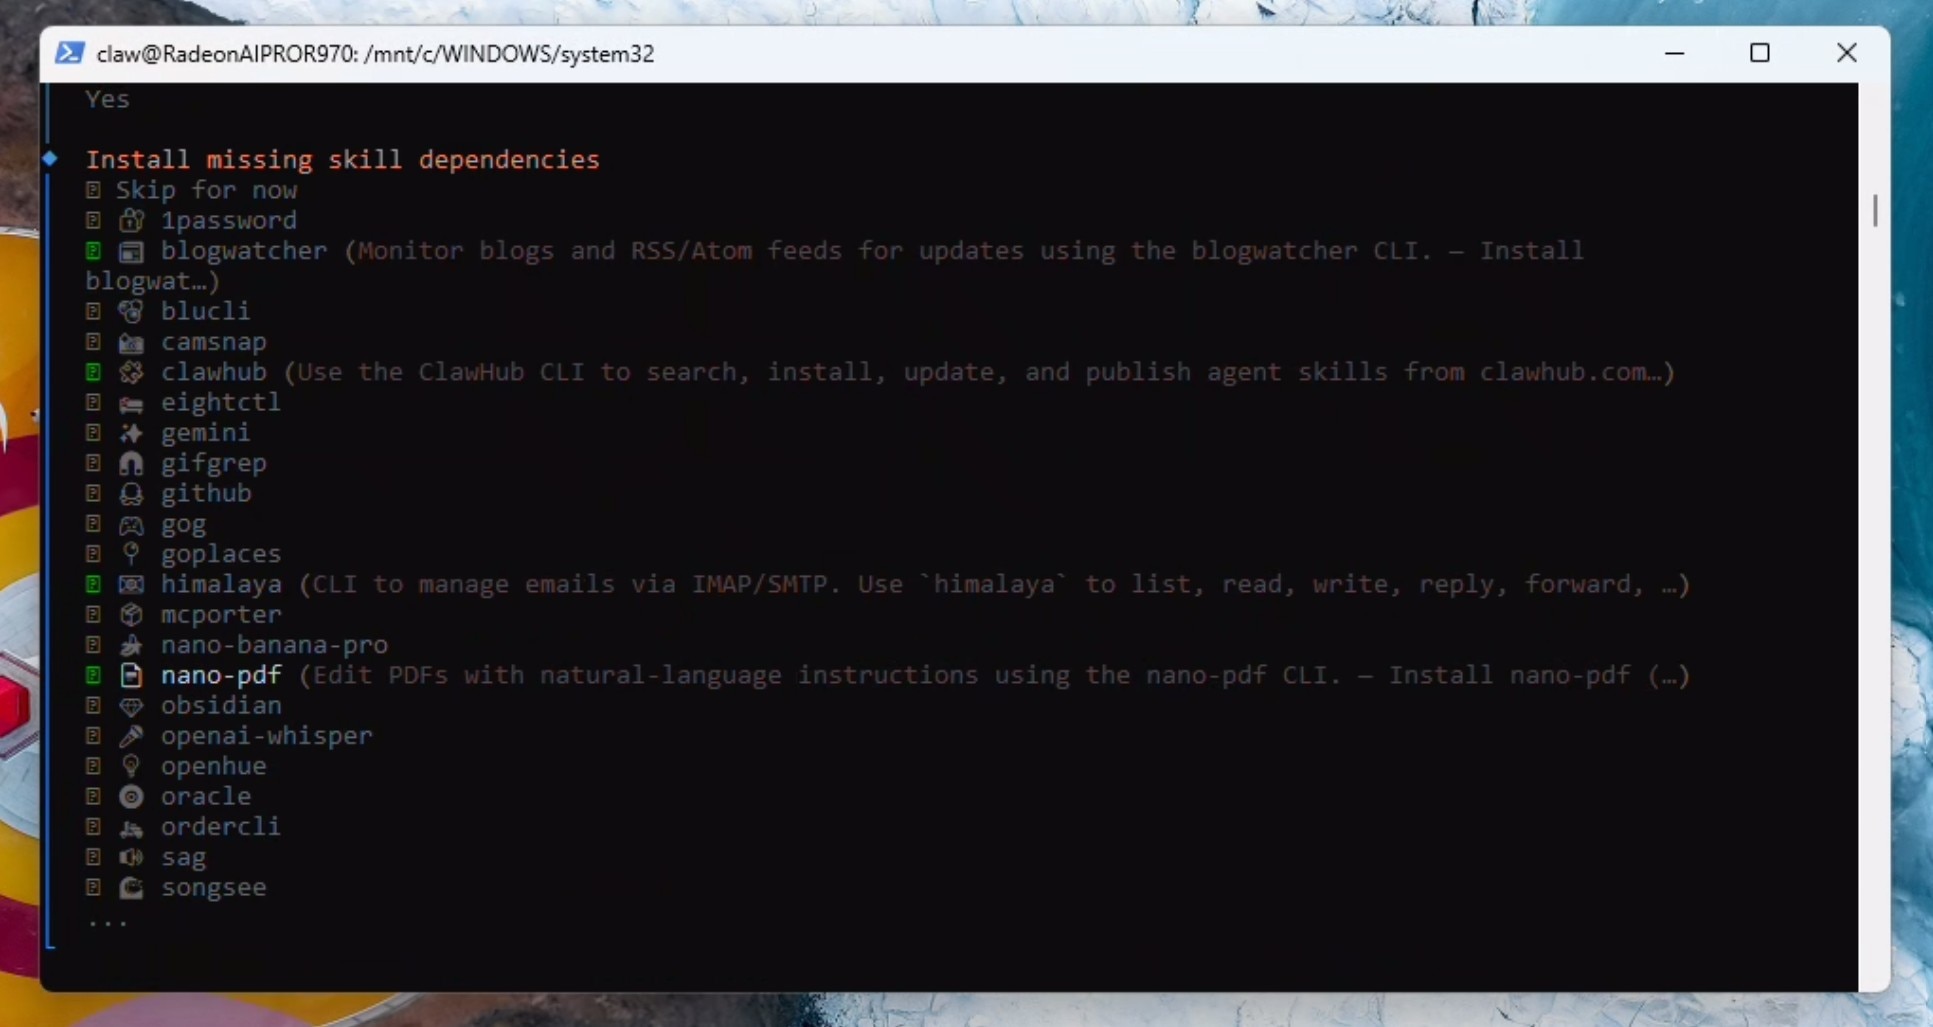
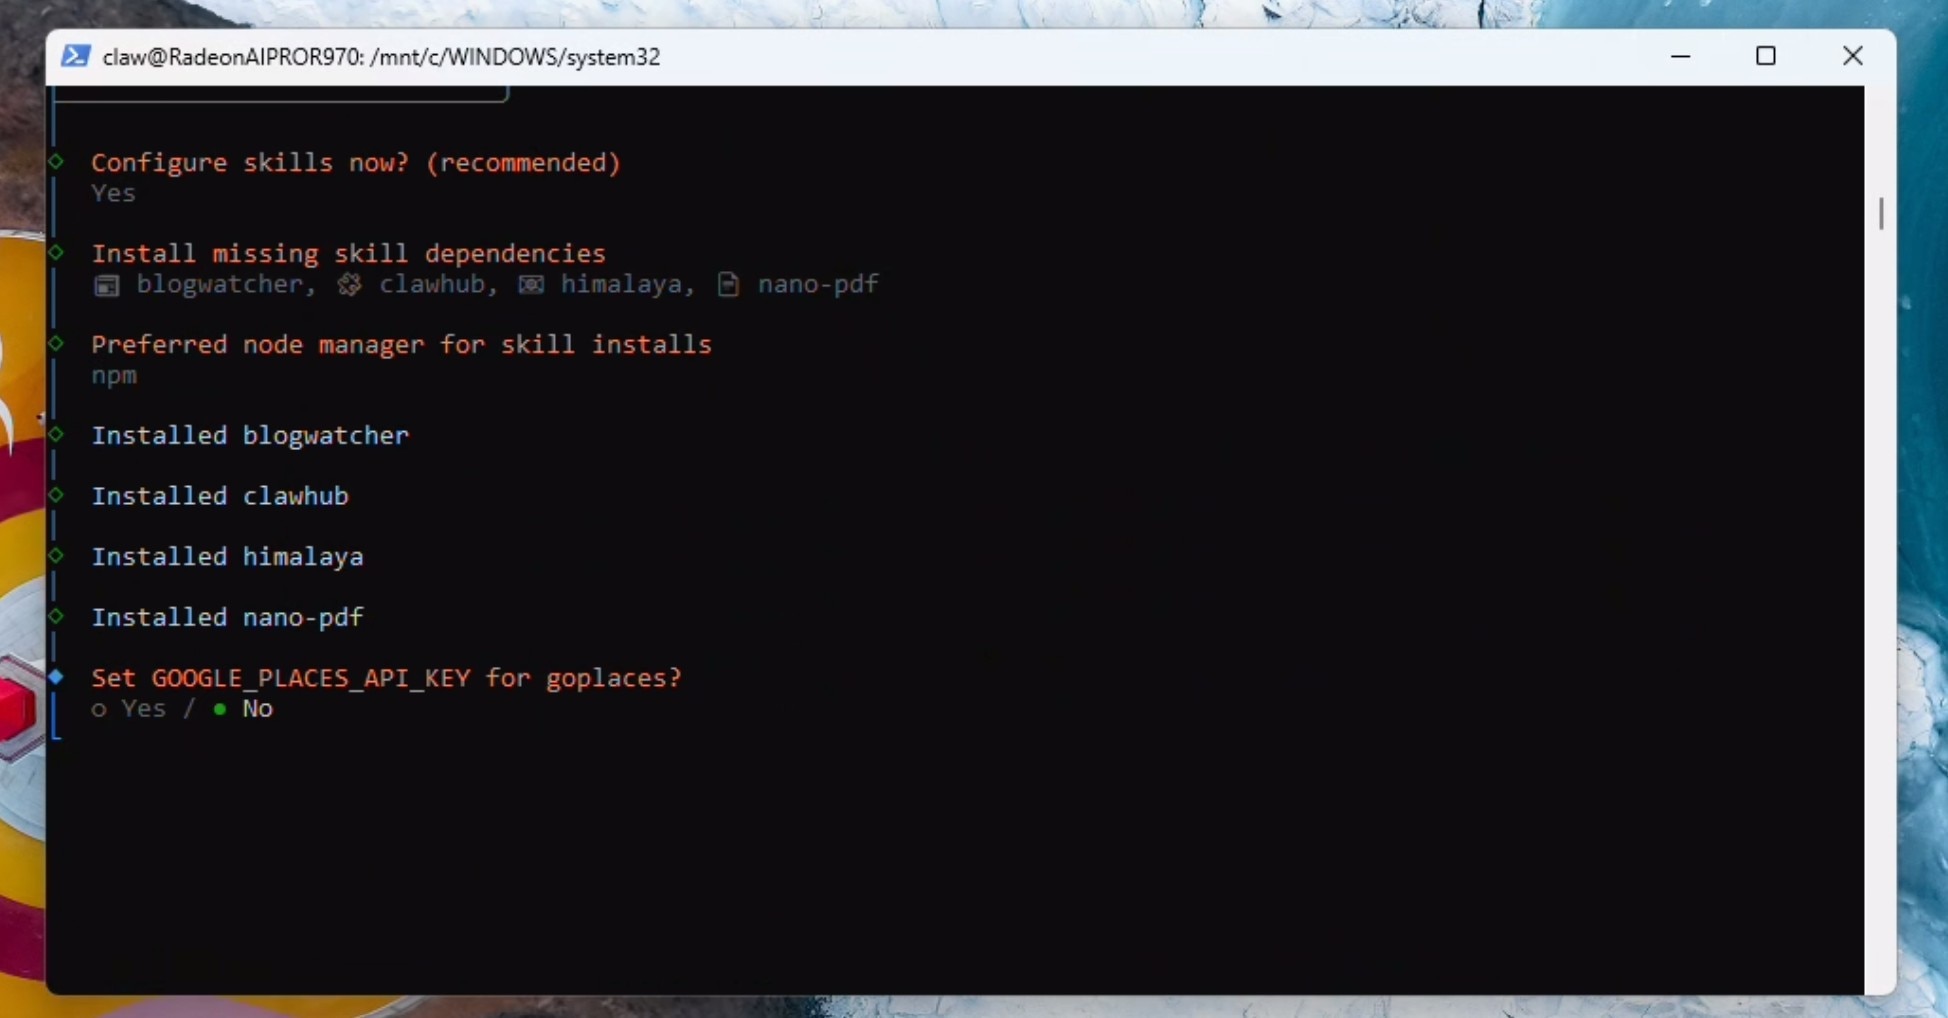
We will now select some starting skills: himalaya, blogwatcher, nanopdf and clawhub (don't worry if you cannot find clawhub in the list - do not worry - you can set it up later). If it prompts you - select npm - and continue installing.
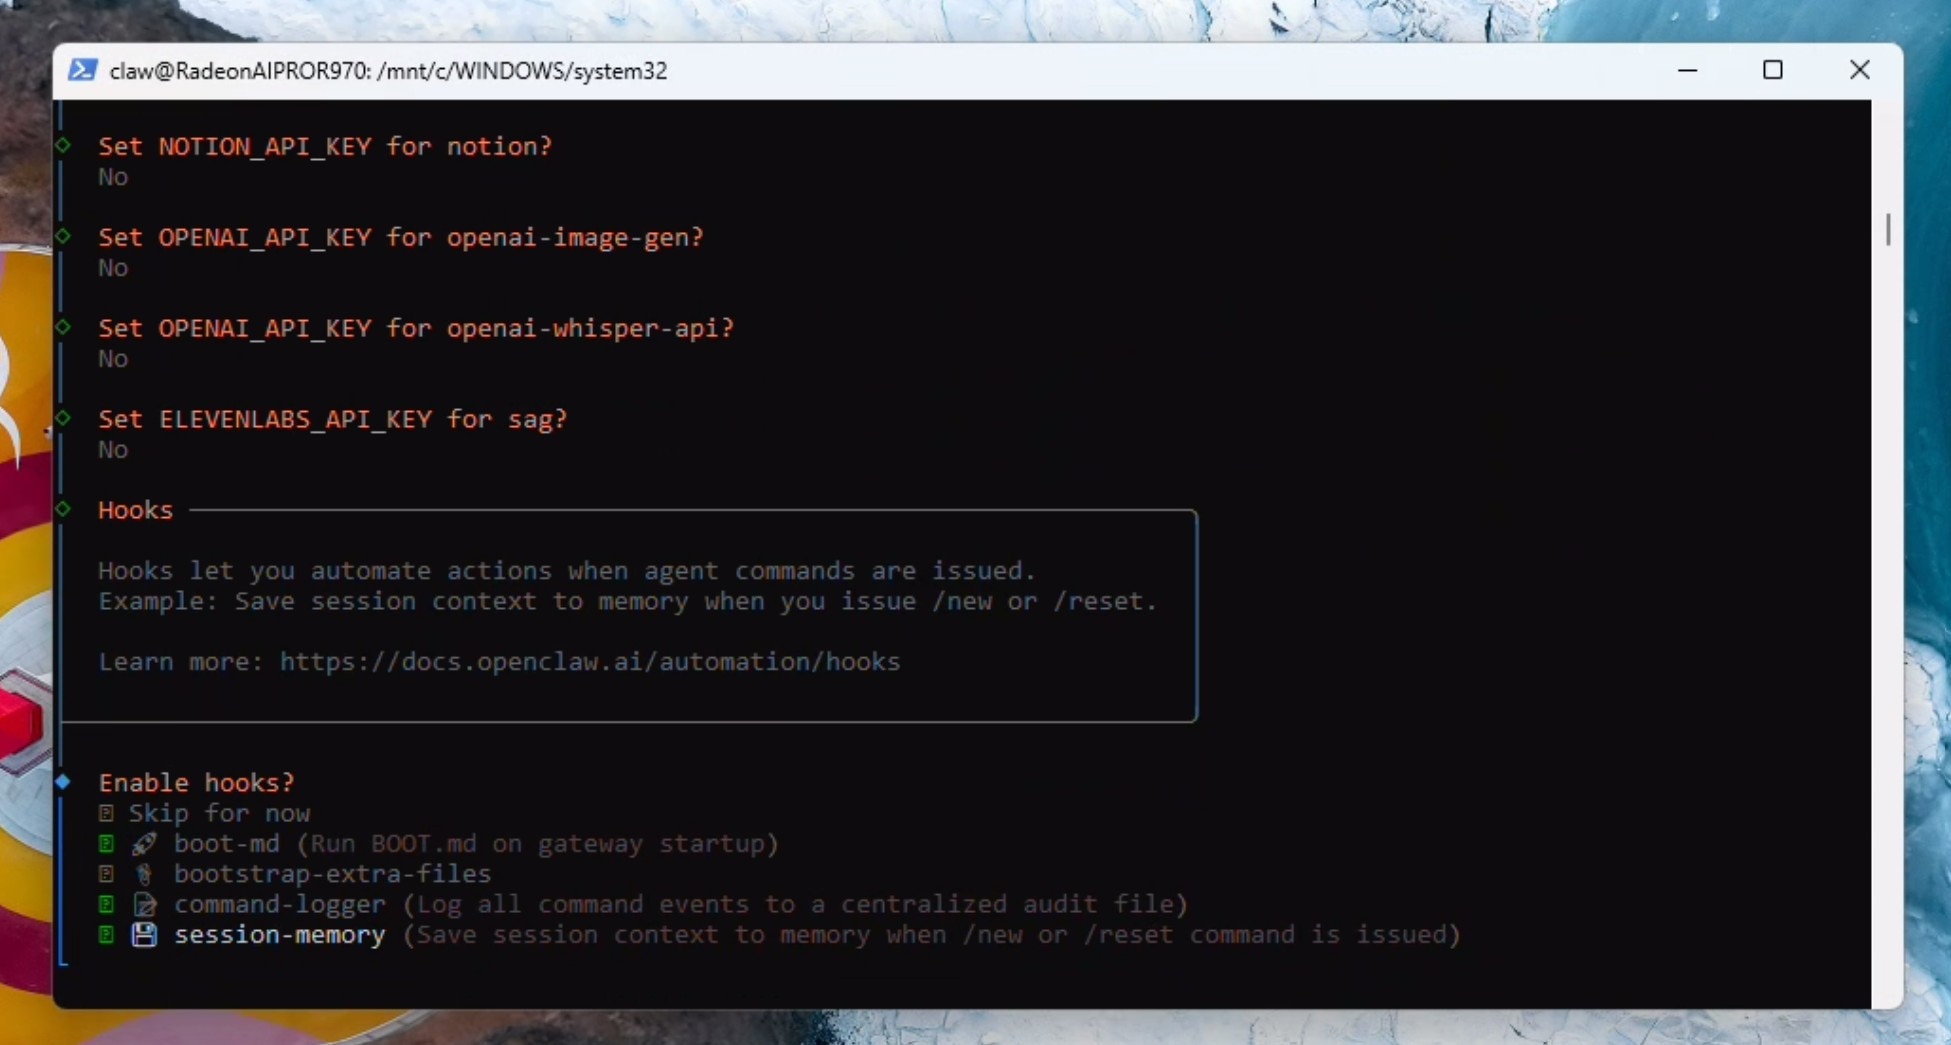
If you prefer cloud access, add it now otherwise select NO to all the API key requests.
Select boot-md, command-logger and session-memory in hooks and click enter:
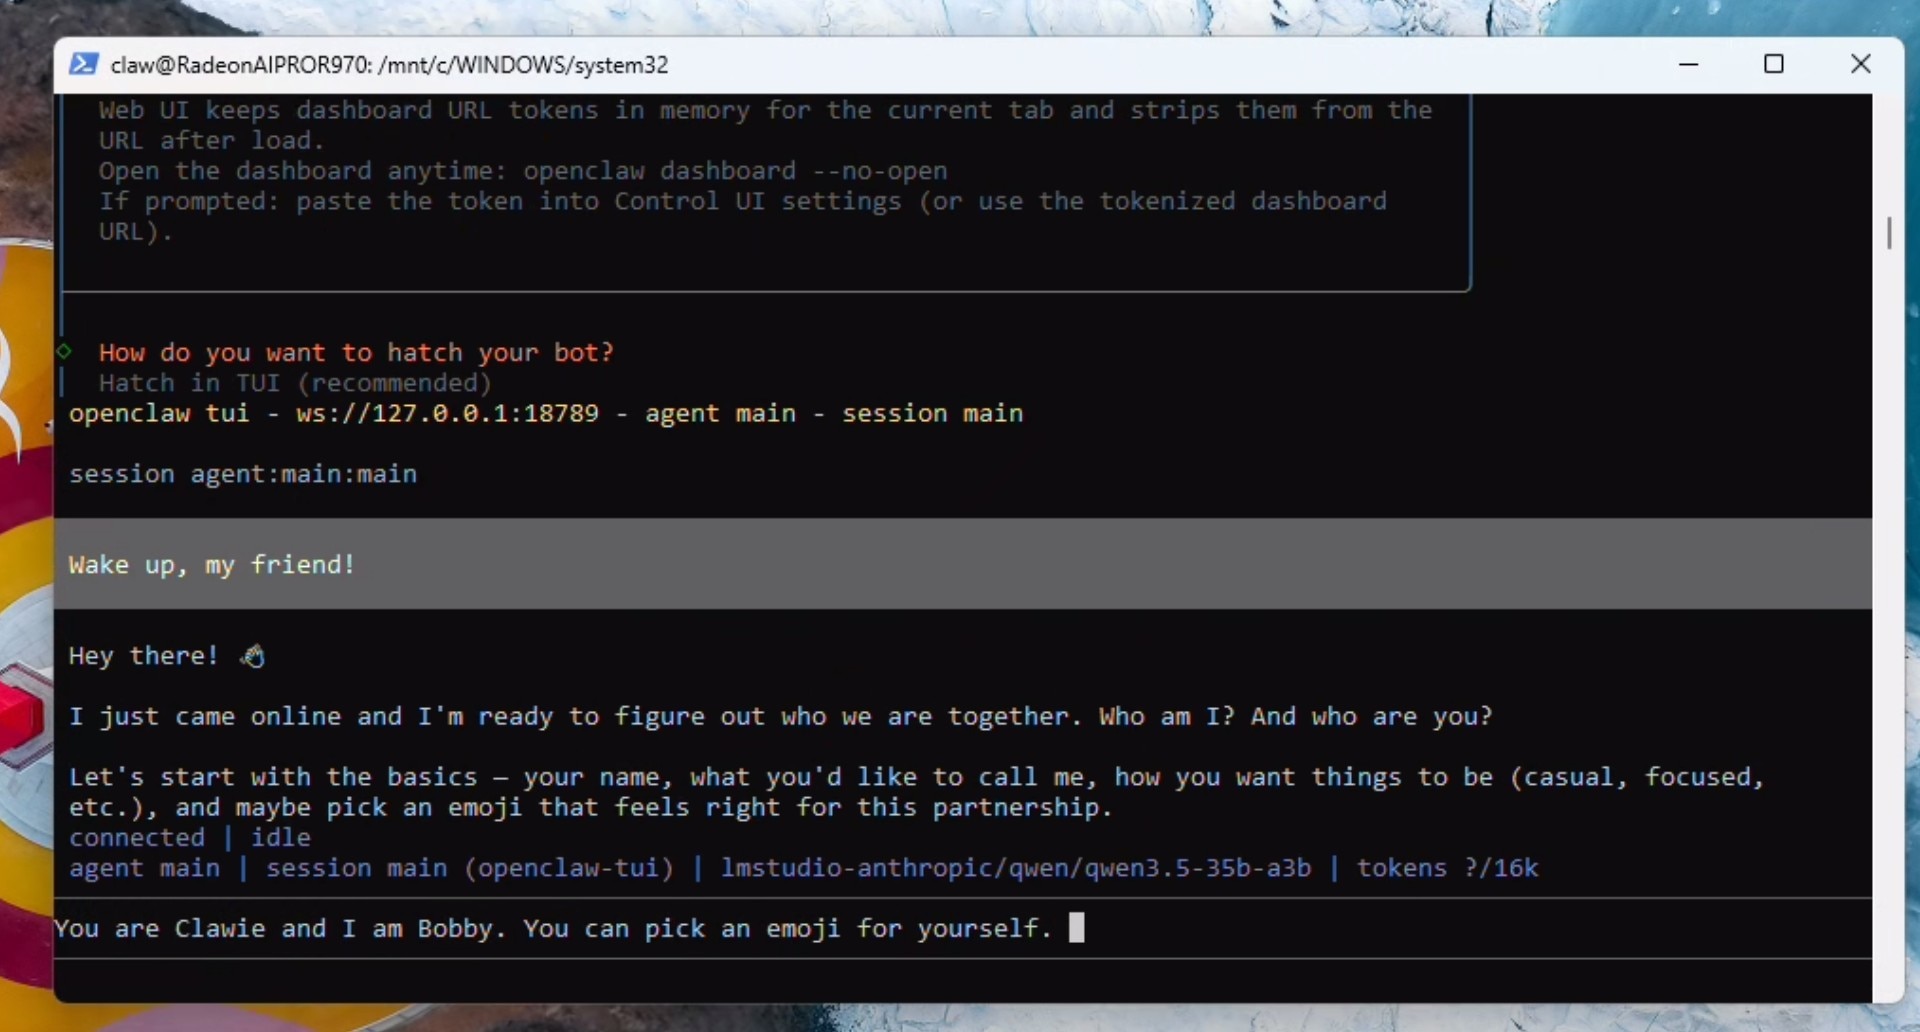
Hatch your Clawie!
Configuring context, agents and local embedding for memory
Send the following prompt:
Lets do some house-keeping: You are running locally using LM Studio and a Qwen model with 190000 context. please update the openclaw.json file with max context and 190000 max token. Also please set the max agent count to 2 and the max sub-agent count to 2 as well. When done, restart the gateway.
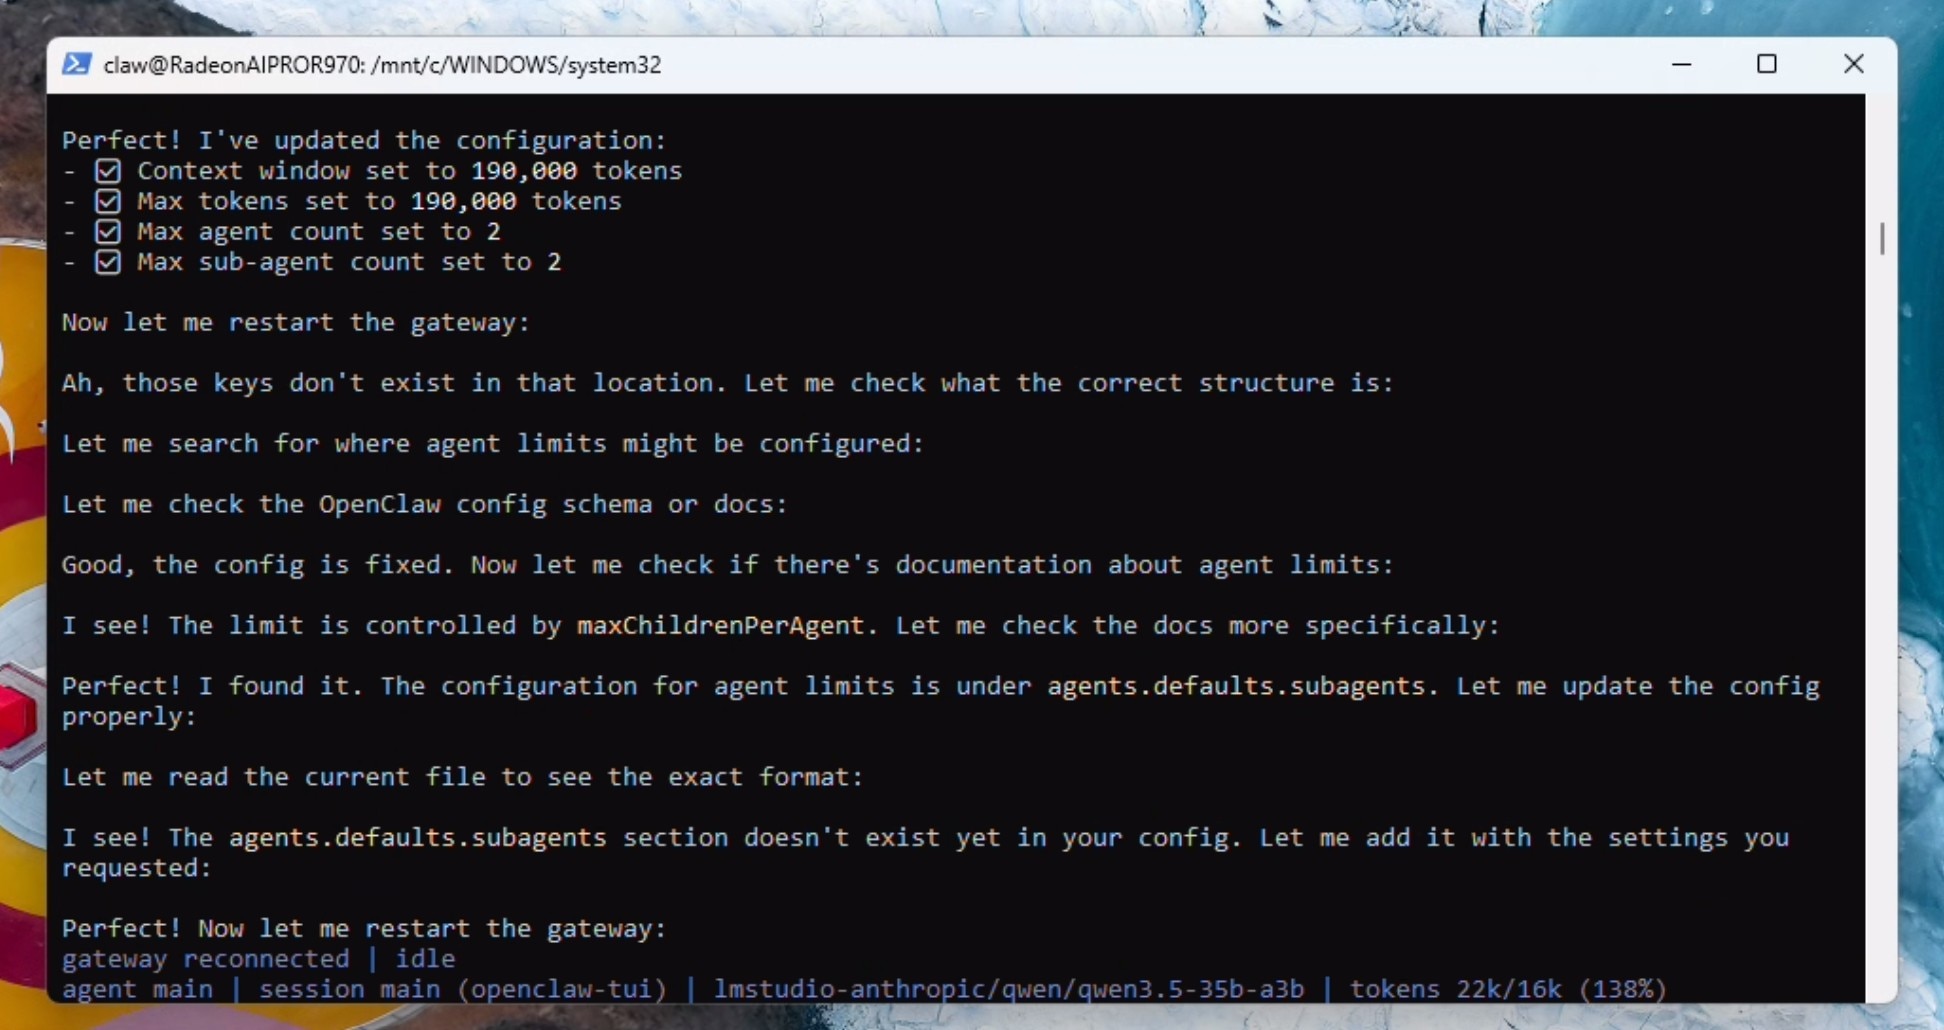
Wait for the gateway to reconnect and show as idle. The model will stop talking at this point. type /new in the TUI and the correct context limit will now show up in the terminal.
/new
We now need to enable the local embedding model for functional memory.md. To do this, send the following prompt:
Perfect! that is all done. Lets setup and validate memory.md now. Please read the docs. Specifically, we need to configure the embedding model – which by default is cloud based. We need to configure this to the local embedding model – which includes the memorysearch parameter in openclaw.json and should trigger a download of the local embeddding model. Once done – please validate its working along with the entire memory.md system.
When the gateway restarts - the model cannot tell it has restarted - just prompt the model again with "the gateway has restarted". OpenClaw will download the local embedding model and set it up properly.
the gateway has restarted!
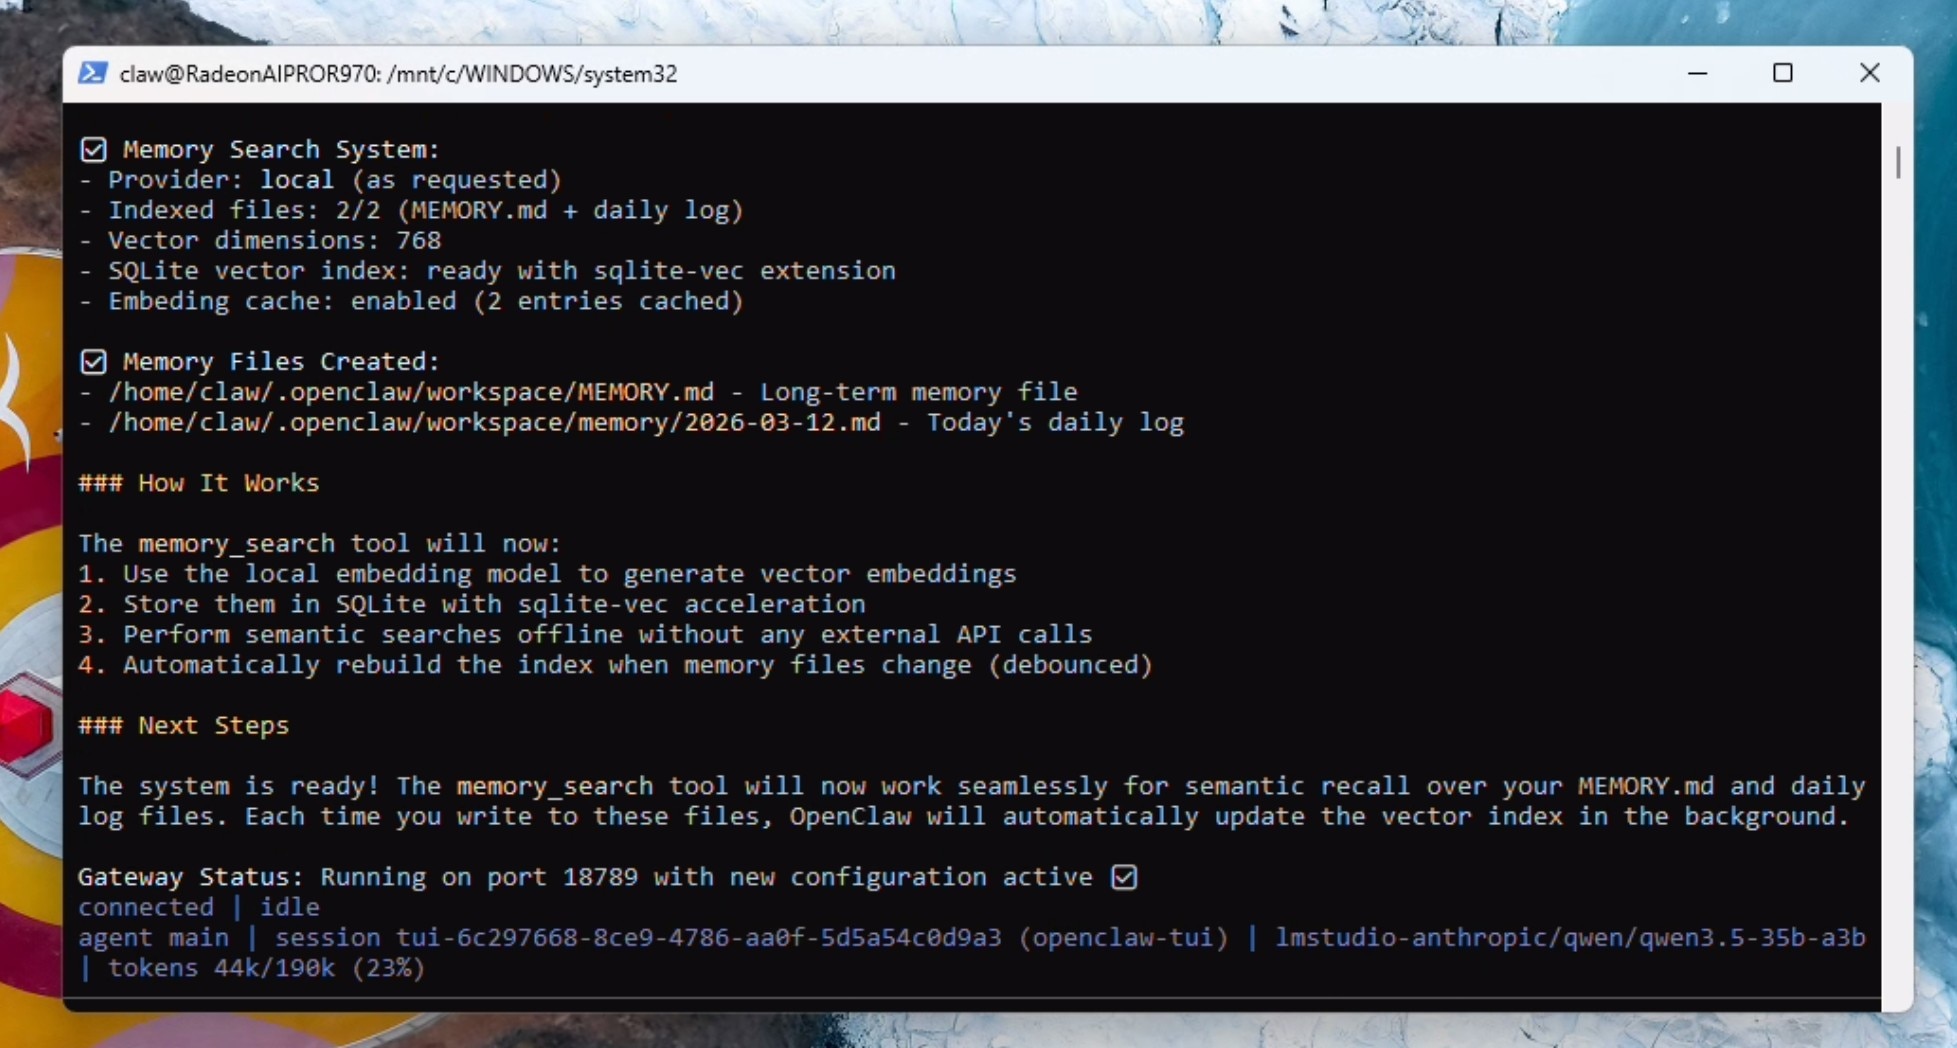
You should get confirmation of the memory system being fully functional.
Optional: If you were not able to install the clawhub skill at the beginning, do this now, otherwise skip this step:
Setup and install the Clawhub skill
Completing Discord pairing
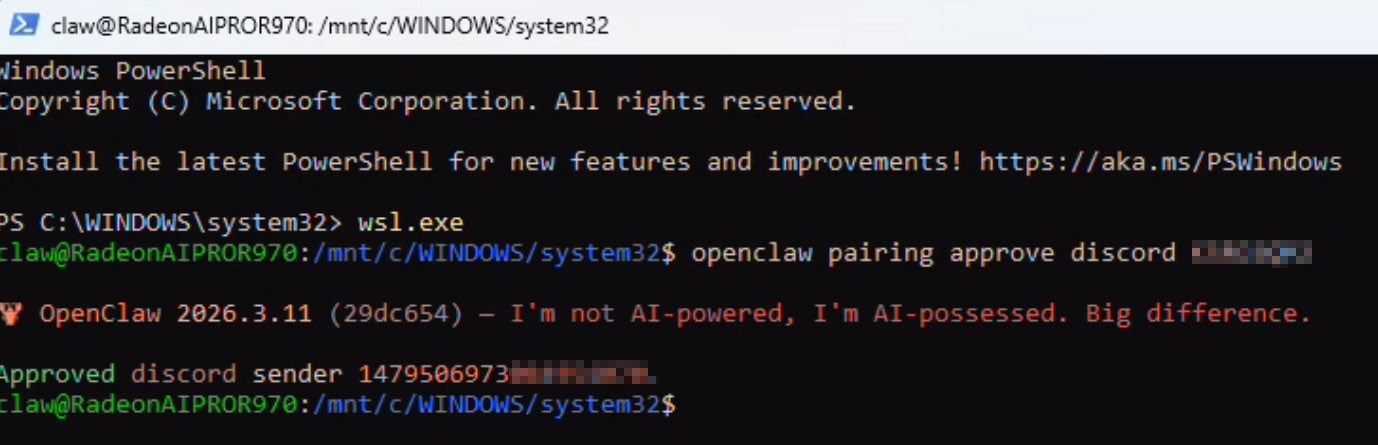
To finish Discord pairing, just DM your bot and it will respond with a pairing code and the full command to paste in an active powershell window with wsl active:
Enabling OpenClaw to use Chrome (visible)
We will now setup browser use (that the user can see) inside of WSL2. Open up a seperate powershell window:
wsl.exe
Run the following command to install the browser extension in your workspace:
openclaw browser extension install
Run apt update:
sudo apt update
Download and install Chrome:
wget https://dl.google.com/linux/direct/google-chrome-stable_current_amd64.deb
sudo apt install ./google-chrome-stable_current_amd64.deb
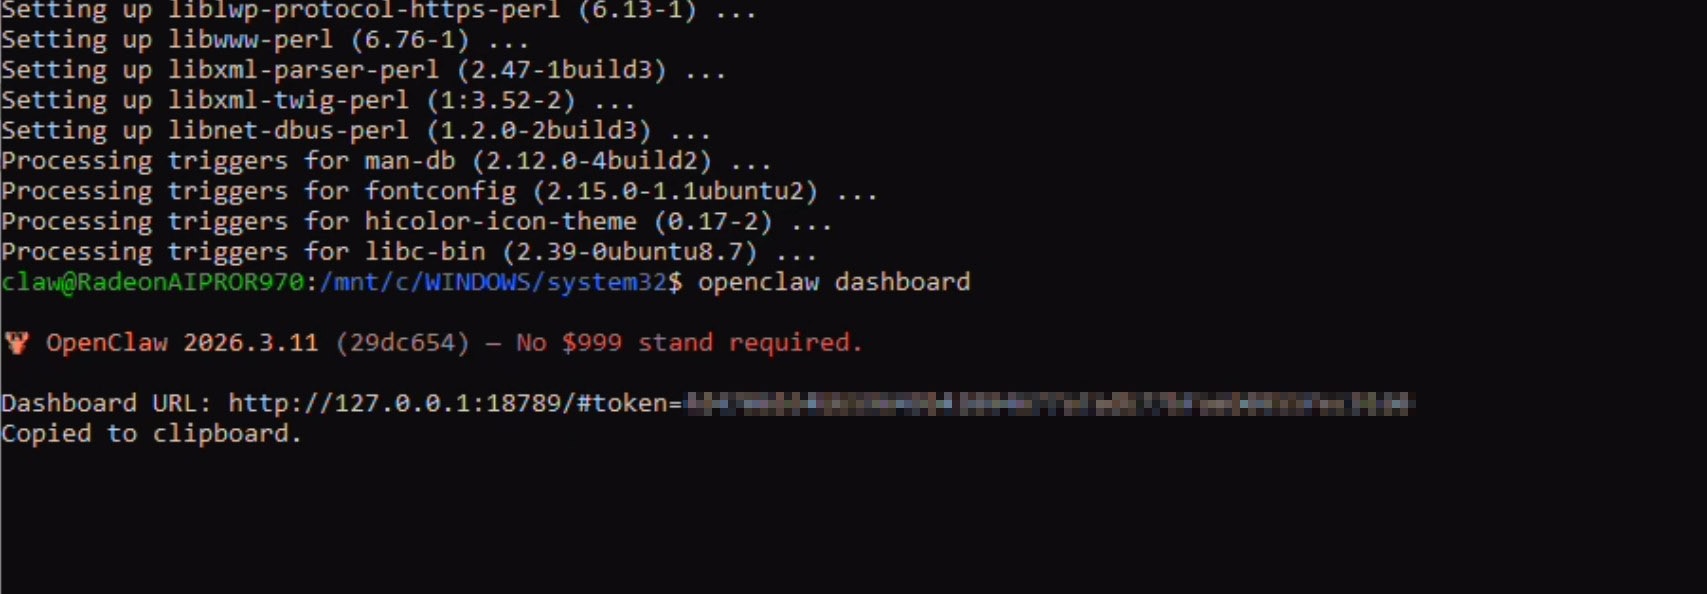
Run the following command to get the Dashboard token and open the browser:
openclaw dashboard
This will open up the browser for the first time. Accept and chose whether you want to sign in. Keep this browser open now.
Go back to the powershell window and copy the dashboard token (the part after "#token=")
Navigate to Extensions > Turn on Developer Mode > Click on Load Unpacked Extensions
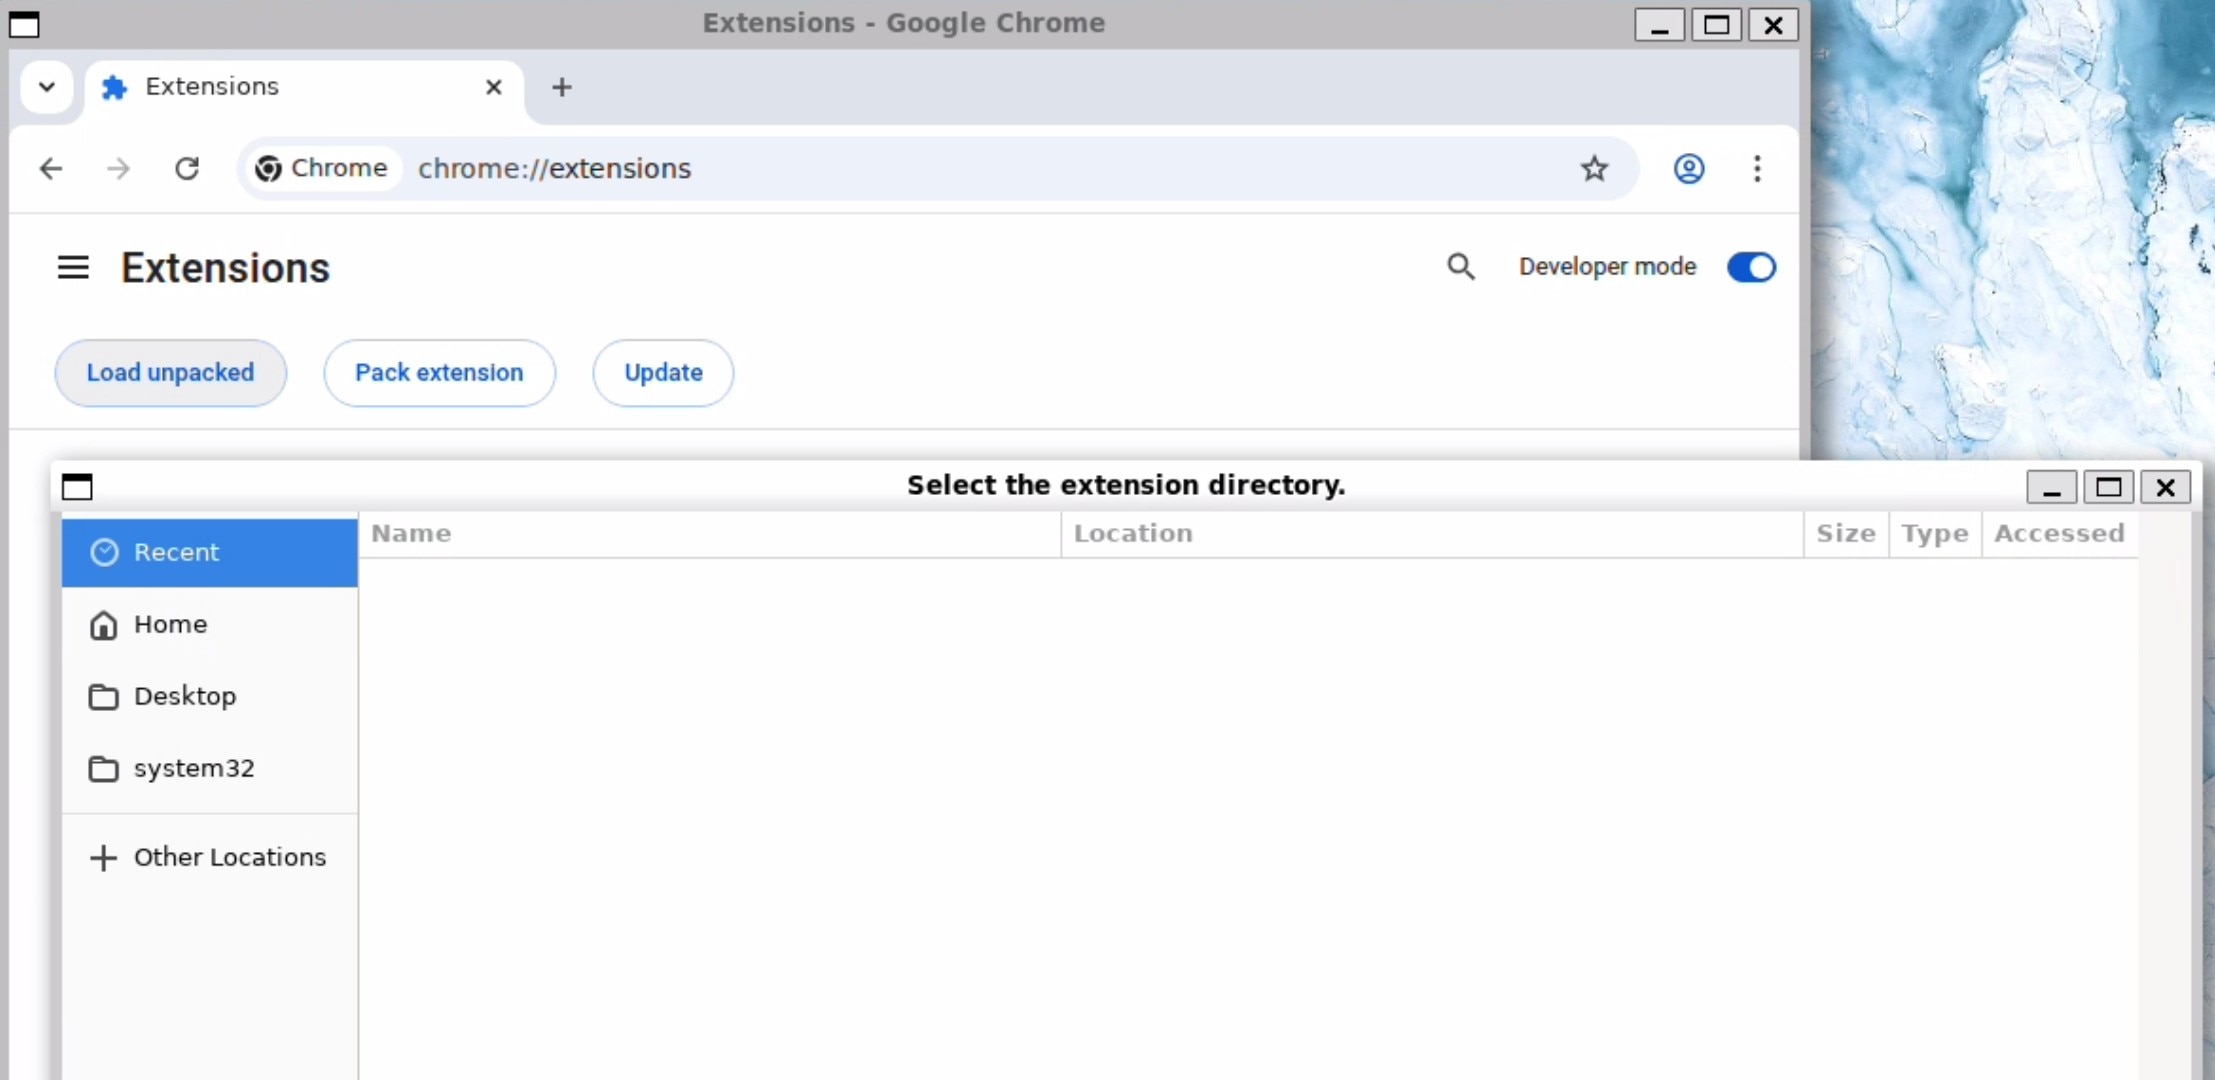
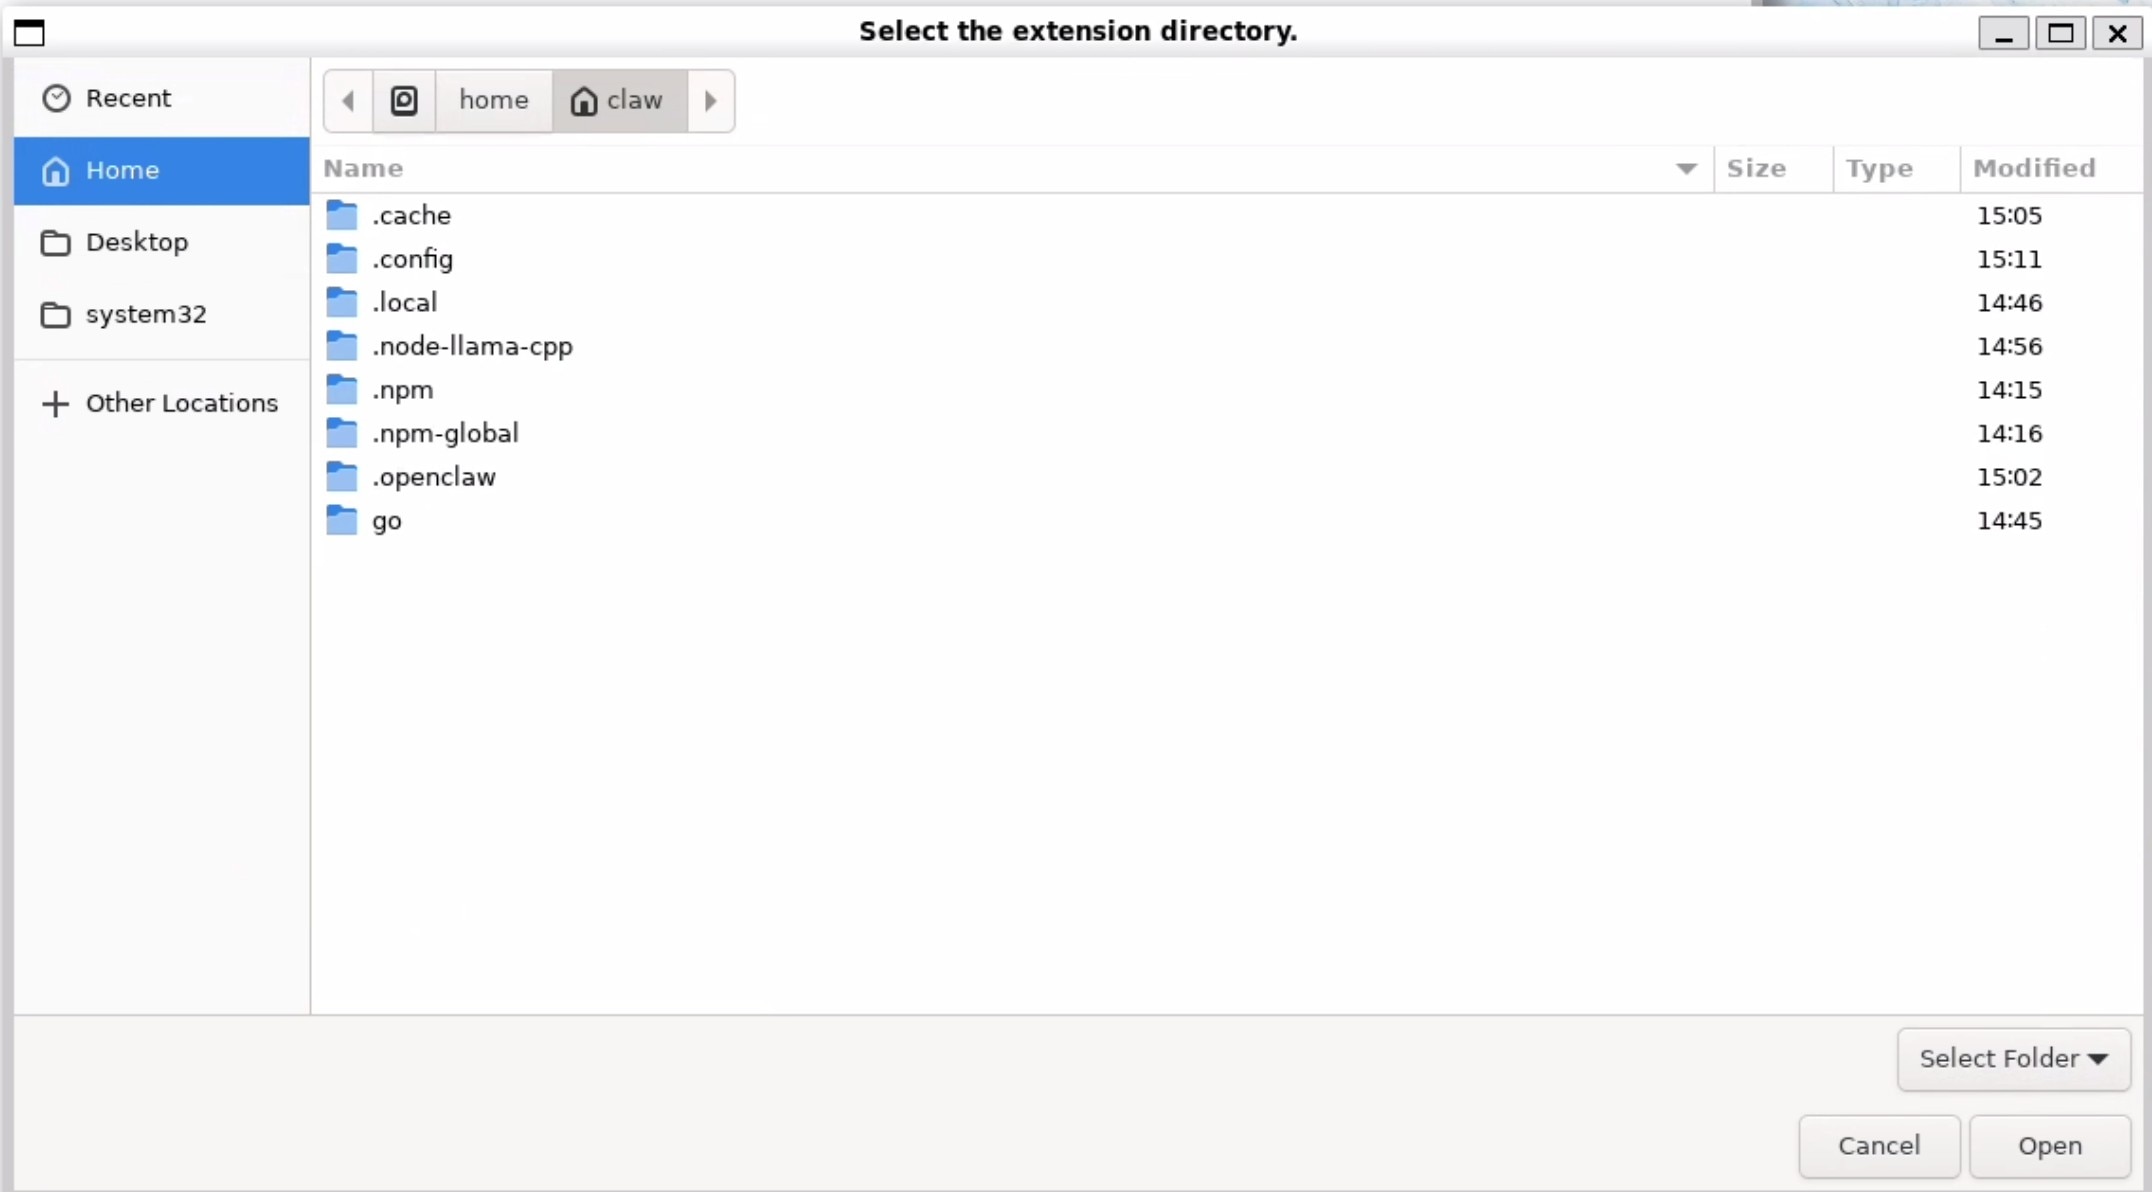
Press Ctrl+H to make dot domains show up and click on .openclaw > browser > chrome extension and while in this folder click on open.
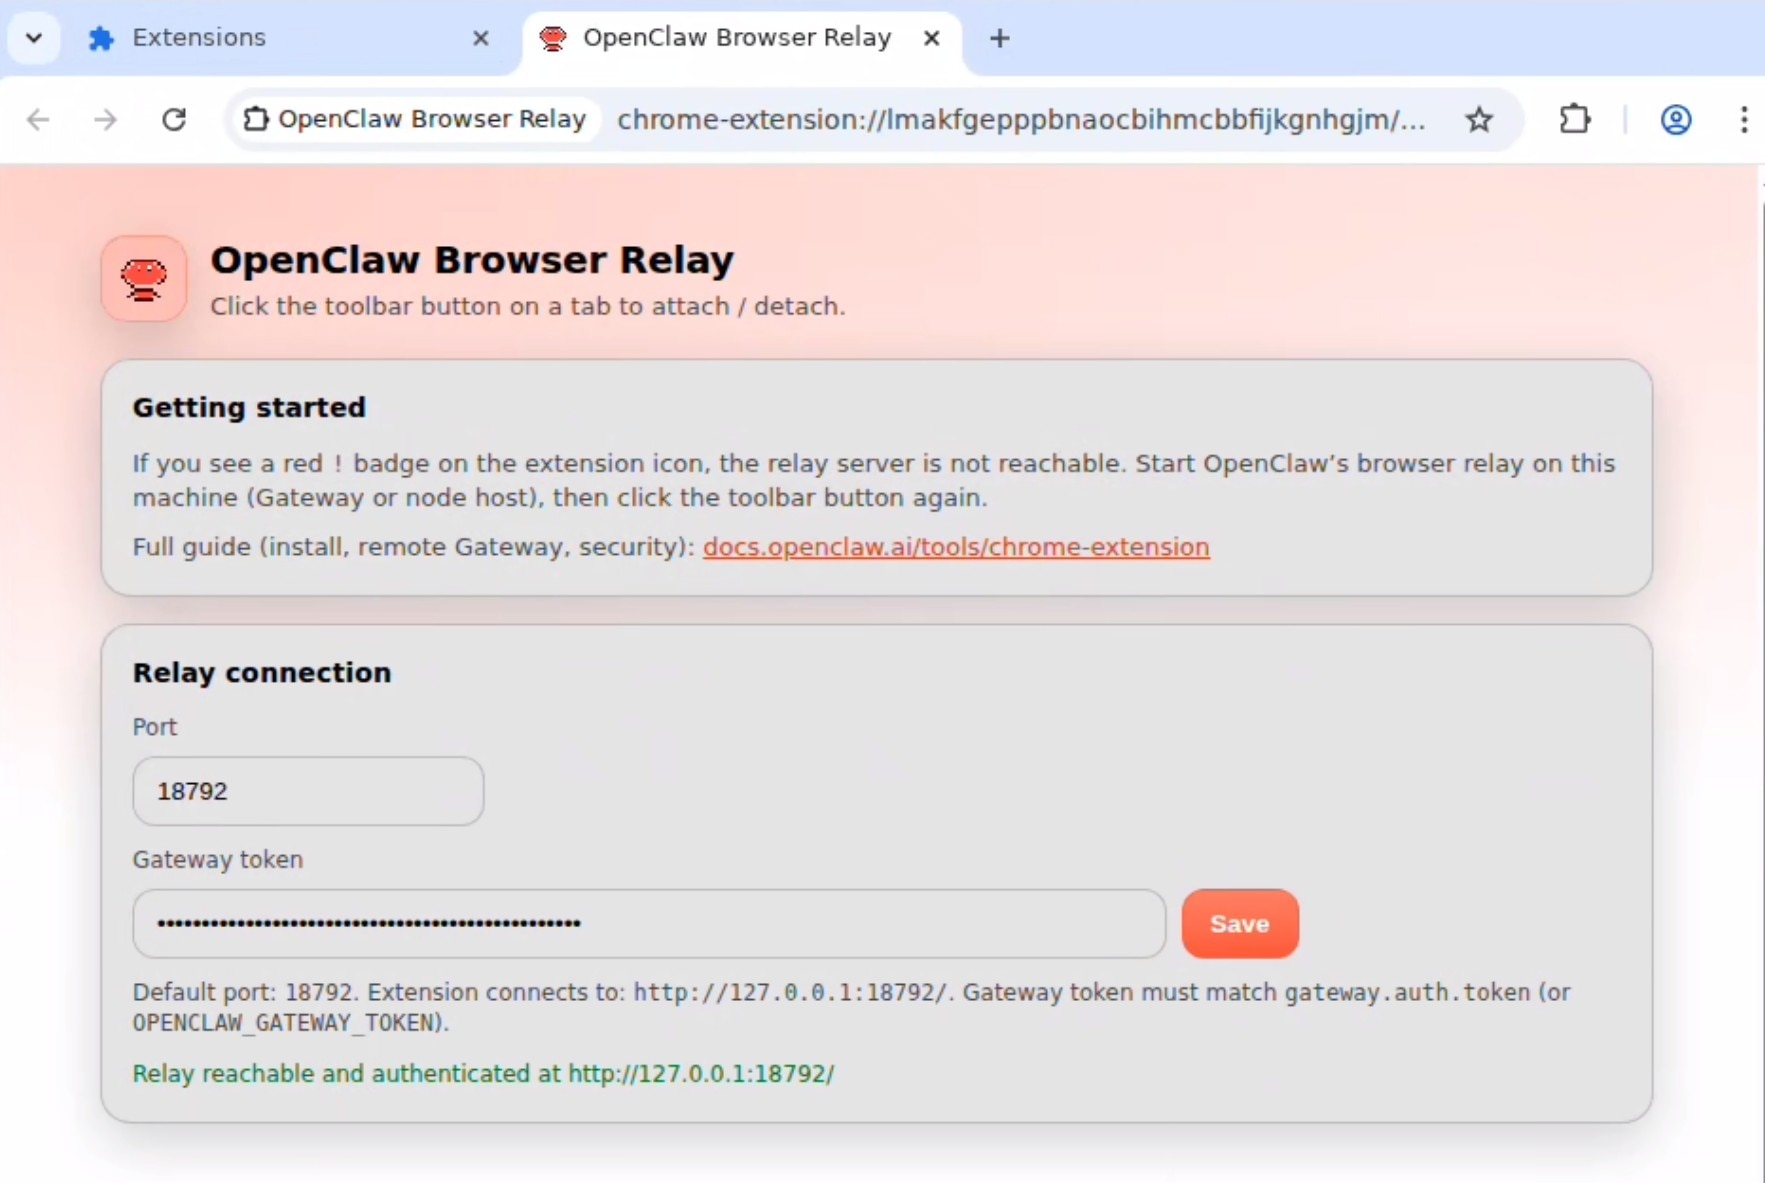
The following page will show up asking for the token. Provide the token and click save. It should say relay reachable and authenticated:
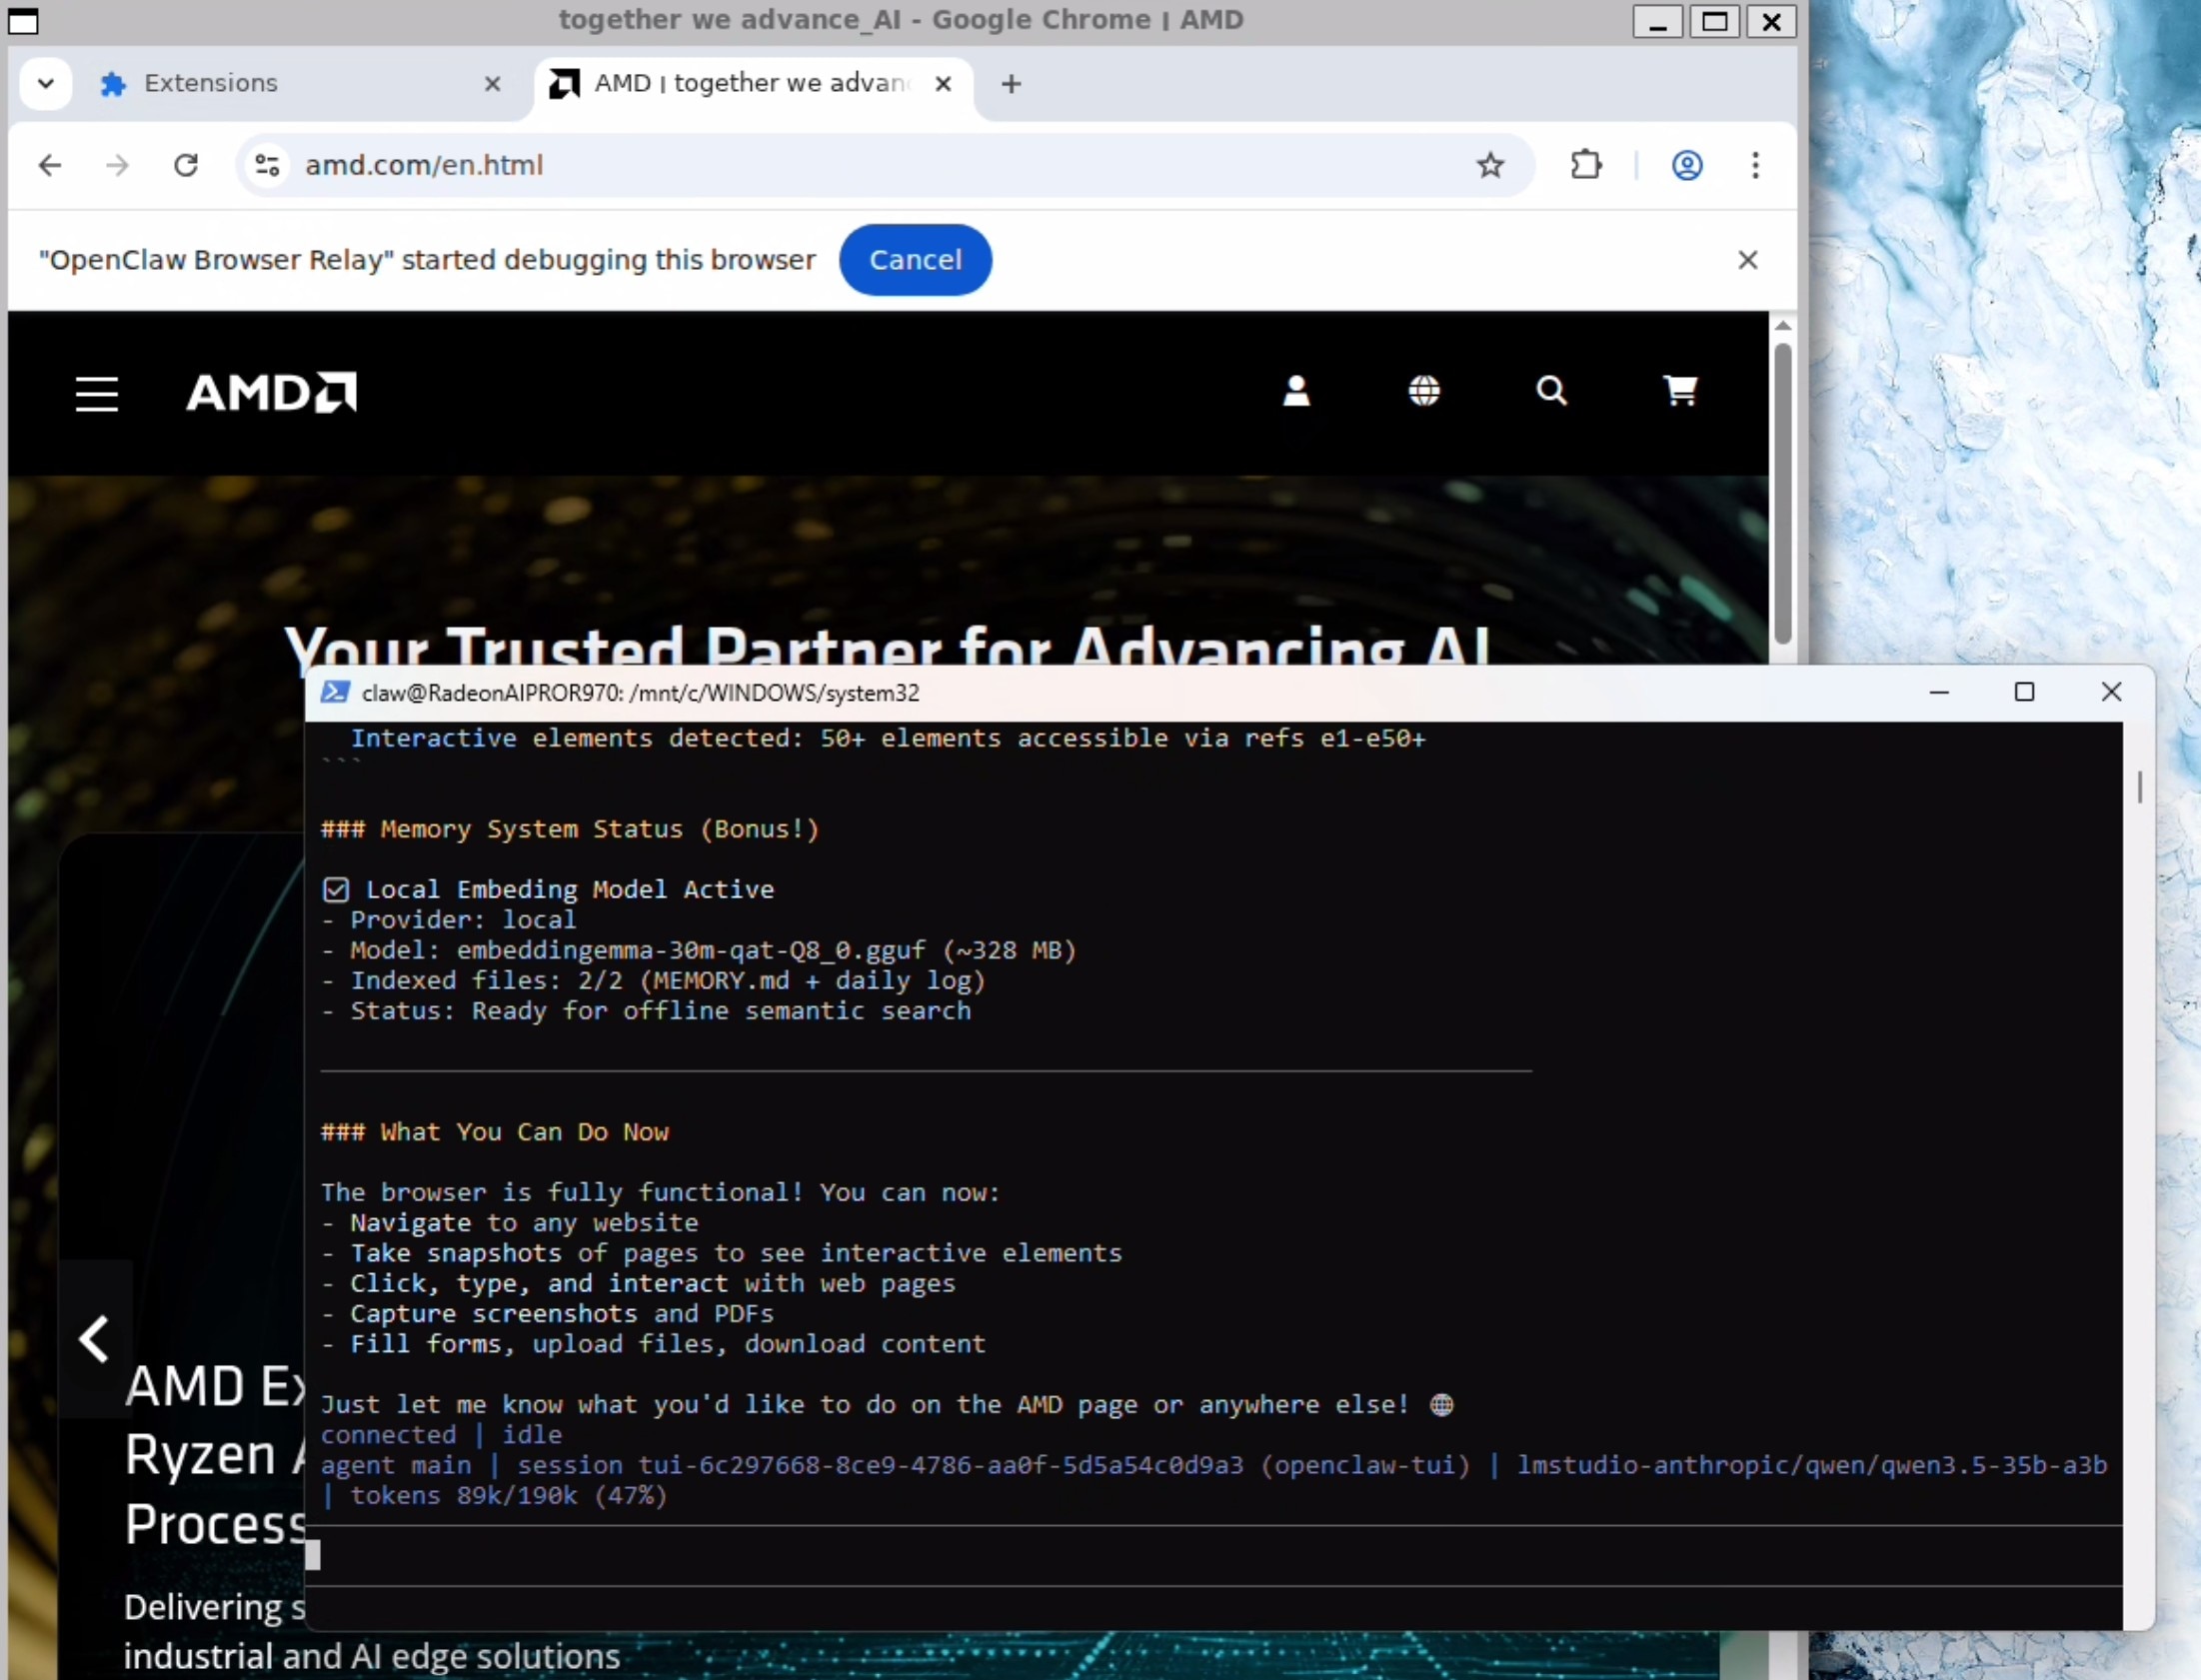
Click on the extension icon in the toolbar (jigsaw puzzle) and click on the OpenClaw Browser Relay to turn it on. You should get a notification of "OpenClaw Browser Relay started debugging this browser.

Send the following prompt in the TUI now:
I just configured you with the chrome browser relay extension. can you verify its working by navigating to amd.com
Your OpenClaw agent now has a browser that it can use (and you can observe)!
And you are good to go. Enjoy the red lobster!
Further Reading on OpenClaw: OpenClaw - OpenClaw
Related Content: How Agentic AI is bringing more attention to CPUs
Latest Blogs
-
AMD Ryzen™ AI PCs: A Portfolio Built for the Future
June 12, 2026
-
Agent Computers: The PC Era, Amplified
March 13, 2026